
What Is Best to Clean Showers? a Pro's Complete Guide
Wondering what is best to clean showers? Discover pro tips for tile, glass, and stone, plus top DIY and commercial cleaners for a sparkling finish.
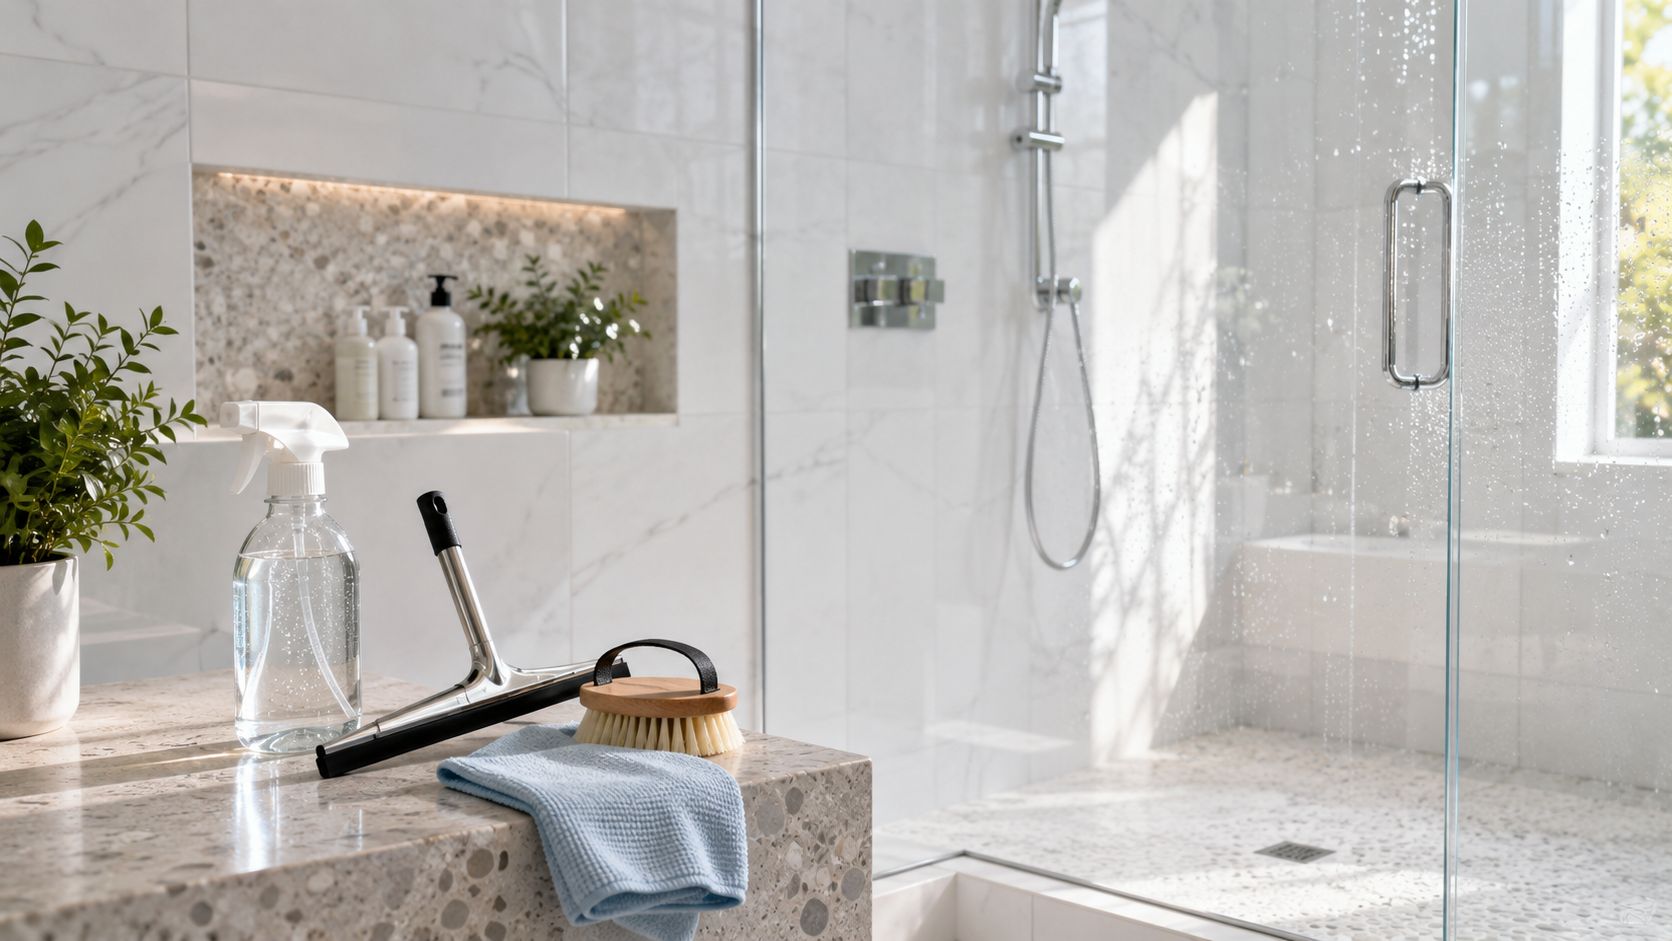
You scrub the shower on Saturday, step back, and it looks great. By Wednesday, the glass is spotted again, the corners feel damp, and that dull film is back on the tile. If you live in the Boston suburbs, especially in homes with hard water, older grout, or bathrooms that don't vent well, that cycle gets old fast.
The frustrating part is that most advice online answers the wrong question. People search for what is best to clean showers, and they get a list of miracle sprays. In real homes, there usually isn't one magic bottle that solves everything. The right answer is a system. You need the right cleaner for the surface, the right tools for the job, and a routine that keeps buildup from getting a head start.
That's what works in bathrooms from Wayland to Newton to Wellesley. A stone shower needs different care than fiberglass. Soap scum needs a different approach than mineral scale. And a shower that gets dried and ventilated properly stays cleaner longer than one that gets left wet after every use.
That Stubborn Shower Scum Is Not Your Fault
Shower buildup comes back for a reason. Warm water, soap residue, body oils, humidity, and poor airflow all pile onto the same surfaces every single day. If the bathroom stays damp, that residue holds on tighter, and every “quick clean” starts feeling less effective.
A lot of homeowners think they're using the wrong product because they still see haze on glass, dingy grout, or chalky buildup around the showerhead. Usually, the bigger problem isn't effort. It's mismatch. The cleaner may be too harsh for the surface, too weak for the deposit, or used without the routine that keeps buildup from returning.
The best shower cleaner is often not one product. It's a repeatable system that matches the chemistry to the material and keeps moisture under control.
That matters in busy households. If two or three people use the same shower every day, the room doesn't get much recovery time. Glass spots faster. Corners stay wetter. Caulk and grout hold moisture longer.
The good news is that most showers can be brought under control without turning every weekend into a deep scrub session. The durable approach is simple:
- Choose by surface: Tile, glass, fiberglass, and stone don't all respond to the same cleaner.
- Treat the actual problem: Soap scum, hard water scale, and mildew need different tactics.
- Keep moisture moving out: Drying and ventilation matter more than people think.
- Stay consistent: Short, regular cleaning beats occasional aggressive scrubbing.
If your shower never seems clean for long, that doesn't mean you're failing. It means the routine needs to work with the bathroom, not against it.
Match Your Cleaner to Your Shower Surface
The best shower cleaner depends on what the shower is made of. A product that cuts soap scum on ceramic tile can scratch fiberglass, and an acidic cleaner that works on glass can permanently etch natural stone. Good results come from matching the cleaner, the tool, and the surface.
This is the first question to answer when you're deciding what is best to clean showers in your home.

Tile and grout
Ceramic and porcelain tile can handle more than most shower surfaces, but grout is usually the weak point. It holds onto soap residue, body oils, and moisture, so the shower can still look dingy even when the tile face looks clean.
For routine cleaning, use a mild bathroom cleaner or dish soap with warm water on the tile, then use a baking soda paste or grout-safe cleaner where the lines are discolored. The goal is controlled scrubbing, not brute force. A soft brush works on tile faces. A firmer grout brush helps in the joints.
A few habits make a big difference here:
- Rinse fully: Cleaner left behind turns into its own film.
- Use the least abrasive tool that works: Glazed tile can turn cloudy if you keep attacking it with rough pads.
- Treat grout separately: It usually needs more dwell time and more agitation than the tile around it.
Glass doors and panels
Glass shows every mistake. Hard water spots, soap film, and leftover cleaner all leave the same hazy look, so homeowners often keep changing products when the bigger issue is the cleaning sequence.
For routine care, use a mild glass or bathroom cleaner, scrub gently with a non-scratch sponge, rinse well, and dry the panel with a microfiber cloth or squeegee. If there is mineral buildup, use a cleaner meant for that job, but only on glass and only long enough to break the deposit loose. Then rinse thoroughly.
If the glass still looks streaky after cleaning, the problem is usually one of three things. Minerals were loosened but not fully removed. Cleaner residue was left on the surface. The panel air-dried before it was wiped down.
Acrylic and fiberglass
Acrylic and fiberglass surrounds are common because they are affordable and easy to install. They also scratch fast. Once the finish gets scored up, grime settles into those tiny marks and the walls never look fully clean again.
Use a non-abrasive cleaner, mild dish soap, or a gentle cream cleaner with a soft sponge or microfiber cloth. Save any focused scrubbing for seams, corners, and the track around a shower door. Broad wall panels should be cleaned with light pressure.
Avoid these on acrylic and fiberglass:
- Scouring powders
- Rough scrub pads
- Stiff brushes on large visible areas
- Strong solvents unless the manufacturer says they are safe
In homes with kids or a heavily used hall bath, this surface benefits from more frequent light cleaning. That is the trade-off. Gentle products protect the finish, but they work best when buildup has not been allowed to sit for weeks.
Natural stone
Natural stone needs its own routine. Marble, travertine, limestone, and some granite surfaces can be damaged by acidic or harsh cleaners, even if those same products work fine elsewhere in the bathroom.
Lowe's advises against using vinegar or harsh cleaners on stone showers and recommends stone-safe products or mild dish soap with warm water instead, because acidic products can damage natural stone surfaces (Lowe's showerhead and drain cleaning guide).
Use pH-neutral stone cleaner, soft cloths, and gentle agitation only where needed. Keep rinse water moving, and do not let cleaner sit longer than necessary. If your shower has marble, this guide on how to clean marble tile properly covers the details that matter.
A simple way to choose
If you want a practical rule, start here. Harder surfaces usually allow a little more scrubbing. Softer or finished surfaces need gentler chemistry and softer tools. Stone needs stone-safe products, every time.
That surface-first approach is what keeps a shower clean without creating new damage you then have to live with.
Natural vs Commercial Cleaners Which Is Right for You
A lot of homeowners in the Boston suburbs ask for the best shower cleaner as if there should be one clear winner. In practice, the right answer is a cleaning system. Use the right product for the surface, keep a routine that prevents heavy buildup, and save stronger options for the jobs that require them.
That is why natural and commercial cleaners both have a place.
Where DIY cleaners make sense
DIY methods work best on compatible surfaces and on buildup that has not been sitting for too long. Vinegar can help loosen mineral residue. Baking soda adds mild scrubbing power for soap scum. Used in the right spot, they are affordable and easy to keep on hand.
Used in the wrong spot, they create problems.
Vinegar is a poor choice for natural stone, and it is not something I recommend as a general-purpose shower cleaner for every material. Baking soda is gentler, but any paste still needs light pressure on softer finishes. The trade-off with DIY cleaning is simple. You save money and control the ingredients, but you spend more time mixing, testing, scrubbing, and rinsing.
DIY options are usually a good fit when:
- The surface is clearly compatible: Ceramic tile, porcelain, and some grout respond well to targeted DIY cleaning.
- The buildup is light or moderate: Regular soap scum and minor hard water residue are easier to remove before they harden.
- You do not mind the extra steps: Homemade methods usually take more setup and more rinse work.
If you want lower-impact options, this guide to eco-friendly cleaning and keeping your home clean and green is a useful next read.
When commercial cleaners are the better tool
Commercial cleaners are often the better day-to-day choice for busy households. They are ready to use, easier to apply evenly, and more consistent from one cleaning to the next. That matters in a primary bath that gets used every day or in a guest bath you need to get presentable fast.
They also solve a problem many articles skip over. Different showers need different chemistry. A stone-safe cleaner, a non-abrasive product for acrylic, and a hard-water remover for glass all do different jobs. The label matters because convenience does not help if the formula is too aggressive for the surface.
Here is the practical comparison.
FactorDIY Cleaners (Vinegar, Baking Soda)Commercial CleanersBest use caseTargeted cleaning on compatible surfaces with lighter buildupRoutine weekly cleaning, specialty surface care, faster applicationMain strengthsLow cost, familiar ingredients, useful for spot treatmentConvenient, consistent, often better matched to specific materialsMain drawbacksNeeds mixing, more labor, not safe for every surfaceCan be too strong if you choose by brand name instead of surface typeGood fit for hard waterOften, on surfaces that can handle acidic cleaningOften, especially with formulas made for mineral depositsGood fit for natural stonePoor fit for vinegar-based methodsGood fit if the product is specifically labeled stone-safeGood fit for busy homeownersBetter for occasional problem-solvingUsually the easier regular-use option
For most homes, the best setup is not natural or commercial. It is both, used with a plan. Keep one mild, surface-safe commercial cleaner for weekly maintenance. Use a DIY method only for a specific issue on a surface you know can handle it. That approach keeps the shower cleaner, protects the finish, and cuts down on the long scrubbing sessions nobody wants.
The Essential Toolkit for a Spotless Shower
The cleaner gets most of the attention, but the tools determine whether you're cleaning efficiently or just spreading grime around. Good shower cleaning doesn't require a closet full of gadgets. It does require using the right tool on the right surface.
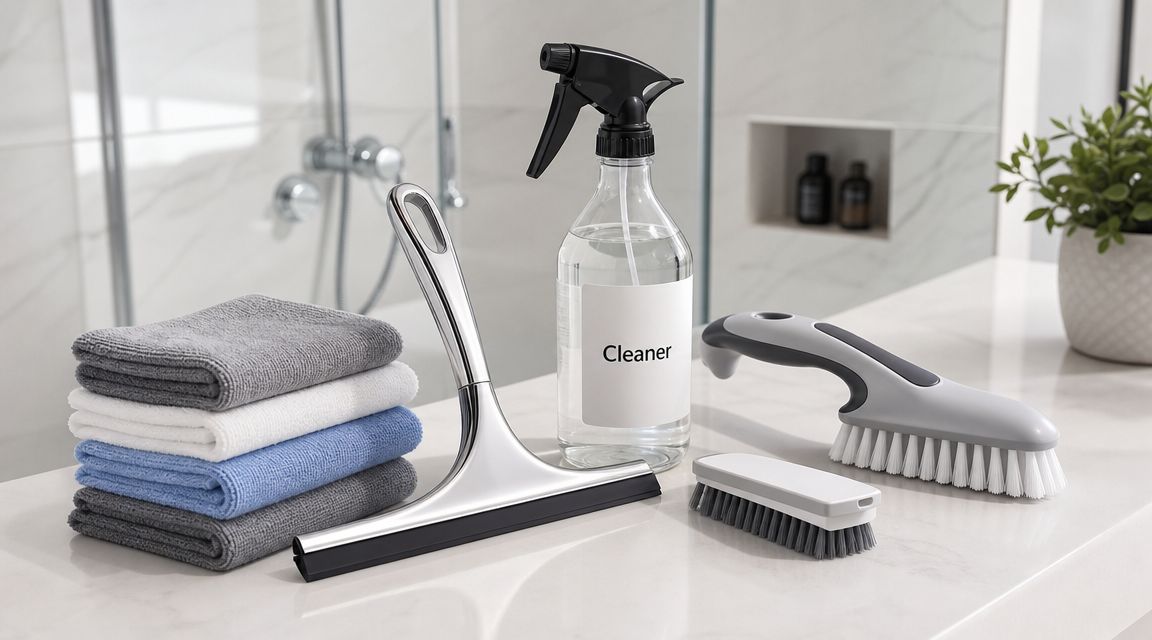
Tools that do the real work
A basic professional-style kit should include:
- A quality squeegee: This is the simplest prevention tool in the bathroom. It removes water from glass, tile, and smooth wall panels before spots and residue set up.
- Microfiber cloths: These are ideal for drying fixtures, buffing glass, and wiping acrylic without scratching.
- A soft sponge or non-scratch pad: Best for fiberglass, acrylic, and general wall cleaning where you want agitation without damage.
- A soft-bristle brush: Useful on tile faces, corners, and around fixtures where a cloth won't get enough grip.
- A grout brush: Narrow, firmer bristles do a much better job in grout lines than a general-purpose scrub brush.
- Spray bottles: Helpful if you mix your own vinegar-and-water solution or want one bottle for a mild daily cleaner and another for spot treatment.
- A bucket or rinse cup: You need a clean rinse, especially when working on soap scum that tends to smear before it lifts.
The wrong tool usually shows up in the finish. Cloudy fiberglass, scratched acrylic, frayed caulk, and roughened grout often come from over-scrubbing, not under-cleaning.
A final point that gets overlooked: keep your shower tools clean too. A dirty sponge, a crusted brush, or a damp rag left in the corner just puts residue back onto the surface.
Your Proactive Shower Maintenance Routine
If you want a shower that stays presentable without constant heavy scrubbing, the routine has to be realistic. Most homeowners don't need a complicated checklist. They need a cadence they'll realistically follow.
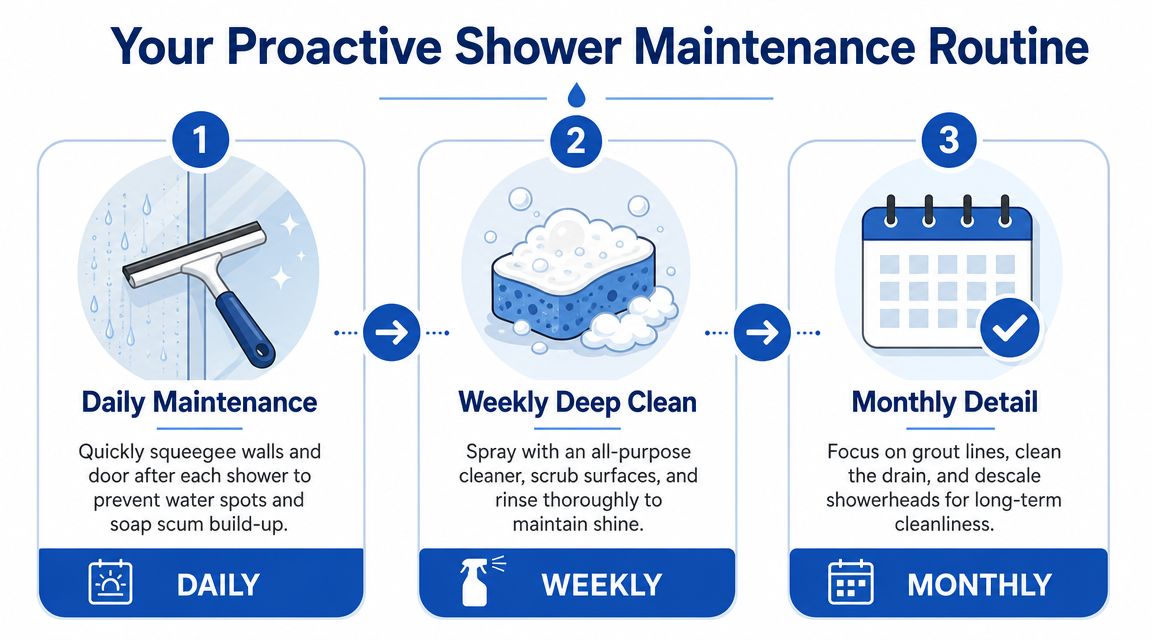
Home-cleaning guidance consistently points to a simple pattern: wipe down or squeegee the shower after every use, do a full clean once a week, and reserve deeper monthly attention for the showerhead, grout, and caulk. The same guidance notes that cleaners often work best with a short 5 to 10 minute dwell time, and that running the bathroom fan for at least 10 minutes after showering helps reduce moisture buildup and mold growth (Horow's shower cleaning guide).
Daily habits that prevent buildup
The daily part should take very little effort. If it feels like a chore, it won't stick.
A strong daily routine looks like this:
- Squeegee the walls and glass after each shower: This removes water before minerals and soap residue dry in place.
- Leave surfaces as dry as possible: A quick wipe on fixtures, ledges, or the door track helps.
- Use the exhaust fan during and after the shower: Moisture that stays trapped in the room feeds mildew and keeps caulk and grout damp longer.
Prevention is key to saving a lot of cleaning time. It doesn't look impressive in the moment, but it keeps the shower from sliding into that grimy stage where every surface needs scrubbing.
Weekly cleaning that stays manageable
Weekly cleaning works best when you don't overcomplicate it. Spray the surface-safe cleaner, give it time to work, then scrub only where the buildup is.
A practical weekly sequence:
- Clear the area: Move shampoo bottles, razors, and soap trays.
- Apply the cleaner: Use a product that fits the material.
- Let it dwell briefly: Many shower cleaners are designed to work after a short wait rather than immediate scrubbing.
- Scrub strategically: Hit corners, grout lines, fixtures, and the lower wall area first.
- Rinse thoroughly: Residue left behind attracts more film.
- Dry the surfaces: This is what keeps “just cleaned” from turning into “already spotted.”
Field note: The weekly clean gets much easier when the shower has been dried consistently. You spend less time breaking through buildup and more time doing a simple maintenance wash.
Monthly detail work that prevents bigger problems
Monthly cleaning is where you handle the areas that slowly drag the whole shower down. If you ignore them, the room starts looking dirty even when the main walls are clean.
Focus on:
- Showerheads: Descale mineral buildup before spray performance drops and fixtures start looking chalky.
- Grout lines: Spot-clean dingy sections before they become deep-set stains.
- Caulk lines and corners: Check for discoloration, trapped residue, or persistent dampness.
- Tracks, edges, and door frames: These areas are prone to collecting water and grime.
There's also a useful prevention angle from mainstream guidance: consistent drying and ventilation can slow mildew and soap-scum buildup enough that a weekly clean can sometimes be stretched to every two weeks when maintenance is strong (Seventh Generation's shower cleaning advice).
For busy households, that's the payoff. The shower doesn't stay clean because you attacked it harder. It stays clean because you stopped giving residue and moisture time to settle in.
When to Call a Pro and Reclaim Your Weekend
Some showers respond well to a good routine. Some don't. If you've been cleaning consistently and the shower still looks dingy, there may be a limit to what DIY methods can fix.
Signs the shower needs more than routine cleaning
Call for professional help when you're dealing with issues like:
- Persistent grout staining: If grout stays dark or blotchy after repeated cleaning, it may need restoration-level attention.
- Heavy buildup in corners and seams: Old soap residue and mineral deposits can harden to the point where household cleaning barely moves them.
- Etched or permanently hazy glass: Not every cloudy door is dirty. Some are damaged.
- Problem caulk or recurring mildew: If discoloration returns quickly, moisture control and deep cleaning may both need attention.
- A shower you don't have time to reset: This is common in busy family homes and before guests, listing photos, or move-outs.
A professional deep clean also helps if you're trying to establish a better maintenance baseline. It's much easier to keep a shower clean once the old buildup is fully removed.
Prevention still matters. Mainstream guidance notes that consistent ventilation and drying can slow soap-scum and mildew buildup enough that weekly cleaning may sometimes be stretched to every two weeks, which is a major help for homeowners who don't want to spend every weekend scrubbing (deep cleaning services near you).
Hiring help isn't giving up. It's deciding that your time has value, and that some bathrooms need professional-level resetting before a simple routine will work.
Frequently Asked Questions About Shower Cleaning
How do I remove hard water stains from shower glass?
Start by figuring out whether you're seeing soap scum, mineral deposits, or both. Soap scum usually leaves a dull film. Hard water often shows up as spots, cloudy patches, or a crusty residue near the bottom of the door and around metal hardware.
On compatible glass surfaces, a mild acidic cleaner is often useful for mineral residue. Apply it, let it sit briefly, then scrub gently with a non-scratch pad or microfiber cloth. Rinse thoroughly and dry the glass right away with a clean microfiber cloth or squeegee.
If the haze doesn't change after careful cleaning, the problem may be etching rather than buildup. At that point, more scrubbing usually won't help and can make the surface look worse.
Is it safe to mix bleach with other shower cleaners?
No. Don't mix bleach with other cleaning products.
That includes mixing bleach with random bathroom sprays, acids, or DIY combinations you've seen online. If you decide to use a bleach-based product, use it exactly as labeled, on its own, and with proper ventilation. Also make sure the product is suitable for the surface you're treating.
A safer rule for homeowners is simple: use one cleaner at a time, rinse fully between products, and avoid improvising chemical combinations in a small bathroom.
If you're not completely sure two cleaners are compatible, assume they are not and keep them separate.
How can I prevent pink buildup in my shower?
That pink or salmon-colored film usually shows up where moisture lingers. It tends to appear in corners, along caulk lines, around the drain area, on shower curtains, and in spots where water sits between uses.
The best prevention is environmental control:
- Dry the shower after use: Remove standing water from walls, doors, corners, and shelves.
- Vent the bathroom properly: Keep moisture moving out rather than letting it sit in the room.
- Clean problem areas before they spread: Corners, seams, and ledges need more attention than broad wall surfaces.
- Reduce clutter: Too many bottles trap water and block airflow.
If pink buildup keeps returning quickly, the issue usually isn't that you need a stronger cleaner. It's that the shower is staying damp too long between uses.
What's the best way to clean a shower drain naturally?
For routine drain maintenance, the most important step is physical removal. Pull out visible hair and buildup from the drain opening first. That's what causes a lot of slow-drain problems.
After that, flush with hot water if your plumbing and drain materials allow it. A drain screen is one of the easiest upgrades you can make because it catches hair before it compacts in the pipe.
If the drain is repeatedly slow, backing up, or giving off odor even after cleaning the opening, it may need more than a simple homeowner fix.
How often should I clean my shower if I want it to stay easy?
The easiest answer is not “deep clean less.” It's “do small things more often.” A shower that gets wiped down and ventilated regularly is much easier to keep under control than one that's ignored until buildup is obvious.
A simple rhythm works well: dry the shower after use when possible, do a regular maintenance clean on a consistent schedule, and handle detail areas before they become a project. That approach protects finishes better and cuts down on the need for aggressive scrubbing.
If your shower needs more than a quick wipe-down, Sunny Day Pro Services helps homeowners in Wayland, Newton, Needham, Wellesley, Weston, and nearby Massachusetts communities get bathrooms back to a clean, manageable baseline. Whether you need a detailed deep clean before guests, move-in or move-out service, or ongoing help keeping the house in shape, their team delivers careful work, clear communication, and results that make maintenance easier from that point forward.

