
How to Clean After Construction: A Complete 2026 Guide
Learn how to clean after construction with our expert guide. We cover safety, tools, a 3-phase timeline, and tips to protect new floors. For homeowners in MA.
You've finished the renovation. The tile is in, the paint is dry, the cabinets look sharp, and the room finally resembles what you paid for. Then the light hits the space from the side and you see it. Dust on the trim. Dust inside drawers. Dust sitting on new hardwood, window tracks, light fixtures, and every flat surface you thought was already clean.
That's where the true scope of post-construction cleanup is often underestimated. This isn't regular house cleaning with a better mop. Fine construction dust can affect indoor air, and it can also damage brand-new finishes if you clean it in the wrong order. According to the U.S. Environmental Protection Agency, improper dust removal after construction can lead to indoor air pollutants, and thorough cleaning with HEPA filters and microfiber cloths reduces airborne particulate levels by an average of 85% within 24 hours.
The other issue is timing. A lot of homeowners clean once, move furniture in, and then wonder why everything has a dusty film again a few days later. Fine drywall dust keeps settling after the crews leave. If you want a space that feels completely finished, you need the right sequence and the right timeline.
Table of Contents
- Protect yourself before you touch the mess
- Prep the house so dust doesn't keep circulating
- A quick pre-clean checklist
- Kitchen surfaces and cabinet interiors
- Bathrooms with new tile grout and fixtures
- Hardwood tile and windows
- How soon should you clean after construction ends
- Can I use a regular vacuum for construction dust
- What's the biggest mistake homeowners make
- Is vinegar safe on new tile and grout
- Why does the room still get dusty after I already cleaned it
- How long does a full post-construction clean take
- Should vents and window tracks be part of the cleaning
Your Renovation Is Done But the Dust Is Everywhere
In Wellesley-area homes, the mess after construction usually looks manageable at first. A few piles of debris. Some powder on the floor. A haze on the windows. Then you start opening drawers, checking tops of door casings, and looking at dark flooring in daylight. The dust is everywhere.
The two biggest mistakes happen fast. First, people start wet wiping before removing dry dust. Second, they assume one deep clean is enough. Both choices create extra work, and the first one can scratch what you just paid to install.
Practical rule: Post-construction cleaning works when you go top down and dry before wet. Reverse that order and you'll chase dust for days.
A professional approach is more than a checklist. It's a sequence. Debris comes out first. Fine dust gets removed with the right equipment. Wet cleaning happens only after the dry material is gone. Then there's a final touch-up after the remaining airborne dust has had time to settle.
That last step is the piece most DIY guides miss. In real homes, especially after drywall, sanding, cutting, and trim work, the first clean gets the space usable. The later touch-up gets it finished.
What usually goes wrong
- Wet cloth first: Water grabs loose drywall dust and turns it into a gritty paste that smears across trim, tile, and glass.
- Floor-first cleaning: Dust falls from fixtures, upper walls, and shelves onto the floor you already cleaned.
- Skipping vent attention: Dust trapped around returns and vents keeps redistributing into the room.
- Rushing move-in: Boxes, furniture, and foot traffic make it harder to remove the last layer cleanly.
If the room looks clean but still feels dusty a day later, the process was incomplete, not unlucky.
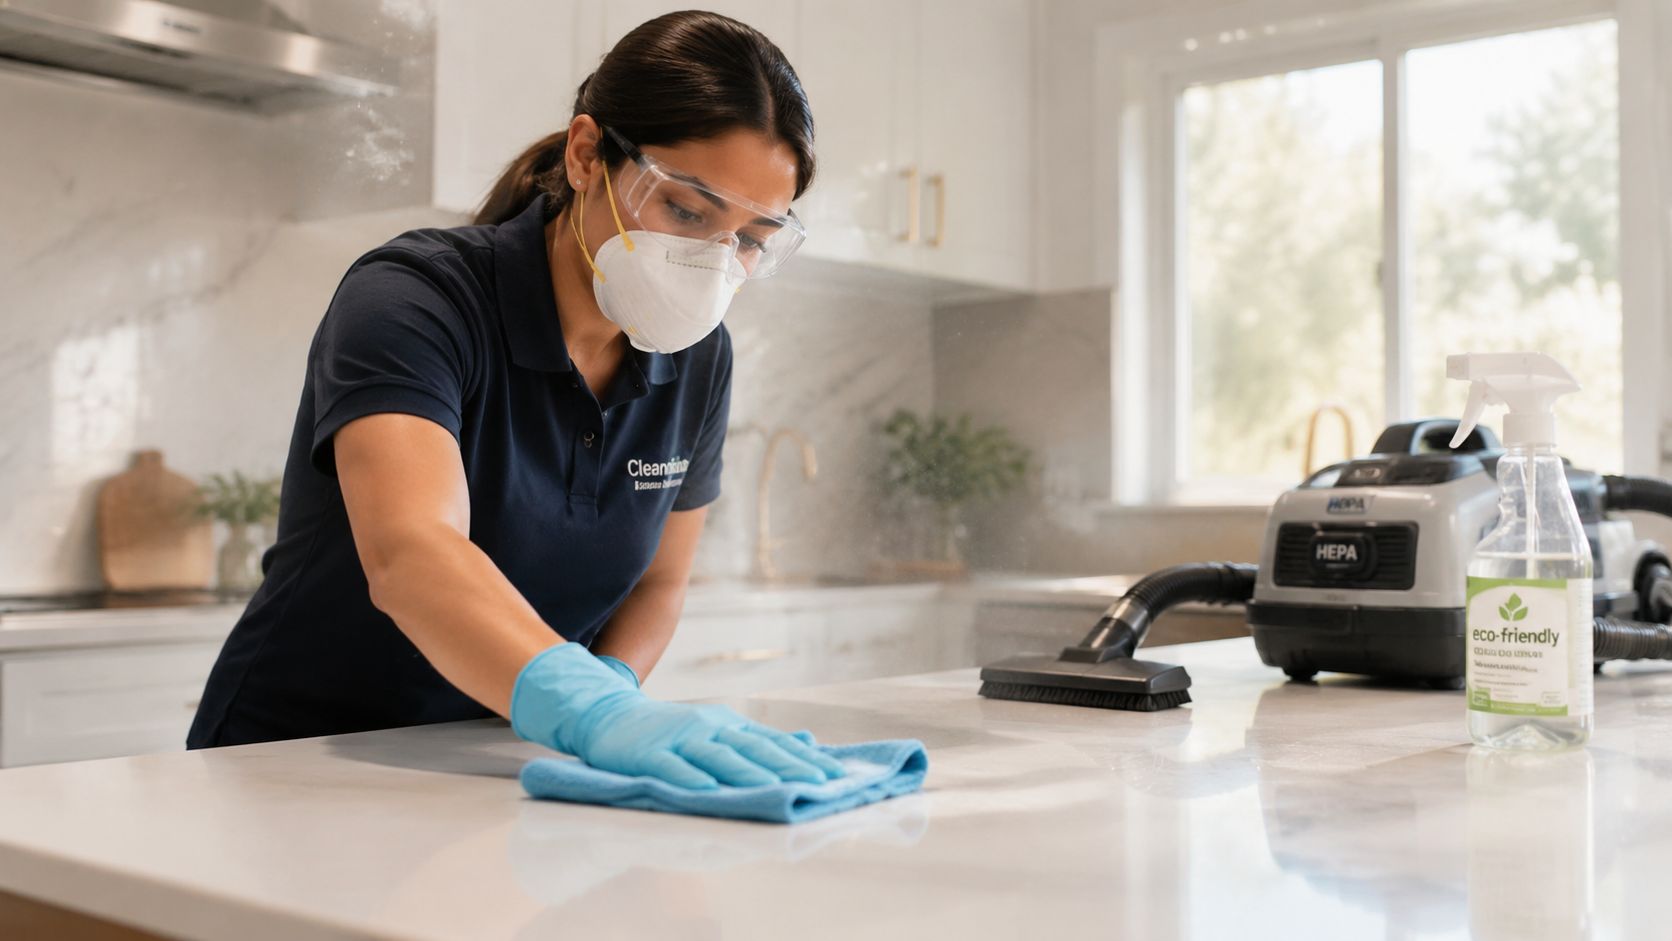
Essential Prep Work and Safety Precautions
Professional crews don't start by spraying cleaner on a countertop. They start by controlling risk. That matters in a post-renovation space because the debris isn't ordinary dirt. It can include silica, sawdust, drywall residue, sharp fragments, adhesive scraps, and dust already sitting inside vents and tracks.
Protect yourself before you touch the mess
A few items should be considered baseline gear before cleanup starts:
- Respiratory protection: Use a mask that can handle fine dust. Construction dust is much finer than ordinary household dust.
- Eye protection: Safety glasses matter when dust falls from overhead fixtures, upper trim, or vent covers.
- Gloves: Use work gloves for rough debris and cleaning gloves for wet-detail work.
- Closed-toe shoes: You don't want to find the missed screw or splinter with your foot.
Even in a finished-looking remodel, there are usually sharp leftovers. I've seen clean-looking spaces hide broken tile chips in corners, razor-thin paint film on hardware, and fasteners sitting under paper or dust.
Prep the house so dust doesn't keep circulating
Before cleaning any room, control the environment.
- Turn off the HVAC: If the system runs while dust is still loose, it can pull particulates through returns and push them back into the home.
- Cover vents and returns: Sealing openings helps stop dust migration during active cleanup.
- Isolate active areas: Effective containment uses a heavy-duty tarp with a minimum thickness of 0.8 millimeters, sealed from ceiling to floor, and larger projects may require a double layer, as described in Sweeten's construction clean-up guidance.
- Open access for airflow when appropriate: Ventilation helps, but only after you've controlled where dust is moving.
- Remove large debris first: Cardboard, cutoffs, packaging, tape, and protective film need to go before fine-detail work starts.
A room prepped properly cleans faster and stays cleaner afterward. A room prepped poorly keeps feeding dust back into the surfaces you already wiped.
A quick pre-clean checklist
- Check ceilings and fixtures: Look for dust shelves on fans, cans, pendants, and trim.
- Inspect new surfaces: Identify delicate finishes before choosing products.
- Spot adhesive and paint residue: Plan targeted removal instead of aggressive scrubbing.
- Confirm tools are ready: Don't start if all you have is a household vacuum and paper towels.
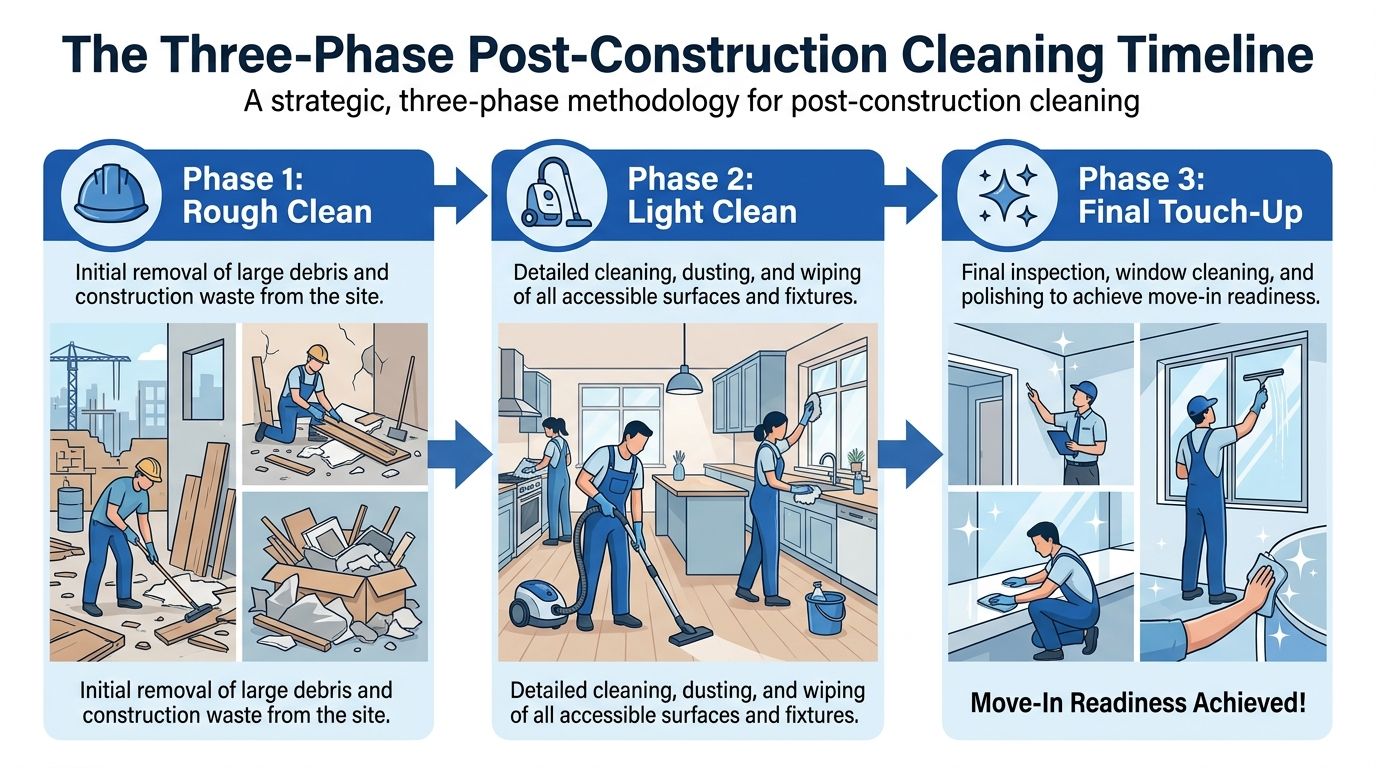
The Three-Phase Post-Construction Cleaning Timeline
A renovation can look finished on Friday and still drop a fine coat of dust across new surfaces through the next week. That gap is where a lot of damage happens. Homeowners wipe what they see, mop too soon, and grind leftover grit into fresh grout lines, tile, and hardwood finishes.
At Sunny Day Pro Services, we handle post-construction cleaning in Wellesley in three passes for a reason. The sequence protects the work that was just paid for. The Institute of Inspection Cleaning and Restoration Certification sets cleaning standards used across the industry, and one rule matters here more than anything else: remove dry particulate before any wet wiping. If loose construction dust gets wet too early, it turns into an abrasive film that is much harder to remove safely.
Phase 1 rough clean
Phase one clears what can scratch, smear, or slow down the detail work.
Remove debris, cutoffs, packaging, tape, protective film, and any heavy dust buildup on floors and in corners. This is also the point to identify problem spots such as cured caulk, paint specks on glass, adhesive residue, and labels left on new fixtures. Catching those early helps you choose the right removal method instead of attacking everything with a scraper and risking damage.
Typical phase-one work includes:
- Debris removal: Drywall scraps, wood pieces, tile offcuts, boxes, and plastic wrap
- Loose dust pickup: Bulk dust from floors, corners, sills, and stair edges
- Surface check: Looking for residue on cabinets, trim, glass, and hardware
- Work-area setup: Opening drawers, shifting light items, and making surfaces accessible
This pass is fast, but it decides how safe the rest of the job will be.
Phase 2 detail clean
This is the labor-heavy pass. It takes time because every surface needs the right method, in the right order, with the right moisture level.
Start high and stay dry as long as possible. Ceiling lines, trim tops, fixture housings, door frames, cabinet faces, shelves, baseboards, and window tracks all need dry microfiber or HEPA vacuuming before any damp cloth touches them. The EPA guidance on indoor air quality during remodeling reinforces the value of HEPA filtration for capturing fine particles that standard household vacuums often recirculate.
Our detail-clean sequence is straightforward:
- Dry dust high surfaces first: Ceilings, trim, vents, light fixtures, upper walls, and shelving
- HEPA vacuum the residue: Corners, tracks, baseboards, cabinet interiors, and floors
- Use controlled damp wiping last: Lightly damp microfiber with finish-safe products only after the dust is gone
That order matters most on new floors. Fresh tile and grout can haze if dust is pushed into the joints with water, and hardwood shows every mistake. For newly installed hard surfaces, use pH-neutral cleaners only. Acidic products, heavy degreasers, and over-wet mops can etch grout, dull finishes, and leave residue that attracts more soil. For a safer maintenance approach after the construction dust is gone, our guide on the best way to clean tile floors covers the methods we recommend.
One common DIY error shows up here. The floor gets mopped while dust is still sitting on sills, trim, and counters. An hour later, the room looks dusty again because the finest particles kept settling.
Phase 3 final touch-up
The last phase should not be scheduled too early. Fine post-construction dust can continue settling for several days, and on some jobs we still see light fallout close to a week after the trades leave.
That is why the final pass is separate. It removes the settled film that appears after the first deep clean and gives new surfaces a true move-in-ready finish.
Phase three usually includes:
- Dust reset on horizontal surfaces: Counters, trim tops, shelves, mantels, and sills
- Glass and mirror correction: Remaining haze, fingerprints, and edge dust
- Fixture finish work: Faucets, pulls, appliance fronts, and lighting trim
- Final floor care: A finish-safe pass matched to tile, grout, vinyl, or hardwood
This is the part homeowners often underestimate. A room can look clean at first glance and still have enough airborne dust left to coat dark floors and polished fixtures overnight. On expensive new surfaces, patience protects the investment better than speed.
Room-Specific Techniques for Flawless Results
Each room collects dust differently, and each surface reacts differently to bad cleaning habits. Kitchens hold dust inside cabinet boxes and around appliance edges. Bathrooms can be ruined by the wrong cleaner on fresh grout. Floors are where the wrong sequence shows up fastest.
Technical data cited by the National Tile Contractors Association shows that adding water to unresolved dry construction dust creates a slurry with a Mohs hardness of 4 to 5, which is hard enough to scratch polished marble and glass. The same source notes that 34% of post-construction floor damage comes from improper cleaning agents, which is why pH-neutral cleaners matter on new grout and finish-sensitive surfaces.
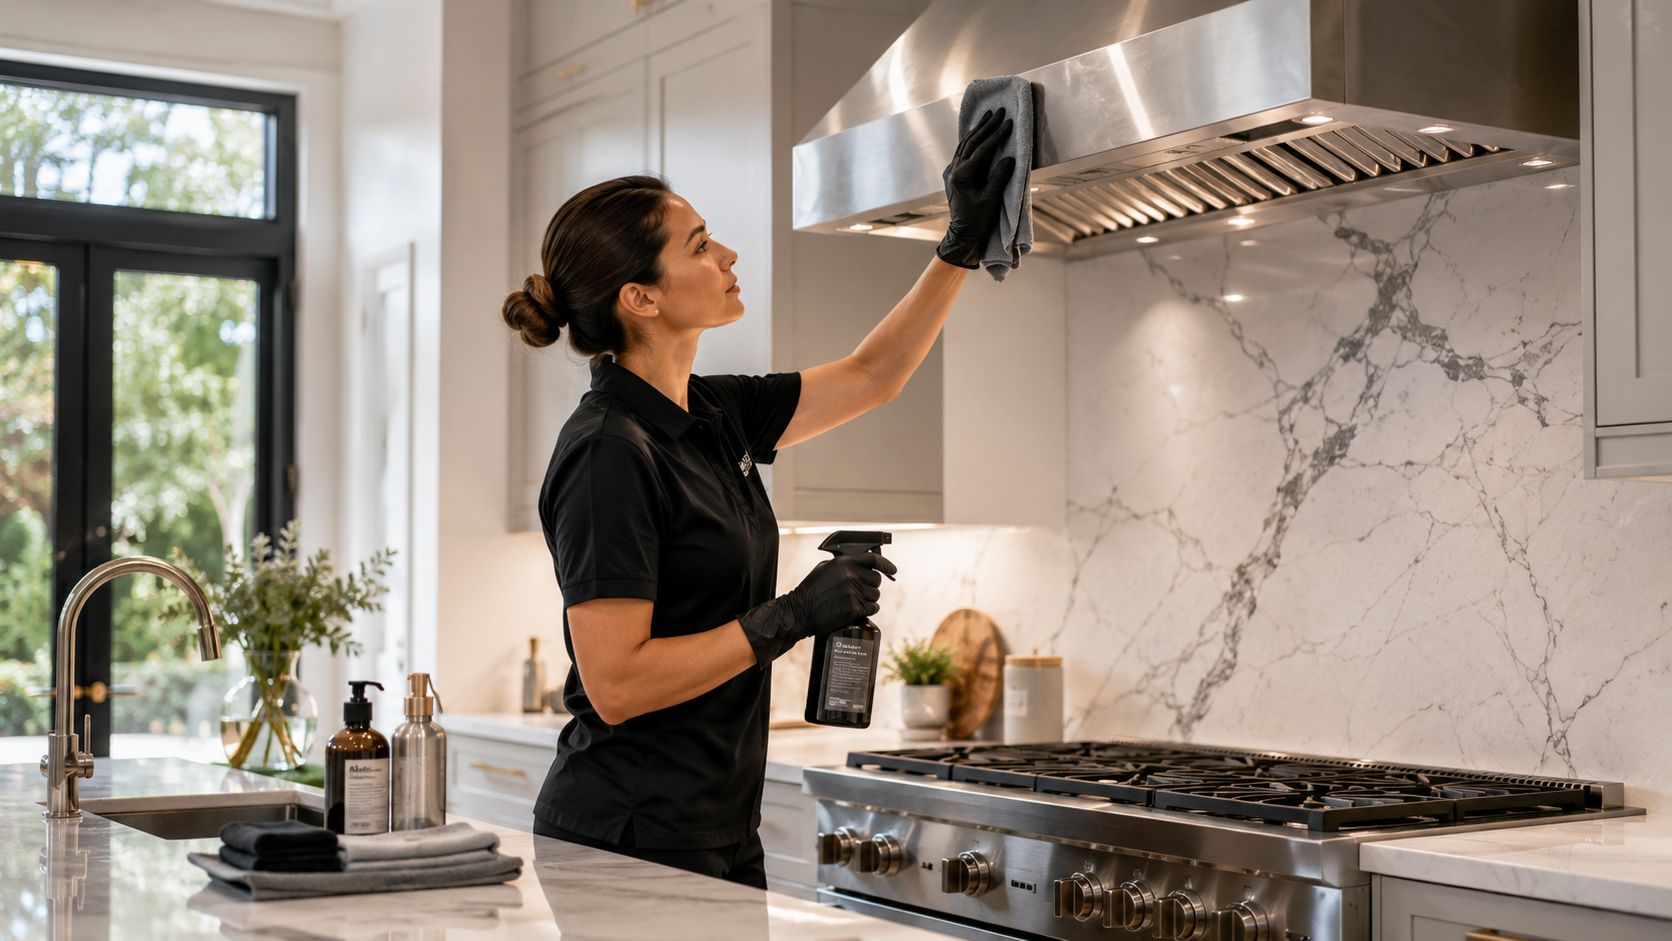
Kitchen surfaces and cabinet interiors
Kitchens need patience. Fine dust settles on the tops of upper cabinets, inside drawer corners, and along hinge lines long before you notice it on the counters.
Use this order:
- Upper cabinet tops and crown details first: Dry microfiber or a HEPA vacuum with a soft brush attachment.
- Cabinet interiors next: Vacuum crumbs, sawdust, and drywall powder before wiping.
- Appliance exteriors after that: Stainless needs a soft cloth and pressure control, not aggressive scrubbing.
- Counters and backsplash last: Only after the room's upper dust has been removed.
For adhesive residue on appliance film or cabinet labels, use a gentle approach. Don't reach for a metal blade. Plastic scrapers, soft microfiber, and a finish-safe residue remover are the safer route.
Bathrooms with new tile grout and fixtures
Bathrooms are high-risk because new tile and grout look durable but can still be vulnerable. Acidic cleaners and generic all-purpose sprays are a bad gamble on fresh installations.
Use pH-neutral products on grout, tile, and stone-adjacent surfaces. Keep water use controlled. Saturating fresh grout lines or leaving dirty liquid on the floor lets suspended grit settle right where you don't want it.
For more tile care guidance, this guide on the best way to clean tile floors gives a solid surface-specific approach.
Fresh grout isn't the place to experiment with vinegar, abrasive pads, or “works on everything” cleaners.
Bathroom priorities should include:
- Vacuuming vents and ledges
- Dry removal around toilet bases and vanity toe-kicks
- Gentle cleaning of shower glass before polishing
- Careful wipe-down of chrome and matte fixtures with non-abrasive cloths
Hardwood tile and windows
Floors tell the truth about your method. If you cleaned in the wrong order, the floor will show it first.
For hardwood, avoid soaking the surface. Dry dust removal has to be thorough before any damp cleaning happens. If dust gets pushed into seams by excess moisture, you create a mess that's harder to lift and risk dulling the finish.
For tile, especially textured porcelain or large-format installations, vacuum grout lines and edges first. Then use a pH-neutral solution and a microfiber mop or cloth, not a harsh brush unless the surface and grout can handle it.
For windows, deal with tracks before glass. Vacuum the channels, corners, and sill edges first. Then wipe the frame and clean the glass. If you start with the pane, loose dust from the track can blow back onto the glass and leave the same film you just removed.
A room-by-room finish pass should always include:
- Doors and trim: Tops, edges, handles, and hinge sides
- Switch plates: Dust loves to cling here after sanding work
- Closet shelving: Often missed and immediately noticeable after move-in
- Baseboards: Final proof that the dusting sequence was done right
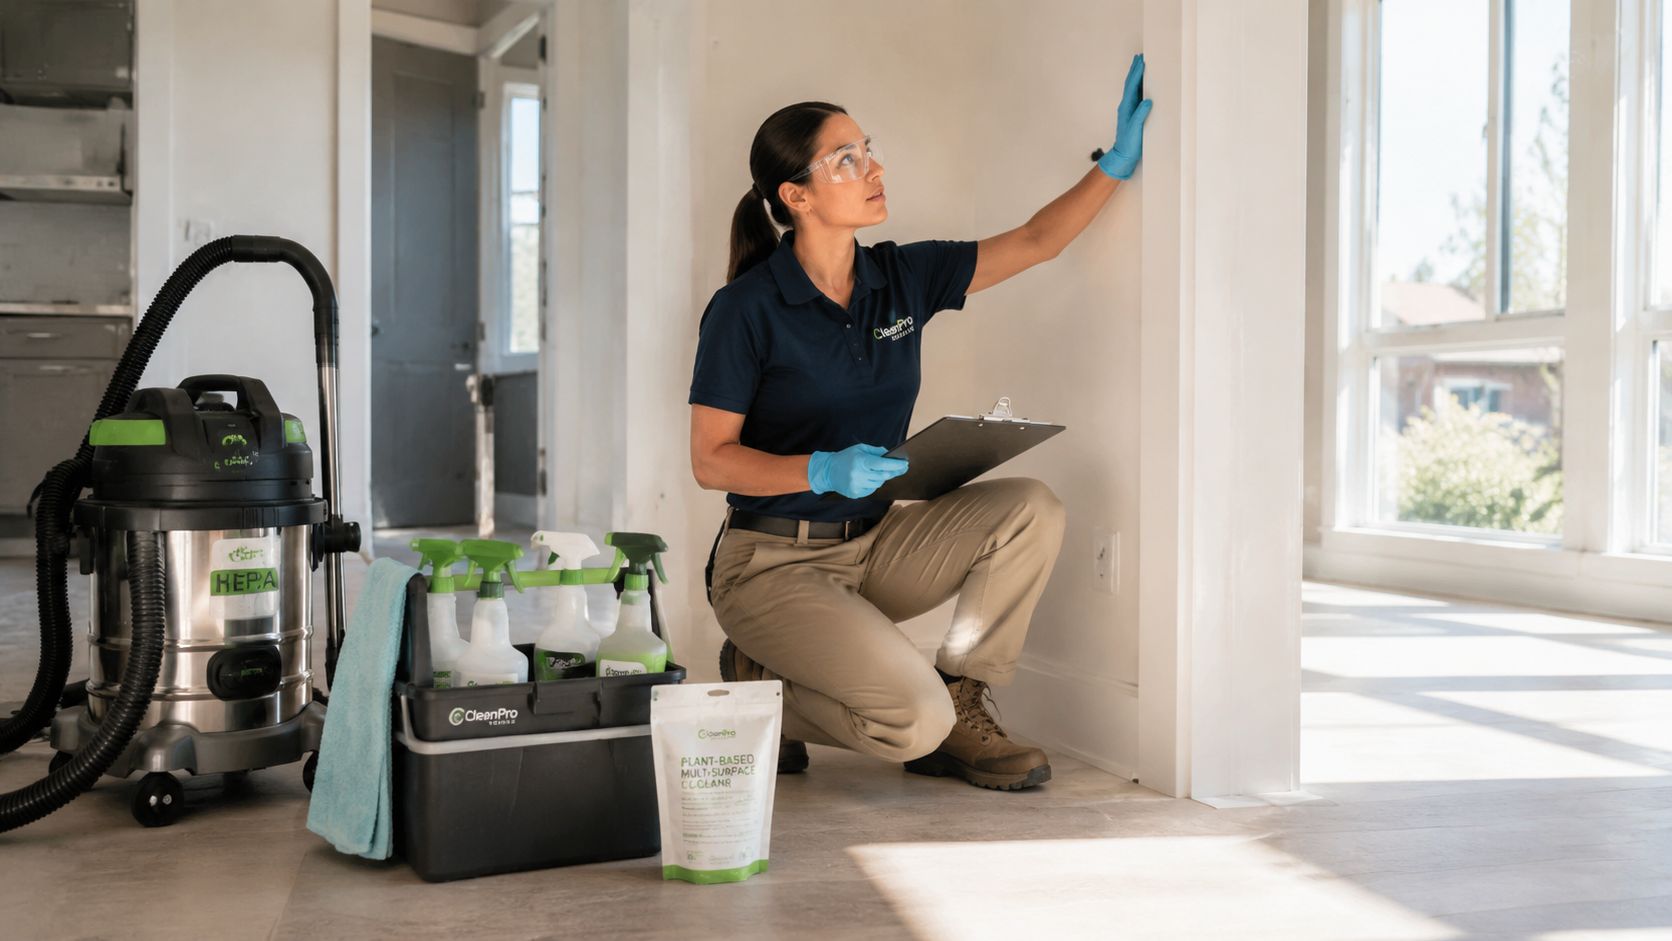
The Right Tools and Eco-Friendly Products
The wrong tool can make a room look clean while leaving dust in the air. The wrong product can leave etching, haze, or dull spots on surfaces that were just installed. That's why tool choice and chemistry matter as much as effort.
What earns a place in the cleaning kit
A few tools do most of the heavy lifting on a proper post-construction job:
- HEPA vacuum: This is essential. A HEPA filter captures 99.97% of particles as small as 0.3 microns, according to SERVPRO's post-construction cleaning guidance. Standard vacuums often recirculate fine dust instead of trapping it.
- Microfiber cloths: They lift and hold dust better than cotton rags or paper towels.
- Soft brush attachments: These let you vacuum trim, vent covers, ledges, and window tracks without scratching.
- Plastic scrapers: Useful for label residue, paint flecks, and dried specks on durable surfaces.
- Microfiber flat mop: Better control, less water, and less risk on wood and grout lines.
A household vacuum with no HEPA filtration may make the room sound cleaner while the finest dust keeps floating and resettling.
Why product choice matters on new finishes
Significant damage often occurs due to improper cleaning. Generic “all-purpose” products can be too aggressive for fresh grout, natural stone, delicate coatings, or specialty floor finishes. Strong fragrance also isn't the same thing as actual cleaning performance.
pH-neutral cleaners are the safer default for many new surfaces because they clean without the acid or alkalinity that can etch, dull, or weaken finishes. Eco-conscious formulas also make sense in recently renovated homes where families want lower-residue products and better indoor air conditions after work wraps up.
If you're building a safer cleaning setup for long-term maintenance, this article on eco-friendly cleaning for a clean and green home is worth reading.
A simple, effective kit usually includes:
- HEPA vacuum with brush tools
- Dry and damp microfiber cloths in separate piles
- pH-neutral floor and surface cleaner
- Plastic putty knife
- Buckets reserved for clean rinse water
- Step stool or ladder for high dusting
- Painter's tape for marking spots that need a second pass
Good post-construction cleaning removes dust without grinding it into the surface or coating the room in unnecessary product.
DIY vs Hiring a Pro A Decision Checklist
A lot of homeowners can handle post-construction cleaning themselves. A lot also underestimate what happens after the first “good enough” pass. On jobs we see around Wellesley, the dividing line is usually not motivation. It is whether the project created fine dust that will keep dropping out of the air for days, and whether the home now has surfaces that can be damaged by the wrong method.
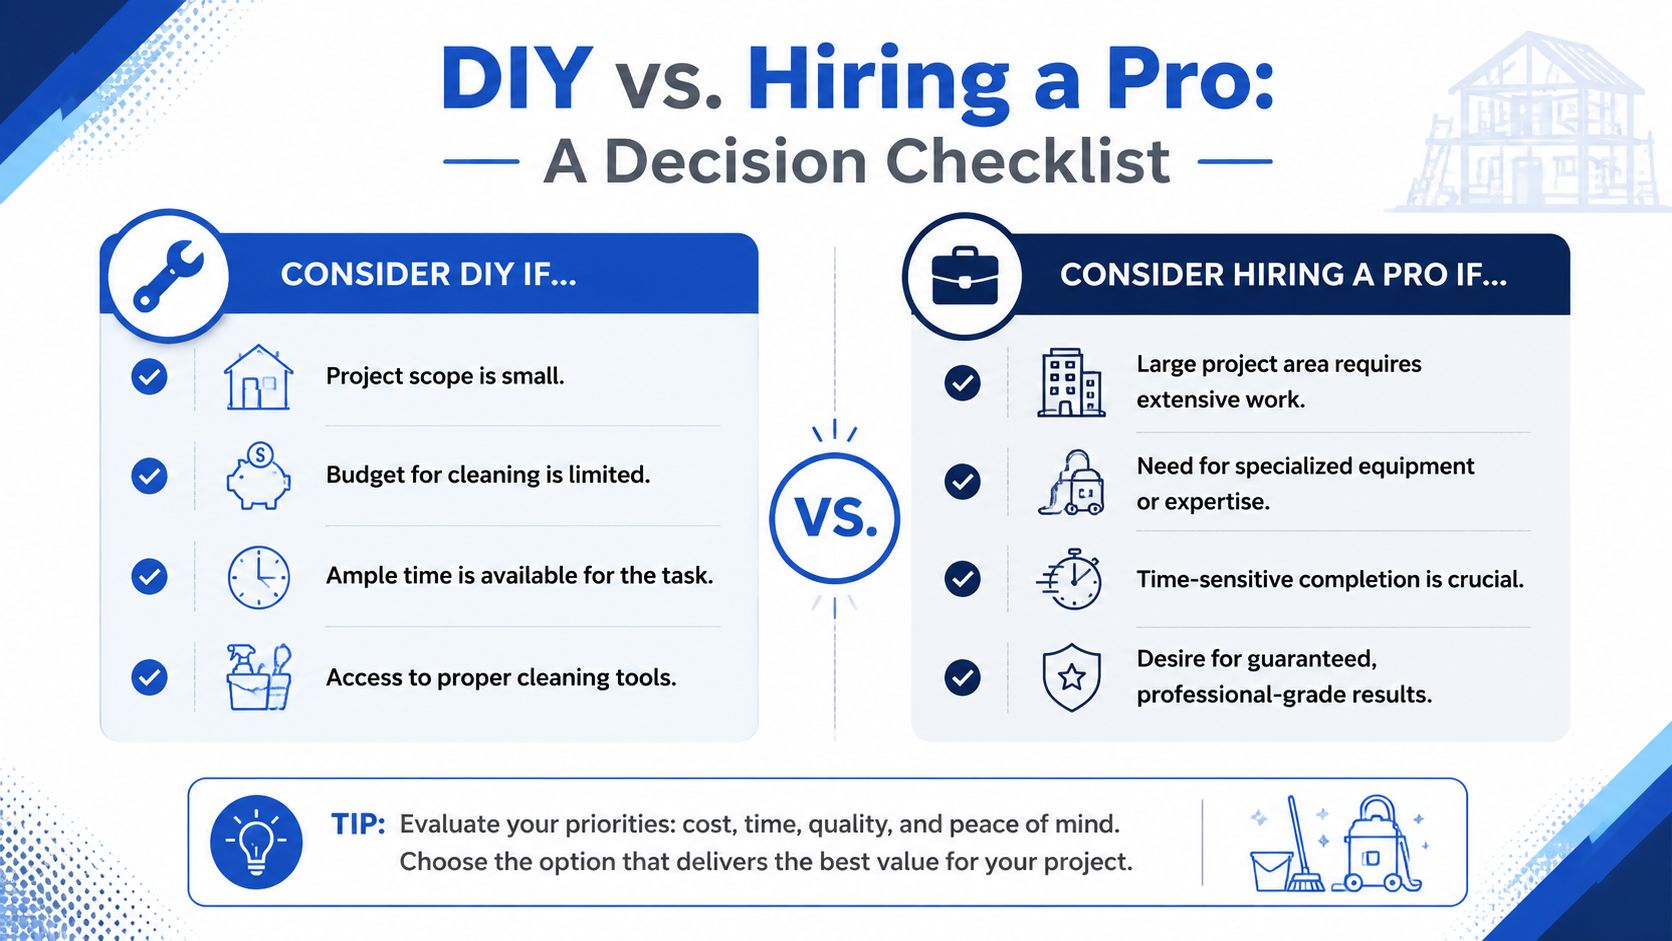
I tell clients to make the decision based on risk, not optimism.
If the work was limited to one contained area and you have time to return for a follow-up touch-up several days later, DIY can work. If dust traveled through returns, settled in bedroom furniture, or landed across new tile, grout, or hardwood, the cost of one cleaning mistake can exceed the cost of hiring help.
When DIY makes sense
DIY usually makes sense under a narrow set of conditions:
- The project was small and contained: A powder room refresh or a single-room cosmetic update is different from a kitchen remodel with open traffic to other areas.
- You have the right equipment: HEPA vacuum, enough clean microfiber, and separate tools for dry removal and damp finishing.
- You can protect new finishes: That means using finish-safe, pH-neutral products instead of grabbing a general cleaner from under the sink.
- You have time for more than one pass: The hidden timeline gap matters. Fine dust often keeps settling after the contractors leave.
- You are comfortable with detail work: Vents, cabinet tops, window tracks, trim edges, and inside drawers are where leftover dust keeps showing up.
A rushed DIY job usually looks clean at eye level and still leaves dust in the places that keep feeding it back into the room.
When professional cleaning is the smarter call
Professional cleaning is the better call when the project created dust beyond the work zone or introduced expensive new surfaces that need careful treatment. That is common after kitchen renovations, basement finishing, hardwood refinishing, tile installation, and larger remodels in Wellesley, Needham, Weston, and Newton.
Hire a pro when:
- Dust spread into multiple rooms or levels
- You have fresh grout, natural stone, hardwood, or specialty finishes
- You need the home ready by a firm move-in or inspection date
- You want the job cleaned in the right sequence instead of by trial and error
- You need detailed cleaning inside cabinets, on sills, in tracks, around vents, and along trim
- You want a planned final pass after additional settling
That last point is the one DIY jobs miss all the time. The first cleanup removes the heavy load. The follow-up removes the fine layer that keeps reappearing.
| Factor | DIY Approach | Professional Service (like Sunny Day Pro Services) |
|---|---|---|
| Time commitment | Usually spread across nights or weekends, with return visits often needed. | Handled with a defined sequence, enough labor, and a clear finish target. |
| Equipment quality | Often limited to household vacuums, consumer mops, and mixed-use cloths. | Uses HEPA filtration, detail attachments, and separate materials for each cleaning stage. |
| Risk to new surfaces | Higher if dust is rubbed in, wetted too early, or cleaned with the wrong chemistry. | Lower because surface type, dust load, and product compatibility are checked before cleaning starts. |
| Dust settling follow-up | Commonly skipped after the first major clean. | Planned as part of the process, especially when fine dust is still dropping out of the air. |
| Cabinets, vents, tracks, and detail areas | Often left for “later,” then missed. | Included in a top-down detail workflow so dust is removed instead of redistributed. |
| Final result | Can work on small jobs if the homeowner has patience, time, and the right tools. | More reliable for protecting finishes and getting the home truly ready to use. |
If the project involved multiple rooms, high-end finishes, or lingering dust that keeps coming back, our post-construction cleaning services in Wellesley and nearby towns are built for that exact cleanup cycle.
Frequently Asked Questions About Post-Construction Cleaning
How soon should you clean after construction ends
Start the rough clean and detail clean once debris removal is complete and trades are done creating dust. Then plan for a final touch-up after the fine dust has had time to settle.
Can I use a regular vacuum for construction dust
It's a poor choice for fine post-renovation dust. HEPA filtration is the safer standard for capturing very small particles instead of blowing them back into the air.
What's the biggest mistake homeowners make
Wetting dust too early. Once water hits loose drywall or sawdust, it turns into a gritty film that's harder to remove and can scratch surfaces.
Is vinegar safe on new tile and grout
It's not the product I'd reach for on fresh grout or finish-sensitive surfaces. pH-neutral cleaners are the safer option when you want to avoid etching or surface damage.
Why does the room still get dusty after I already cleaned it
Because the finest particles keep settling after the first major cleanup. That's why a final touch-up matters.
How long does a full post-construction clean take
It depends on project size and how far the dust traveled, but larger whole-home cleanups are substantial jobs, not quick wipe-downs.
Should vents and window tracks be part of the cleaning
Yes. Both hold dust that can keep spreading back into the room if they're skipped.
If your renovation is finished and you want the space cleaned the right way, Sunny Day Pro Services helps homeowners in Wellesley, Needham, Weston, Newton, Wayland, and nearby Massachusetts communities get to a clean, move-in-ready result without risking new tile, grout, hardwood, or fixtures. Request a fast quote and get a post-construction cleanup plan that matches the way dust settles.

