
Bathroom Tile and Grout Cleaner: A Practical Guide
Choose the best bathroom tile and grout cleaner for your surface. Compare formulas, safety steps, DIY maintenance, and when to call a professional.
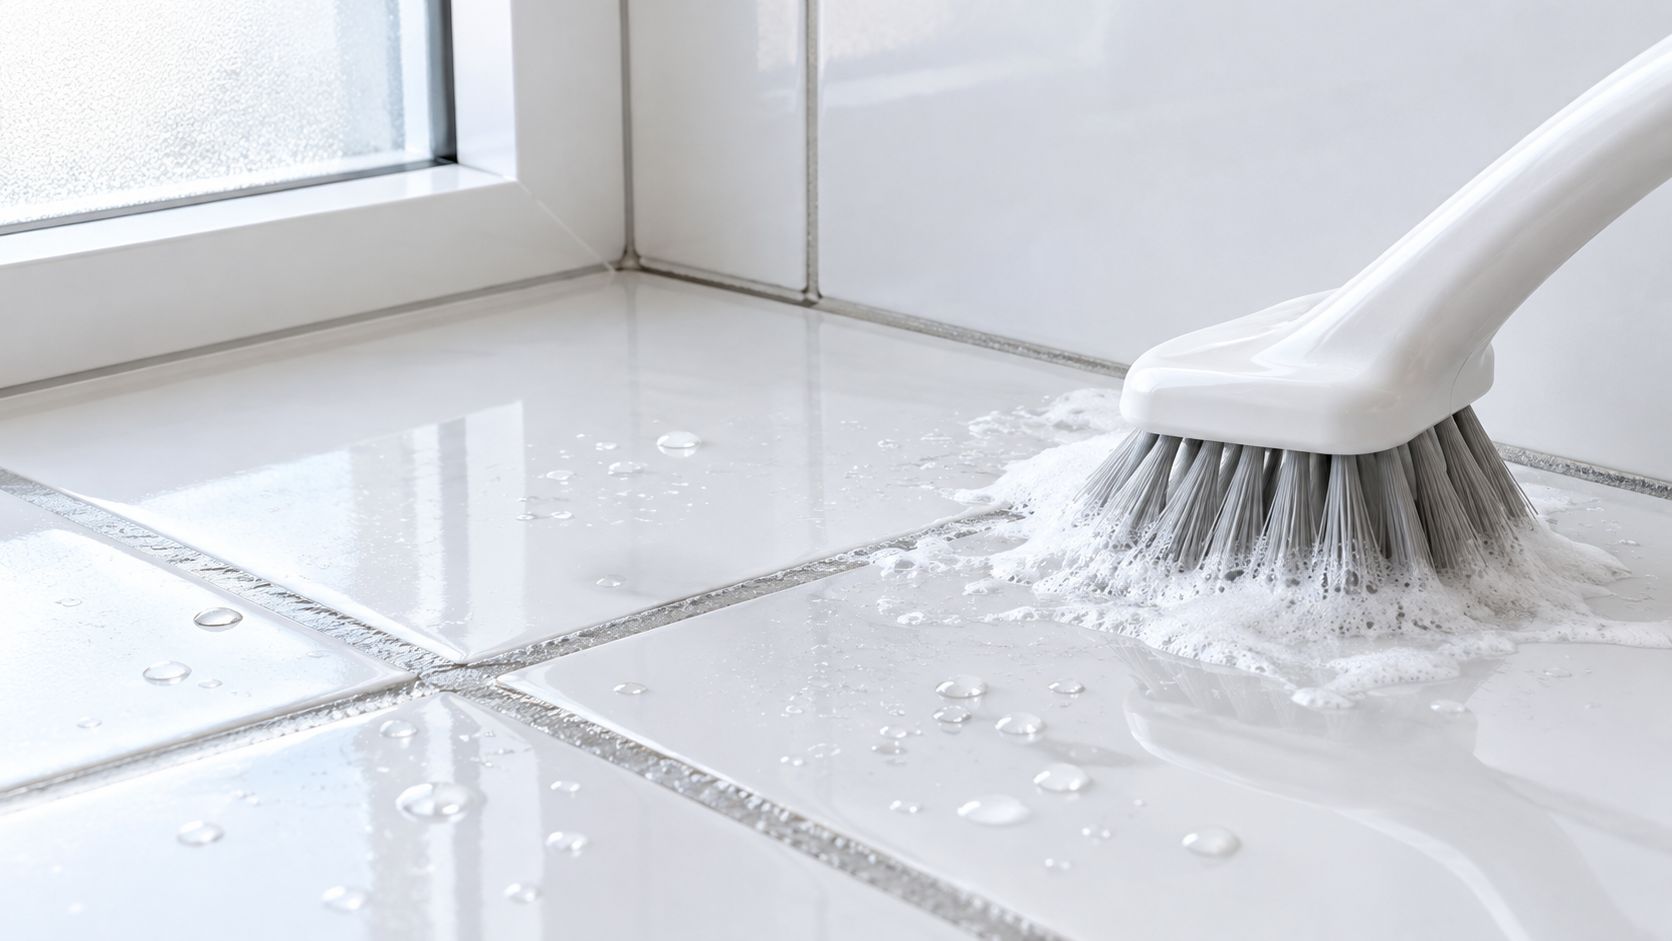
You scrub the shower, rinse the walls, and still see dark grout lines, a faint pink film near the drain, and cloudy streaks on the tile. In a Massachusetts bathroom, that often means the surface isn't merely “dirty.” Soap residue, hard-water scale, moisture, grout porosity, old sealer, and the wrong cleaner may all be involved.
A marble vanity can make the mistake more obvious. Leave an acidic bathroom spray sitting too long, and a once-shiny surface may develop a dull ring. Use an aggressive pad on cement grout, and you can roughen the joint so it holds even more soil. Spray a disinfectant and wipe it away immediately, and you may have cleaned the surface without completing the product's disinfection claim.
The practical answer isn't always the strongest bottle under the sink. It starts with identifying the material, identifying the soil, and choosing a formula that can do the job without damaging the bathroom.
Table of Contents
The Bathroom Cleaning Problem Most Homeowners Misread
A homeowner in Wayland or Newton may see a shower that looks clean at first glance. The glazed tile still reflects light, but the grout is streaky. A faint pink film has appeared in the dampest corner. On the vanity, a dull ring marks the spot where a cleaner pooled around the faucet.
That combination tempts people to escalate. They reach for a harsh descaler, a chlorine product, or a stiff abrasive brush and attack everything at once. The result can be more complicated than the original mess. Acid can etch natural stone and wear down cement grout, while abrasive scrubbing can change the texture of a joint. A strong disinfectant may also dry before it has remained wet for the required time.
Think in materials, not bottles
A bathroom is a material system made up of tile, grout, sealer, caulk, fixtures, and sometimes natural stone. Glazed porcelain, unsealed cement grout, epoxy joints, and marble don't respond to the same chemistry. The stain matters, but the surface matters first.
Grout also serves a structural and protective purpose. It helps keep water out, protects tile edges, accommodates slight irregularities, and allows limited movement in the tile assembly. Earlier cement grouts commonly had absorption rates above 35%, as described in the Tile Council of North America grouting presentation, so porous joints can hold moisture, soil, and cleaner residue more readily than glazed tile.
Practical rule: The right bathroom tile and grout cleaner is the gentlest product that removes the specific soil from the specific surface.
By the end of this guide, you'll have a way to choose a cleaner, a routine that separates ordinary cleaning from disinfection, and a clear boundary for when professional assessment makes more sense. The goal isn't a product roundup. It's a calm decision process that avoids preventable damage.
What a Bathroom Tile and Grout Cleaner Actually Does
A bathroom tile and grout cleaner combines water, surfactants, solvents, acids, alkalis, enzymes, or other ingredients to loosen and suspend soil. The product may dissolve mineral deposits, break up oily soap scum, lift organic staining, or help rinse residue from textured grout.
The central distinction is between cleaning and disinfection. Cleaning removes visible soil, soap residue, body oils, and other impurities. Disinfection targets microorganisms and requires an EPA-registered product used exactly according to its label. One job doesn't automatically complete the other.
Why grout changes the equation
Glazed ceramic and porcelain have a relatively closed, smooth surface. Cement grout has pores and texture. Epoxy grout is smoother and more chemically resistant, but it still requires label-compatible care. Natural stone may contain minerals that react with acids even when the surrounding ceramic tile does not.
A cleaner's performance depends on four variables:
- Surface: Identify glazed tile, porous cement grout, epoxy, caulk, or natural stone.
- Soil: Separate soap scum, mineral scale, mildew staining, grease, and ordinary dust.
- Exposure: Dwell time must be long enough to work, but not longer than the label permits.
- Removal: Rinse or wipe away loosened soil and product residue as directed.
The EPA's Safer Choice guidance emphasizes why formulation and disclosure matter. A product shouldn't rely only on words such as “natural” or “powerful.” Its ingredients, intended use, exposure profile, and environmental impact all deserve attention, especially in an enclosed bathroom.
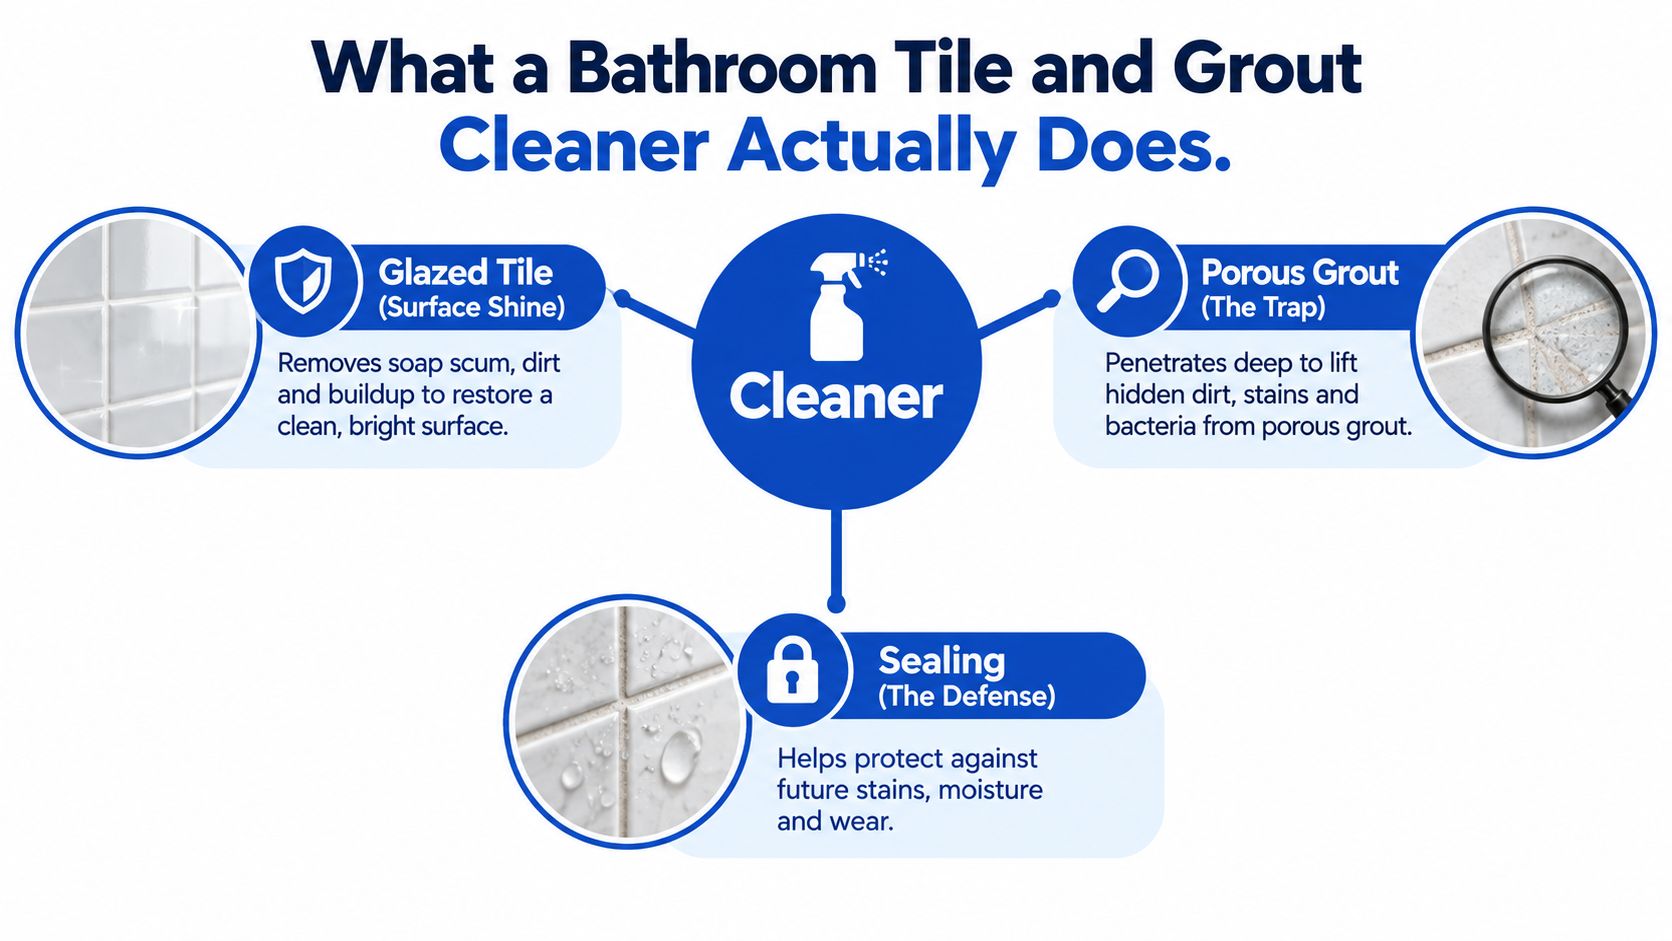
A useful mental model is simple: identify the surface, identify the soil, then choose the chemistry. If the material is uncertain, start conservatively and test an inconspicuous area before treating the whole bathroom.
Acidic, Alkaline, and Enzymatic Cleaners Compared
Acidic formulas are designed for mineral problems. Citric acid can help loosen some hard-water deposits, while hydrochloric acid is much more aggressive against scale and rust. That strength creates a serious trade-off. Acid can etch marble, travertine, and other calcium-based stone, and repeated exposure can erode porous cement grout.
Alkaline cleaners approach a different soil profile. They're useful against soap scum, body oils, and greasy residue that builds up in showers. A highly alkaline formula may still affect colored grout, sealers, or nearby finishes, so “alkaline” doesn't mean universally safe.
Enzymatic and surfactant-based products usually make better routine-maintenance choices when the bathroom has ordinary soil rather than heavy mineral scale. They can work more slowly, but slower action may be preferable to repeated exposure to aggressive chemistry.
Cleaner Chemistry Compared
| Formula | Best For | Watch Out On | Safety Notes |
|---|---|---|---|
| Acidic | Hard-water scale, rust, mineral deposits | Marble, travertine, other acid-sensitive stone, porous cement grout | Use only when the label permits it, test first, and rinse thoroughly |
| Alkaline | Soap scum, body oils, grease | Some colored grout, sealers, decorative finishes | Wear protection and avoid leaving residue on absorbent joints |
| Enzymatic or surfactant-based | Routine soil, light organic residue, regular maintenance | Heavy mineral scale may require a targeted product | Often a gentler default, but follow the surface and product label |
The EPA's selected registered disinfectant information illustrates another important trade-off. One registered hypochlorite label specifies 5 minutes of wet contact for hard, nonporous glazed ceramic tile and 10 minutes for porous grout and cement, followed by rinsing. Grout needs more conservative chemistry and longer exposure because its pores make complete wetting harder to maintain.
Choose acidic chemistry for mineral scale only when the surface can tolerate it. Choose alkaline chemistry for greasy soap residue with equal care. For recurring maintenance, start with a compatible, nonabrasive surfactant-based cleaner.
Matching the Cleaner to Your Tile and Grout
Start with the grout, not the label on the bottle. Cement grout often feels sandy or slightly chalky and may show small pores along the joint. Epoxy grout usually feels smoother and keeps a more consistent color. Premixed and modified cement products can fall between those descriptions, especially after years of use.
The tile finish narrows the options further. Glazed ceramic and porcelain generally tolerate a wider range of labeled bathroom cleaners than marble, travertine, limestone, or other acid-sensitive stone. Granite can vary by finish and composition, and slate may have texture or coatings that make residue difficult to remove.
A quick decision path
- Identify the surface. Look at the tile, grout, vanity, trim, and metal fixtures separately. The shower wall may be porcelain while the vanity is marble.
- Identify the soil. Soap scum and body oil call for a different approach from white mineral scale, rust, mildew staining, or grease.
- Check the grout condition. Crumbling, missing, eroded, or persistently dark grout may not be a cleaner-selection problem.
- Ask about sealer. Was the grout sealed, and when? Unsealed grout absorbs more liquid and may retain more residue.
- Test discreetly. Apply the product to a hidden area and observe the grout, tile, stone, finish, and surrounding metal.
Colored grout deserves extra caution. EPA product labels warn that some bathroom cleaners can discolor colored grout, etch older sinks or tubs, or harm decorative surfaces. A hidden-area test isn't a formality. It's the safest way to catch a compatibility problem before it spreads across the shower.
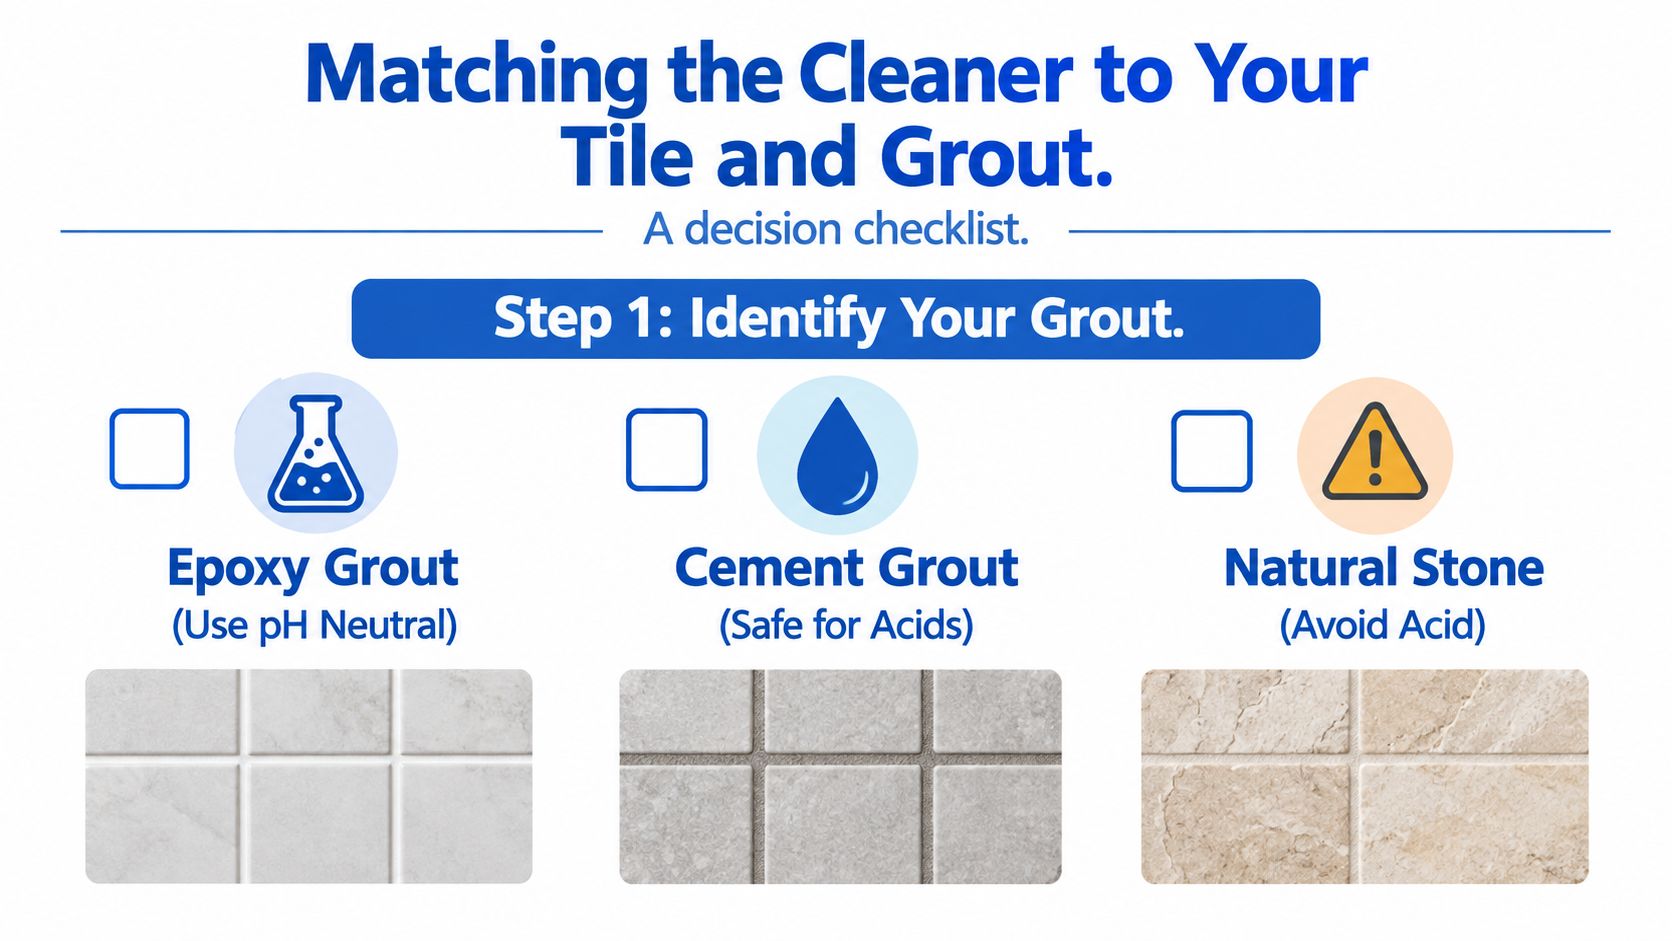
Before opening the bottle: Know the surface, the soil, the sealer status, and the permitted dwell time. Then choose the least aggressive formula that can handle the job.
A label that says “safe for tile” may not mean safe for every grout, stone, sealer, or fixture in the room. Read the directions for the complete material system, not just the most visible surface.
A Safe Step-by-Step Bathroom Tile and Grout Cleaning Routine
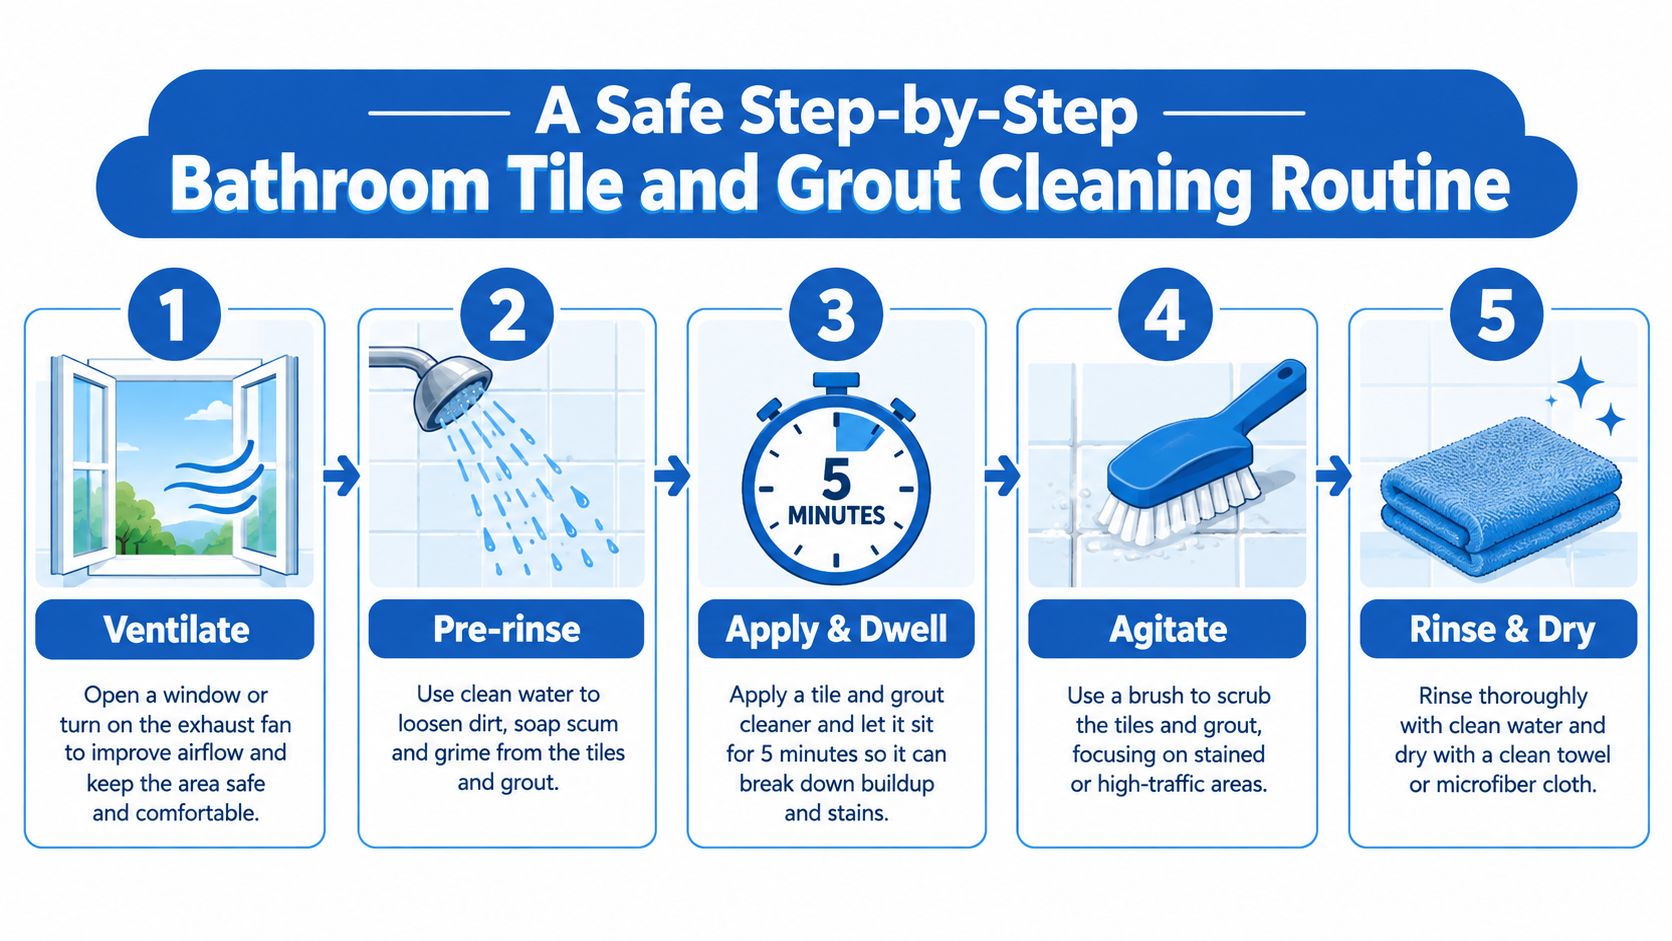
Ventilate before applying anything. Open a window or door when practical, run the bath fan, put on gloves, and keep children and pets away from wet product. Never combine cleaners, especially bleach with ammonia, vinegar, acidic descalers, toilet-bowl cleaner, rust remover, or another household product. The CDC explains that bleach and acids can produce chlorine gas, while bleach and ammonia can produce toxic chloramine gas, as detailed in its bleach safety guidance.
The cleaning sequence
- Pre-rinse. Use clean water to loosen surface dust and soften residue. Don't flood an already damaged grout joint.
- Apply the chosen cleaner. Follow the label for dilution, application area, material compatibility, and dwell time.
- Agitate carefully. Use a soft nylon grout brush. Avoid aggressive abrasive pads that can alter the grout surface.
- Rinse thoroughly. Remove suspended soil and cleaner residue, especially from porous cement joints.
- Dry the room. Use a clean towel on accessible surfaces and keep ventilation running until the bathroom is no longer damp.
A useful home-maintenance reference is this guide to tile and grout cleaning machines for home use, but equipment shouldn't replace material identification. Excessive pressure or heat can damage weak joints, sealers, caulk, or decorative surfaces.
Disinfect only after cleaning
Detergent-based soil removal comes first because dirt and impurities can reduce a disinfectant's effectiveness. If disinfection is needed, use an EPA-registered product exactly as labeled and keep the surface visibly wet for the complete contact time. Absorbent grout can dry a sprayed film too quickly, so reapplication may be necessary.
When bleach-label directions aren't available, the CDC describes a solution of 5 tablespoons of household bleach per gallon of room-temperature water, with the surface visibly wet for at least 1 minute. Household bleach commonly contains 5% to 9% sodium hypochlorite, according to the CDC cleaning and disinfecting guidance. For mold cleanup, the CDC says not to use more than 1 cup of bleach in 1 gallon of water, and it recommends ventilation in its household mold cleanup guidance.
Those figures don't override a product label. Rinse when required, ventilate again, and don't close the bathroom while grout and surrounding materials remain wet.
Eco-Friendly and Safer Choice Options Worth Choosing
“Eco-friendly” shouldn't mean “trust the front label.” The EPA's Safer Choice program offers a more useful benchmark because certified manufacturers must disclose every ingredient, including fragrances. That full-disclosure requirement has applied since April 2011, according to the EPA's Safer Choice FAQ.
EPA scientists evaluate ingredients against human-health and environmental criteria that include carcinogenicity, reproductive and developmental toxicity, aquatic toxicity, and environmental persistence. The program's Safer Chemical Ingredients List contains more than 950 chemicals that meet its ingredient-level criteria, and nearly 2,000 finished products qualify to carry the Safer Choice label, as reported by the EPA in the same guidance.
Why the label matters in a bathroom
A small bathroom may have limited ventilation, frequent product use, and porous grout that holds residue. Those conditions make formulation transparency more valuable than an unsupported “natural” claim. Residues also enter household wastewater after rinsing, so environmental considerations belong in the product decision.
Safer Choice products aren't magic. A gentler routine cleaner may take longer on mineral scale or old layers of soap scum. That doesn't make it a poor choice. It means the homeowner should reserve stronger chemistry for a targeted, compatible task instead of using it across every surface during every cleaning.
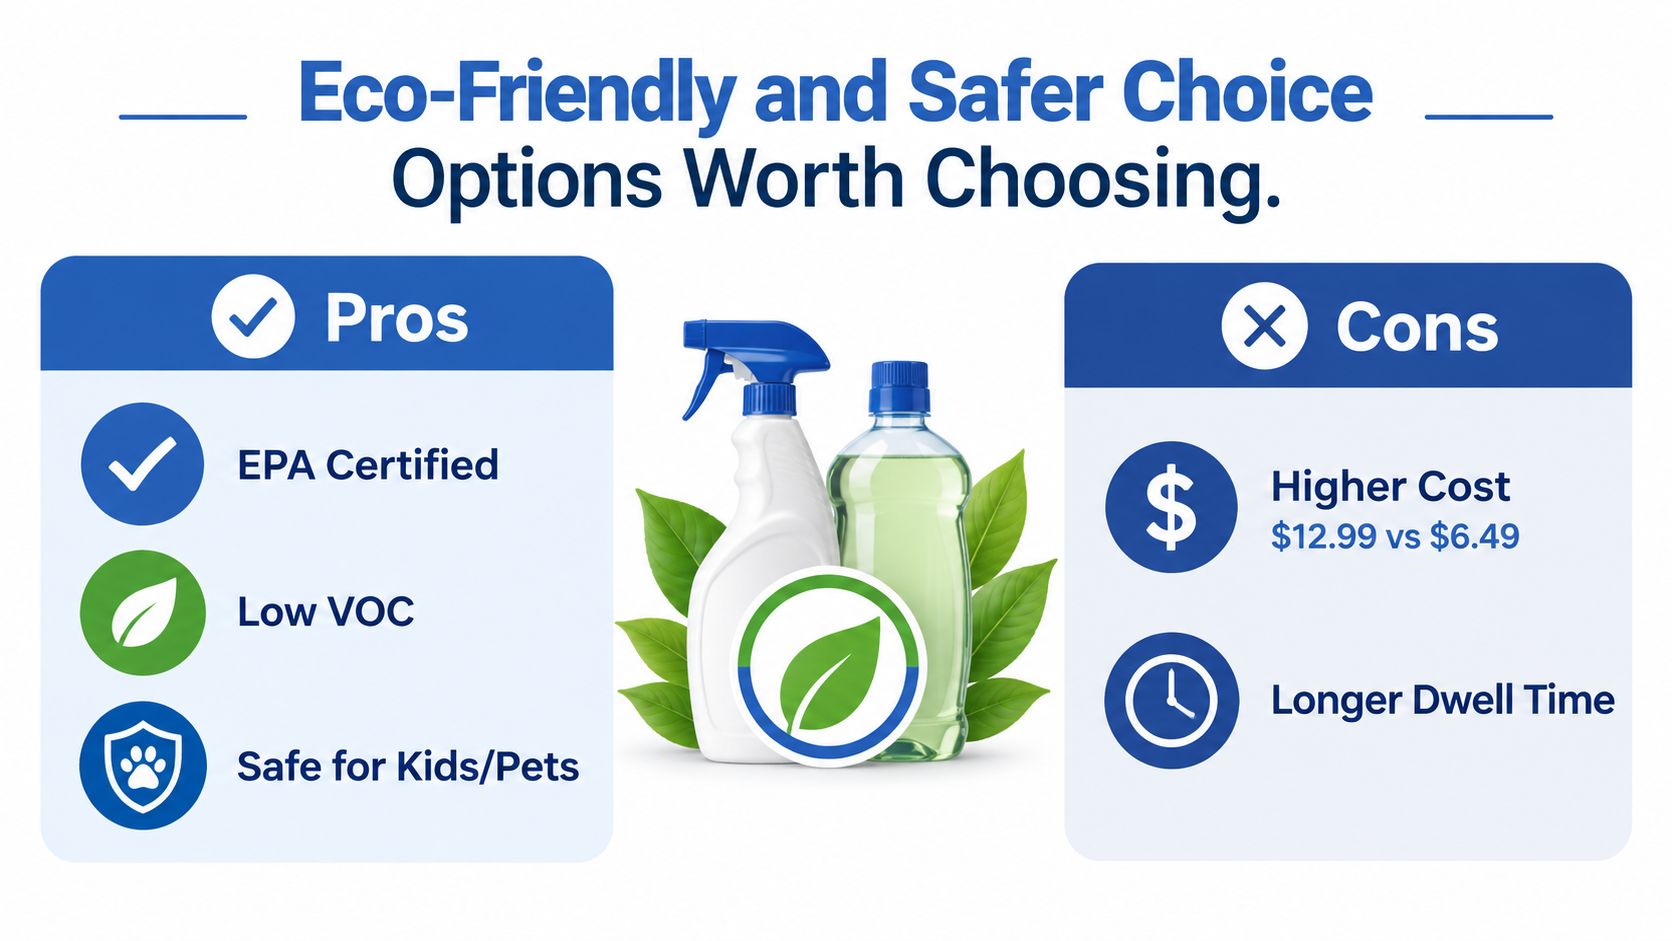
A safer default is a maintenance strategy, not a weakness. Regularly removing residue with a compatible product can reduce the need for emergency scrubbing and aggressive restoration.
For practical product-selection ideas, see this overview of eco-friendly cleaning products. Choose a transparent, label-compatible formula for ordinary maintenance, then escalate only when the material and soil justify it.
DIY Maintenance Habits That Keep Grout Cleaner Longer
The easiest grout to clean is grout that doesn't receive a fresh layer of residue every day. After a shower, rinse the walls where practical and use a squeegee on broad tile surfaces. That simple removal step limits the soap film that later hardens along grout lines.
Run the bath fan during the shower and for a while afterward, or open a window when conditions allow. Moisture control won't repair damaged grout, but it reduces the damp conditions that encourage recurring surface growth. Drying the room also makes a weekly light clean more effective.
Match the fix to the stain
- General discoloration: A baking soda paste can provide mild mechanical assistance, but apply it gently and rinse completely.
- Organic staining on suitable white or colorfast cement grout: An oxygen bleach soak may help, provided the product label permits the use.
- Mildew spotting: Hydrogen peroxide can be applied cautiously to compatible surfaces after a hidden-area test.
- Mineral scale: Use a surface-compatible descaler rather than assuming vinegar or a stronger acid belongs on every tile system.
Don't combine these approaches with vinegar, ammonia-based products, or bleach. “Natural” ingredients can still react with other cleaners, and residue from one product can make the next product unsafe.
Cement grout also benefits from appropriate resealing. Sealer doesn't make a joint maintenance-free, but it can reduce absorption and slow staining. For a deeper look at the difference between cleaning and protection, review this guide to grout cleaning and sealing.
Skip abrasive pads, colored scouring products that can dye light grout, and repeated high-pressure scrubbing. If a gentle routine cannot change the color, the joint may be permanently discolored, chemically altered, or ready for repair rather than another round of cleaner.
When to Call a Professional Tile and Grout Cleaner
DIY cleaning has reached its limit when the grout stays discolored after compatible, gentle cleaning, when the joints crumble or disappear, or when mold returns despite ventilation and moisture control. Those signs point beyond ordinary surface soil. They may indicate failed sealer, eroded grout, damaged caulk, persistent moisture, or water migration near a plumbing penetration.
Unknown materials deserve the same caution. Older Massachusetts bathrooms and recent remodels may contain several grout systems, natural stone, old coatings, or repairs that aren't obvious from the surface. A professional can test discreetly, compare the material response, and avoid treating a marble vanity or colored joint like ordinary porcelain.
What professional service adds
A trained tile and grout cleaner brings more than a stronger chemical. The technician chooses among hand agitation, steam, pressurized hot-water extraction, and other methods based on the surface condition. The service also includes judgment about whether a joint needs cleaning, resealing, color correction, or replacement.
For a busy homeowner in Wayland, Newton, Needham, Wellesley, Weston, or nearby communities, that assessment can prevent a small maintenance issue from becoming a repair project. Property managers and real estate professionals also benefit when move-in, move-out, showing, or turnover work has a defined scope and fewer material surprises.
Sunny Day Pro Services offers tile and grout deep cleaning, grout brightening, and grout cleaning and sealing for residential surfaces. A professional visit makes particular sense after post-construction work, before listing a home, after a move, or when repeated household cleaning has stopped producing a meaningful change.
If the bathroom only needs a routine refresh, follow the material-first process above. If the grout is failing, the surface is unknown, or moisture keeps returning, requesting an assessment is usually safer than escalating to a harsher bottle.
Sunny Day Pro Services provides residential cleaning, tile and grout deep cleaning, grout brightening, sealing, move-in and move-out service, and post-construction cleanup for homeowners and property professionals in Massachusetts. For a bathroom that needs material-safe cleaning rather than guesswork, visit Sunny Day Pro Services to request a fast quote or schedule service.

