
How to Clean Oven Drip Pans Without Scratching
Learn how to clean oven drip pans the right way with proven methods, safe cleaners by material, and pro tips to restore shine without damage.
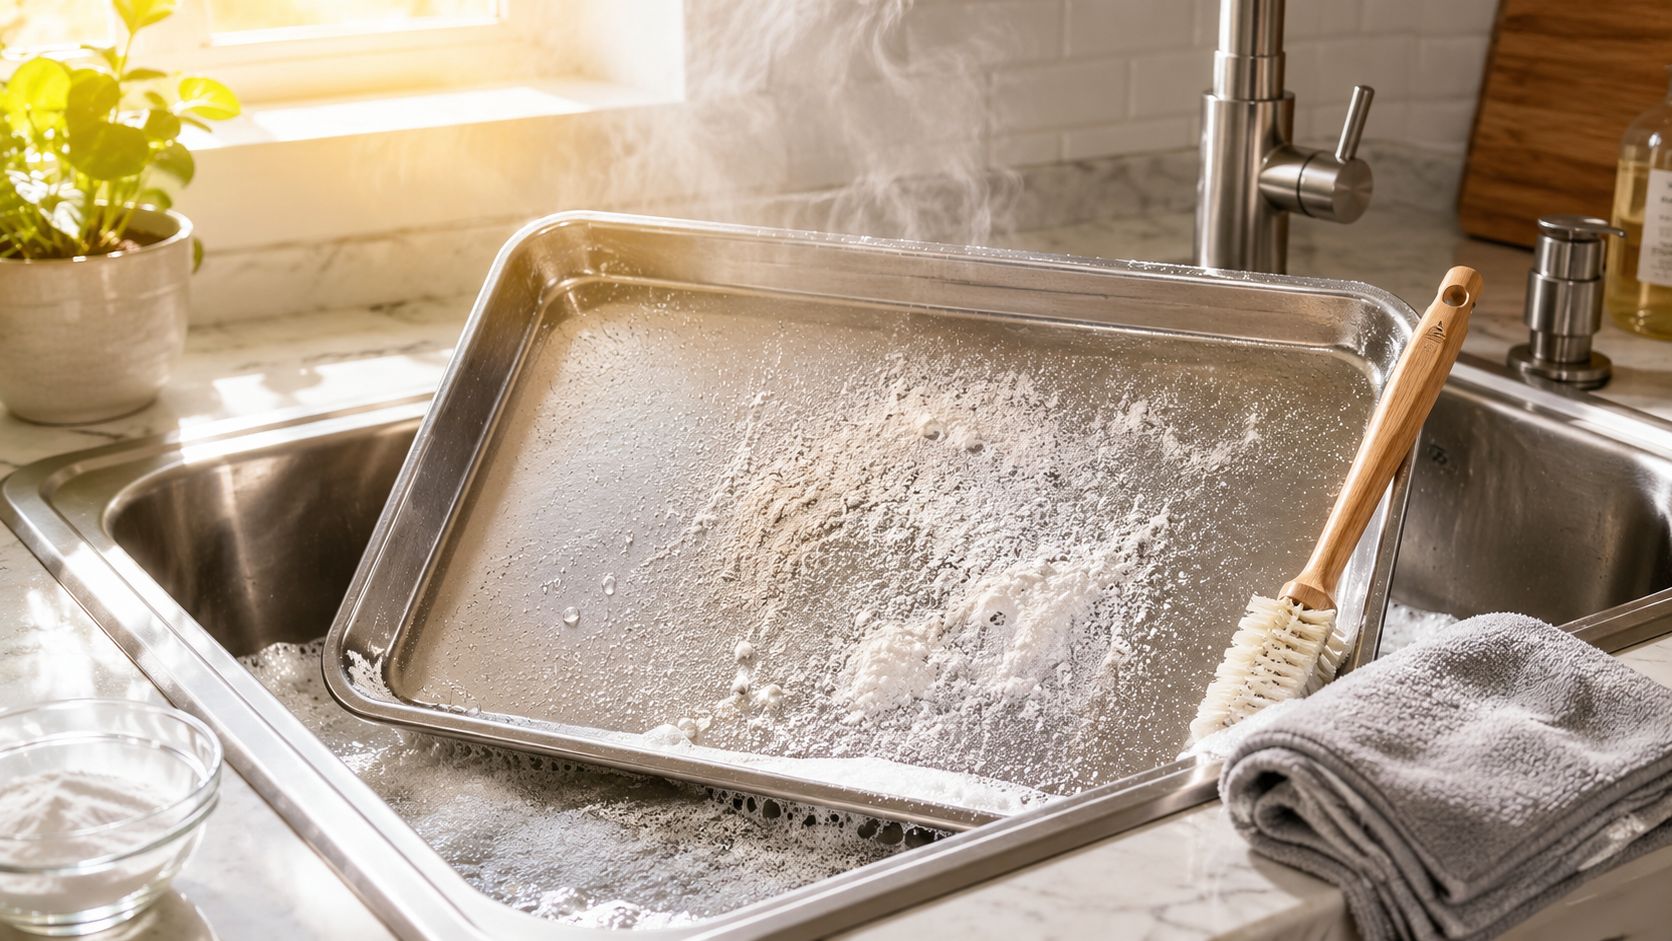
You lift the burner and find last week's spaghetti sauce welded to the drip pan. The grease is dark, the corners are crusted, and the next time you cook, the kitchen may smell like the spill is still there. Clean oven drip pans are easier when you match the method to the pan's material instead of attacking every surface with the same harsh scrubber.
Porcelain, chrome, and aluminum each tolerate different cleaners and levels of abrasion. The safest approach starts with identification, then uses soaking and controlled scrubbing to loosen residue before you escalate to stronger treatments.
Table of Contents
Why Your Drip Pans Look Worse Every Time You Cook
Drip pans sit directly beneath the burner, so they catch nearly everything that escapes a pot or skillet. Pasta water leaves starch and salt behind. Tomato sauce leaves acidic, sticky residue. Bacon grease and frying oil create a thin film that repeatedly bakes onto the surface each time the burner heats.
That combination explains why a pan can look acceptable after one meal and awful after several. Grease holds food particles against the finish, while high heat hardens the mixture into a carbonized layer that a dry sponge won't remove easily. Once the surface becomes rough, new spills cling to it faster.
Practical rule: A drip pan that gets wiped while residue is fresh usually needs less force later. Aggressive scrubbing is often a symptom of delayed cleaning, not the solution.
The buildup also affects the cooking environment. Food and grease left beneath a burner can smoke or create unpleasant odors when heated again. Residue may also interfere with a clean fit around the burner, leaving the stove looking neglected even when the visible cooktop has been wiped.
Why timing matters
KitchenAid advises cleaning stovetop drip pans each time the burners are used, and appliance manuals commonly allow hand cleaning or dishwasher cleaning for removable pans. Light grease may take 10 to 30 minutes to loosen, while heavy buildup can require an overnight treatment, as reflected in KitchenAid's drip-pan care guidance and the appliance operating guidance.
You don't need to make every cleanup a major project. Wipe fresh spills promptly, then give the pans a more deliberate soak when grease begins to dull the finish. That small habit keeps residue from becoming a baked-on restoration job.
What to Do Before You Touch a Single Pan
Start with safety, not cleaner. Turn the stove off, disconnect power if your appliance instructions require it, and wait until every burner and drip pan is fully cool. Never apply water or degreaser around hot electrical connections, burner receptacles, controls, or wiring.
Use this preparation checklist
Document the setup. Take a quick photo before removing anything. Burner coils, caps, rings, and pans need to return to their original positions, and a photo prevents guesswork.
Remove gently. Lift electric coils without yanking the receptacles. On gas ranges, remove grates, burner caps, and removable pans according to the appliance manual. Set electrical components aside and keep them dry.
Clear loose debris. Brush crumbs and dry food particles into the trash before soaking. Loose grit can act like sandpaper under a sponge.
Identify the finish. Porcelain-enameled steel usually has a smooth, glasslike coating and may be white, black, or another color. Chrome pans have a reflective metallic appearance. Aluminum tends to look lighter and more matte, and it can discolor with aggressive chemistry or heat.
Gather the right tools. Prepare hot water, dish soap, a half-sheet pan or basin, a long-handle nylon brush, a soft sponge or non-scratch pad, baking soda, microfiber towels, and gloves. Keep any commercial degreaser available only if its label allows use on the specific surface.
Material determines the method
Manufacturers don't treat all drip pans alike. GE allows many removable porcelain pans to be cleaned in a dishwasher or with hot soapy water, but warns against putting them in a self-cleaning oven because the finish can be damaged. GE also notes that chrome pans can warp and discolor during self-clean cycles, while aluminum pans may discolor under that heat, as described in GE's published drip-pan care guidance.
If you're uncertain, choose the least aggressive method first. A hot, soapy soak is easier to repeat than a damaged finish is to restore.
The Five Methods Worth Knowing
There isn't one universal cleaner for drip pans. Porcelain may tolerate a dishwasher, while chrome and aluminum require more caution. The table below gives a quick starting point, but always check your range manual and the cleaner label before treating the pan.
| Method | Time Required | Best For | Safe Materials |
|---|---|---|---|
| Dishwasher cycle | Follow appliance cycle | Removable porcelain pans approved by the manufacturer | Porcelain when the manual permits it |
| Vinegar and baking soda soak | 10 minutes hot-water soak, 30 minutes with vinegar, then at least 15 minutes after baking soda | Light to moderate grease | Use cautiously on compatible porcelain and some metal pans, never as a substitute for manufacturer guidance |
| Hot washing soda bath | 20 minutes | Heavy grease and dull baked-on residue | Confirm compatibility first, especially for aluminum and delicate finishes |
| Ammonia soak | Overnight | Porous or heavily soiled porcelain | Porcelain only when manufacturer guidance permits it |
| Commercial degreaser | 5 to 10 minutes of dwell time | Stubborn baked-on grease | Only materials listed on the product label |
Dishwasher cleaning
A dishwasher is convenient for removable porcelain drip pans when the appliance manufacturer explicitly allows it. It isn't a safe default for every metal pan, and it won't repair a finish that's already chipped or peeling.
Vinegar and baking soda
A common household sequence uses very hot water for 10 minutes, distilled white vinegar for 30 minutes, then baking soda for at least 15 more minutes before rinsing and scrubbing, according to AARP's drip-pan cleaning method. Another approach uses equal parts vinegar and hot water for at least 30 minutes, followed by baking soda and scrubbing, as outlined in Thumbtack's stove drip-pan guide. For broader guidance on combining these household ingredients, see this vinegar and baking soda cleaning guide.
Washing soda and ammonia
For serious buildup, a technical benchmark uses 3 tablespoons of washing soda per quart of water at 140°F (60°C) for 20 minutes, with the temperature maintained within about ±2°F and without boiling, according to CookinDocs' washing soda method. GE's guidance permits an overnight soak using about 1/4 cup of ammonia for porous or heavily soiled drip pans. Don't mix ammonia with bleach or other cleaners.
Commercial degreaser
A heavy-duty oven degreaser can work on stubborn grease when the product label approves the pan material. A practical workflow uses a hot soapy soak first, then a 5 to 10 minute degreaser dwell time, followed by a non-scratch pad, as described in this drip-pan cleaning method. The soak reduces the amount of force needed, which is especially important on coated surfaces.
The Step-by-Step Method That Actually Works
For most kitchens, the reliable starting point is simple: hot dish-soap water, patient soaking, controlled brushing, and targeted degreaser only where needed. This sequence removes grease without making abrasion your primary tool.
Set up the soak
Place the removed pans in a half-sheet pan, sink, or basin. Add hot water and enough dish soap to make the water slippery, then soak for 15 to 30 minutes, following the practical workflow described by Modern Home Tools.
Don't scrub immediately. The hot water softens grease, and the soap helps separate oily residue from the finish. For chrome or aluminum, avoid water so hot that you can't handle the pan safely, and don't leave delicate finishes submerged longer than necessary unless the manufacturer permits it.
Brush before you scour
Lift each pan from the water and use a long-handle nylon brush to work around the rim, burner opening, and corners. A soft sponge or non-scratch pad is safer than steel wool, a knife, or a metal scraper. Use light pressure and repeat the pass instead of trying to remove every mark in one stroke.
For a stubborn spot, make a baking soda paste with a small amount of water and apply it directly to the residue. Let the paste soften the area briefly, then work with the nylon brush or soft pad. This gives you mild mechanical help without the sharp abrasion that can dull porcelain or scratch reflective metal.
Escalate only on the remaining residue
If baked-on grease remains, apply a compatible commercial degreaser for 5 to 10 minutes, then finish with a non-scratch pad. Rinse thoroughly so no cleaner remains in the pan, especially near burner openings.
Dry every pan completely with a microfiber towel before reinstalling it. Water spots are easier to prevent than remove, and a dry pan keeps moisture away from electrical components. Replace each burner and cap using your reference photo, then confirm that everything sits flat before turning the stove back on.
Mistakes That Ruin Drip Pans Fast
The self-cleaning oven cycle sounds like an easy answer because it uses extreme heat to burn away oven soil. It isn't a safe cleaning shortcut for drip pans. GE warns that chrome pans can warp and discolor in a self-clean cycle, and manufacturer guidance also warns that aluminum can discolor and removable gas-range porcelain pans should not be placed in self-clean mode, as summarized in KitchenAid's material-specific guidance.
The shortcuts that cause permanent trouble
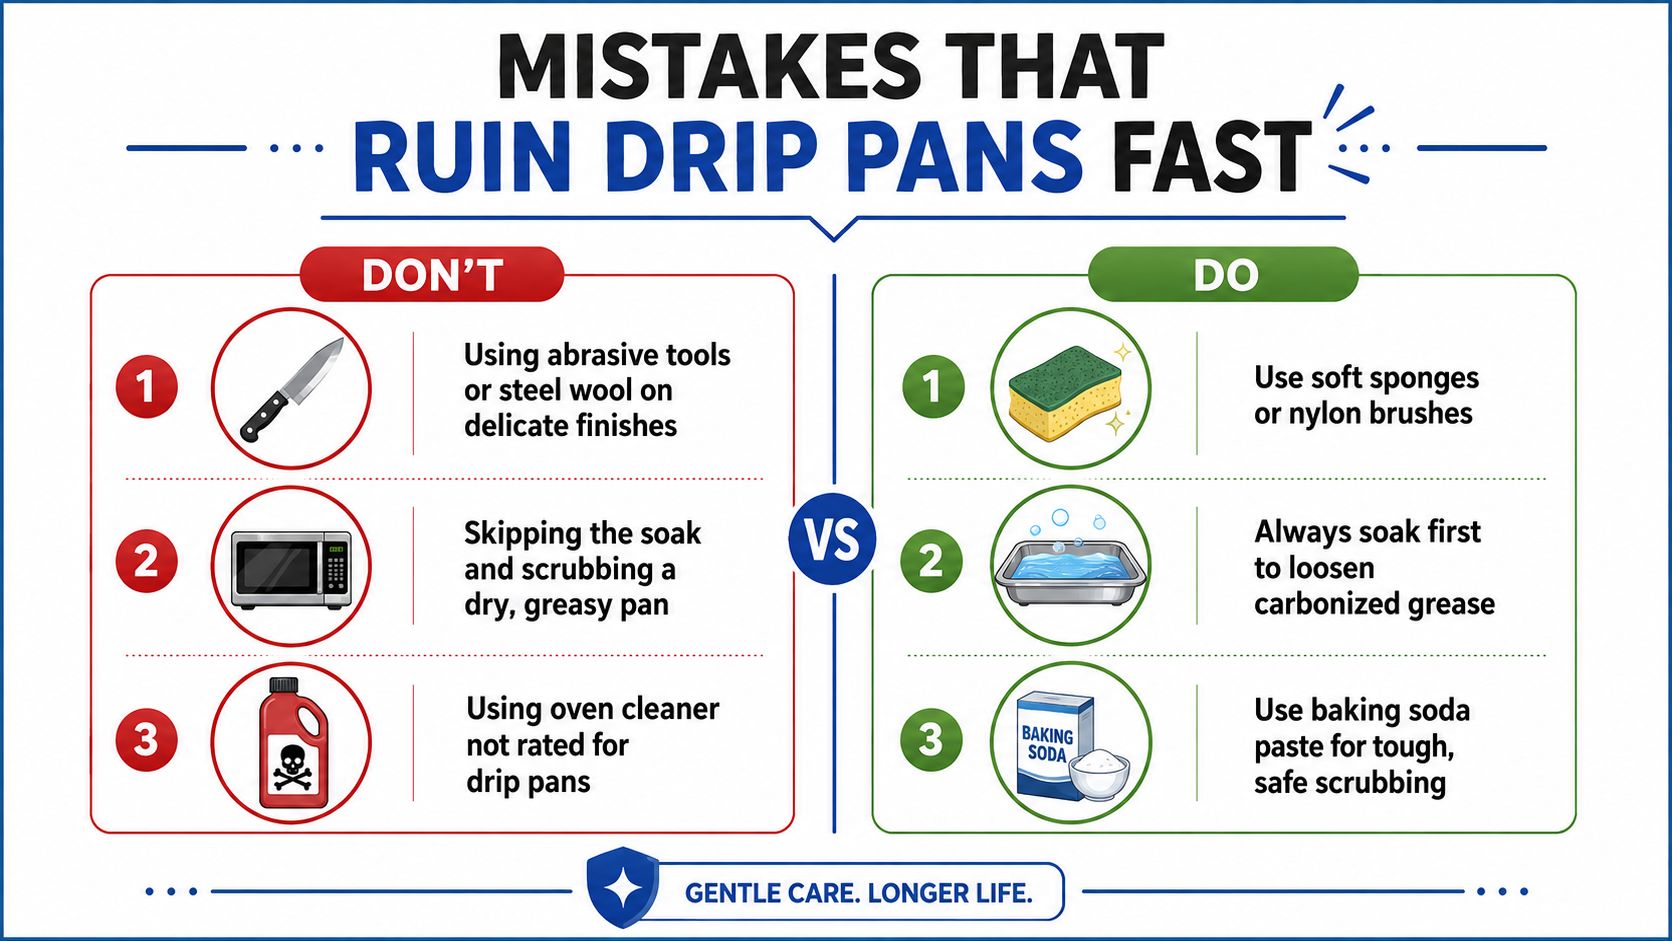
- Steel wool on porcelain: It can scratch or dull the coating, leaving a rougher surface that holds future grease.
- A knife or screwdriver as a scraper: Sharp edges gouge finishes and can create damage that cleaning won't reverse.
- Bleach on aluminum: Aluminum can discolor or react badly to harsh chemicals. Use only a cleaner approved for that material.
- Hot pan on a cold surface: Rapid temperature changes can warp thin metal. Set warm pans on a heat-safe surface and let them cool naturally.
- Dry scrubbing: A dry, greasy pan forces you to use excessive pressure. Soak first.
- Unapproved oven cleaner: Some formulas are too aggressive for coated or reflective finishes. The label must specifically support the surface.
- Leaving residue behind: Degreaser left in a burner area can smoke or burn when the stove heats again. Rinse thoroughly and dry completely.
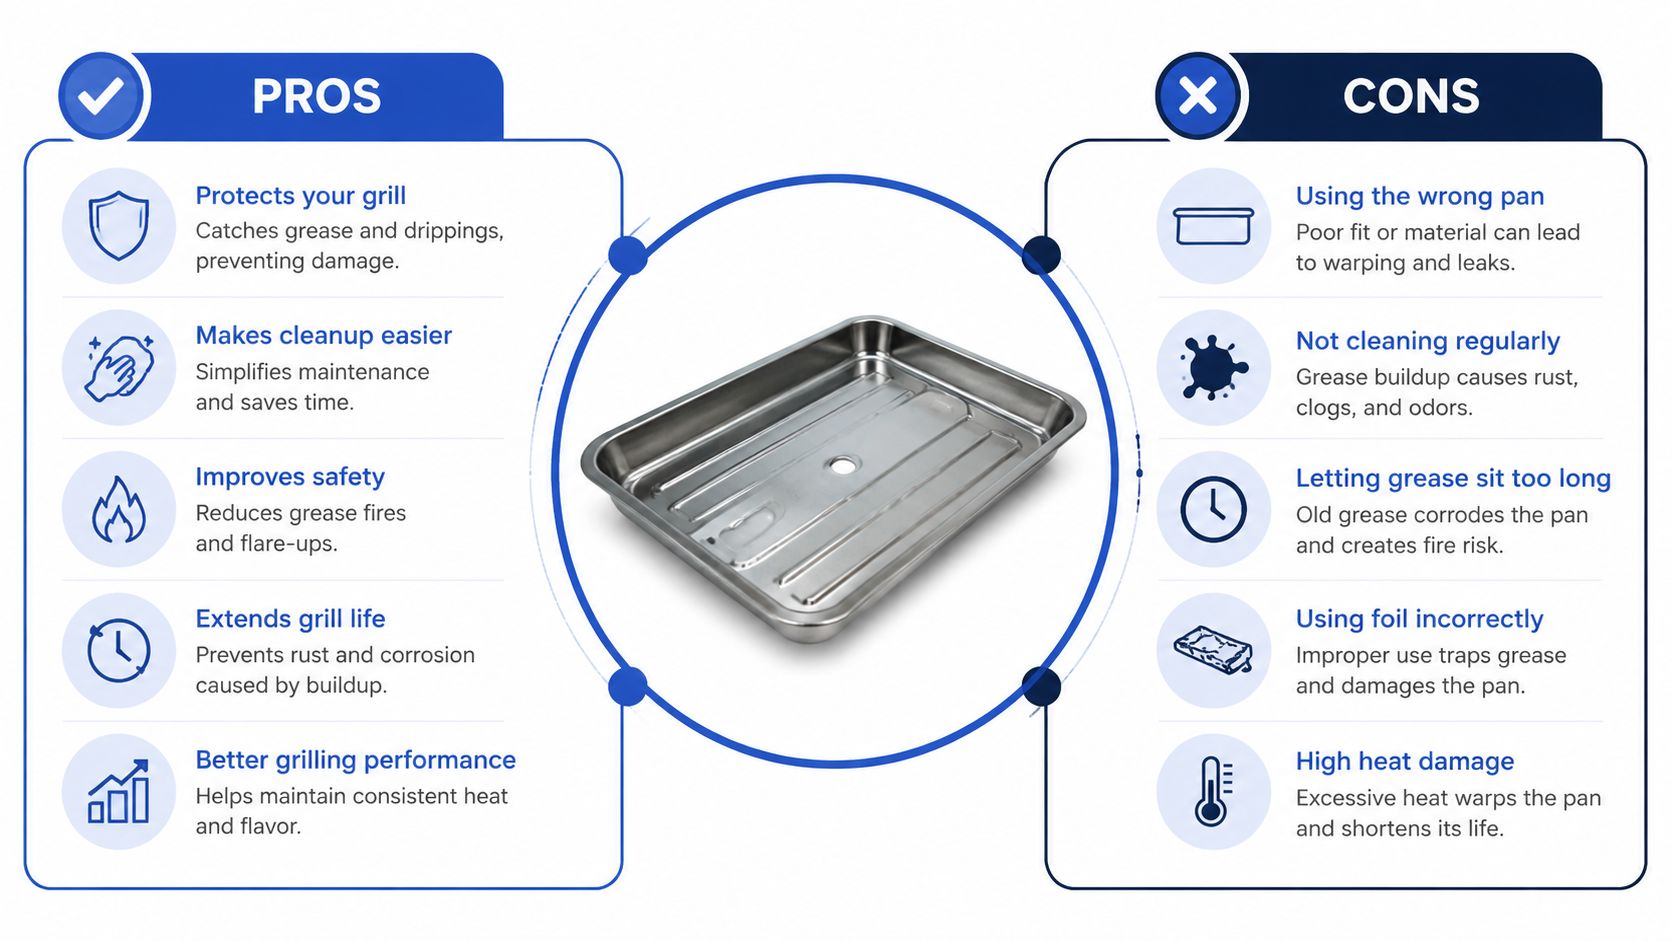
Finish-saving habit: If a soft pad and a proper soak aren't moving the residue, change the chemistry or increase dwell time. Don't automatically increase pressure.
Chrome deserves particular care because its reflective finish makes scratches and discoloration obvious. Aluminum needs the same restraint, especially around alkaline cleaners and high heat. Porcelain is durable, but its coating can still scratch, chip, or lose its smooth appearance when treated like bare steel.
What to Do When the Grease Won't Budge
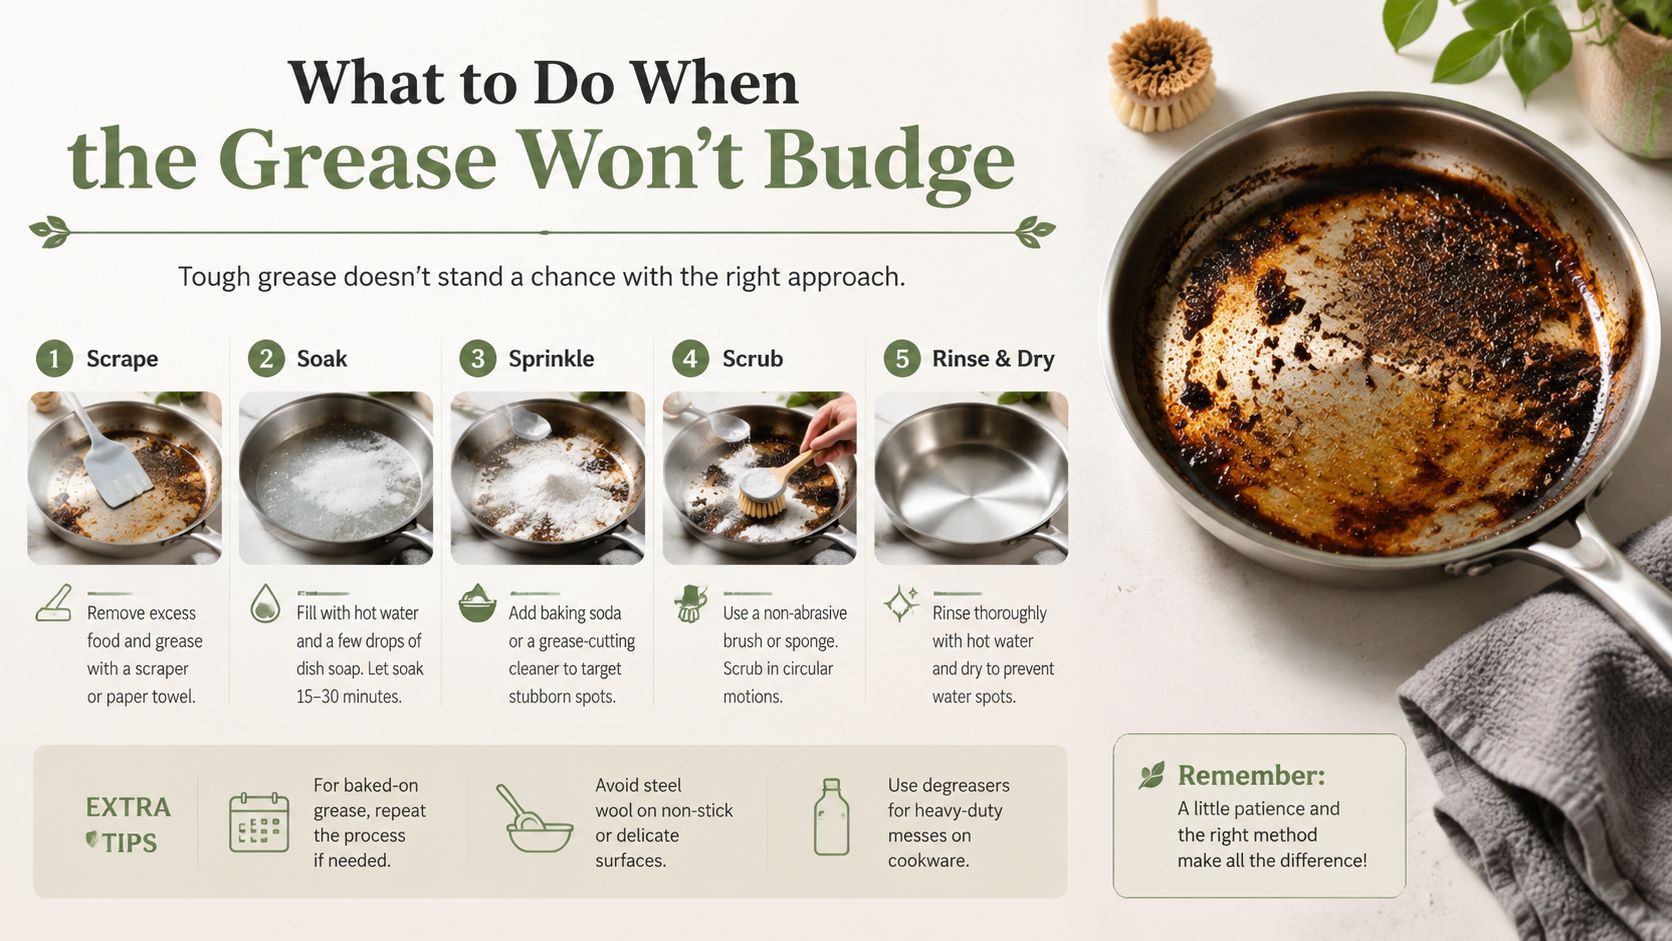
Months-old grease needs an escalation path, not a stronger scrubber used immediately. Start by giving the pan another hot dish-soap soak, then inspect the residue while it's wet. If the film softens at the edges, continue with a nylon brush rather than jumping to a metal tool.
Escalate in controlled stages
Repeat the hot soak. Work in another 15 to 30 minute cycle if the first soak loosened the surface but didn't remove it.
Apply a baking soda paste. Cover the remaining dark patches, let the paste sit briefly, and scrub with a soft sponge or nylon brush. Keep the pressure low on porcelain, chrome, and aluminum.
Use a washing soda bath for compatible pans. A hot alkaline wash at 140°F (60°C) with 3 tablespoons per quart of water can sit for 20 minutes. Keep the bath within about ±2°F of the target and don't boil it, following the technical method from CookinDocs.
Finish with targeted degreaser. Apply a product approved for the pan's material, allow a 5 to 10 minute dwell time, then use a non-scratch pad and rinse thoroughly.
The full process should remain controlled. Stronger chemistry doesn't compensate for the wrong material, and longer contact isn't automatically safer. For related technique on burnt metal cookware, this guide to cleaning a burnt stainless steel pan offers useful context, but drip-pan finishes still require the appliance manufacturer's limits.
Know when cleaning has reached its limit
A pan that's merely stained may still function safely after thorough cleaning. A pan that's warped, pitted, rusted, chipped, or flaking is different. Scrubbing won't restore the original surface, and a damaged pan may no longer sit correctly beneath the burner. Replacement is the cleaner choice when the finish has failed.
Keeping Drip Pans Clean Between Deep Cleans
The easiest drip-pan cleaning happens after cooking, while spills are still soft. Once the stove is completely cool, wipe visible splatter from the cooktop and respond to any boil-over instead of allowing residue to bake during the next meal.
Match maintenance to burner use
KitchenAid's guidance recommends cleaning stovetop drip pans each time the burners are used, which is a useful standard for frequent cooks. In practice, households can use a layered routine:
- After cooking: Wipe fresh spills once the surface has cooled.
- After a boil-over: Remove and clean the affected pan as soon as it's safe.
- Weekly: Give regularly used pans a warm soapy soak and inspect the corners.
- Monthly: Deep-clean pans in busy kitchens where several burners run often.
- Before listing or moving: Clean the pans alongside the oven interior, cooktop, and surrounding appliance areas.
A routine wipe prevents the hard, dark ring that forms where sauce or grease repeatedly dries. It also makes the next deep clean shorter because the pan never develops as many overlapping layers.
Watch for replacement signs
Cleaning won't fix a pan that rocks beneath the burner, has a peeling coating, or shows deep corrosion. If the burner doesn't sit correctly, the pan is distorted, or the appliance produces smoke even after residue has been removed, stop using the questionable component and consult the range manual or a qualified appliance professional.
Busy homeowners in Wayland, Newton, Needham, Wellesley, Weston, and nearby Massachusetts communities may prefer to fold appliance care into a broader cleaning visit. A professional can handle oven interiors and related appliance areas while working through a move-in, move-out, recurring, or deep-cleaning appointment. For households trying to reduce harsh products, this chemical-free cleaning guide provides a useful starting point for choosing gentler options.
The practical payoff is straightforward. Clean pans reduce the residue available to smoke, keep the stove looking cared for, and prevent a small spill from becoming a demanding restoration project. When the finish is damaged rather than dirty, replace it instead of scrubbing harder.
Sunny Day Pro Services offers recurring cleaning, deep cleaning, move-in and move-out service, and inside-oven cleaning add-ons for busy Massachusetts homeowners. If your drip pans and oven have reached the point where routine soaking isn't enough, visit Sunny Day Pro Services to request a quote and schedule help around your needs.

