
Expert Guide to Drywall Dust Cleaning in 2026
Master drywall dust cleaning with our expert guide. Learn the best prep, tools, and methods for a spotless, healthy home after any renovation.
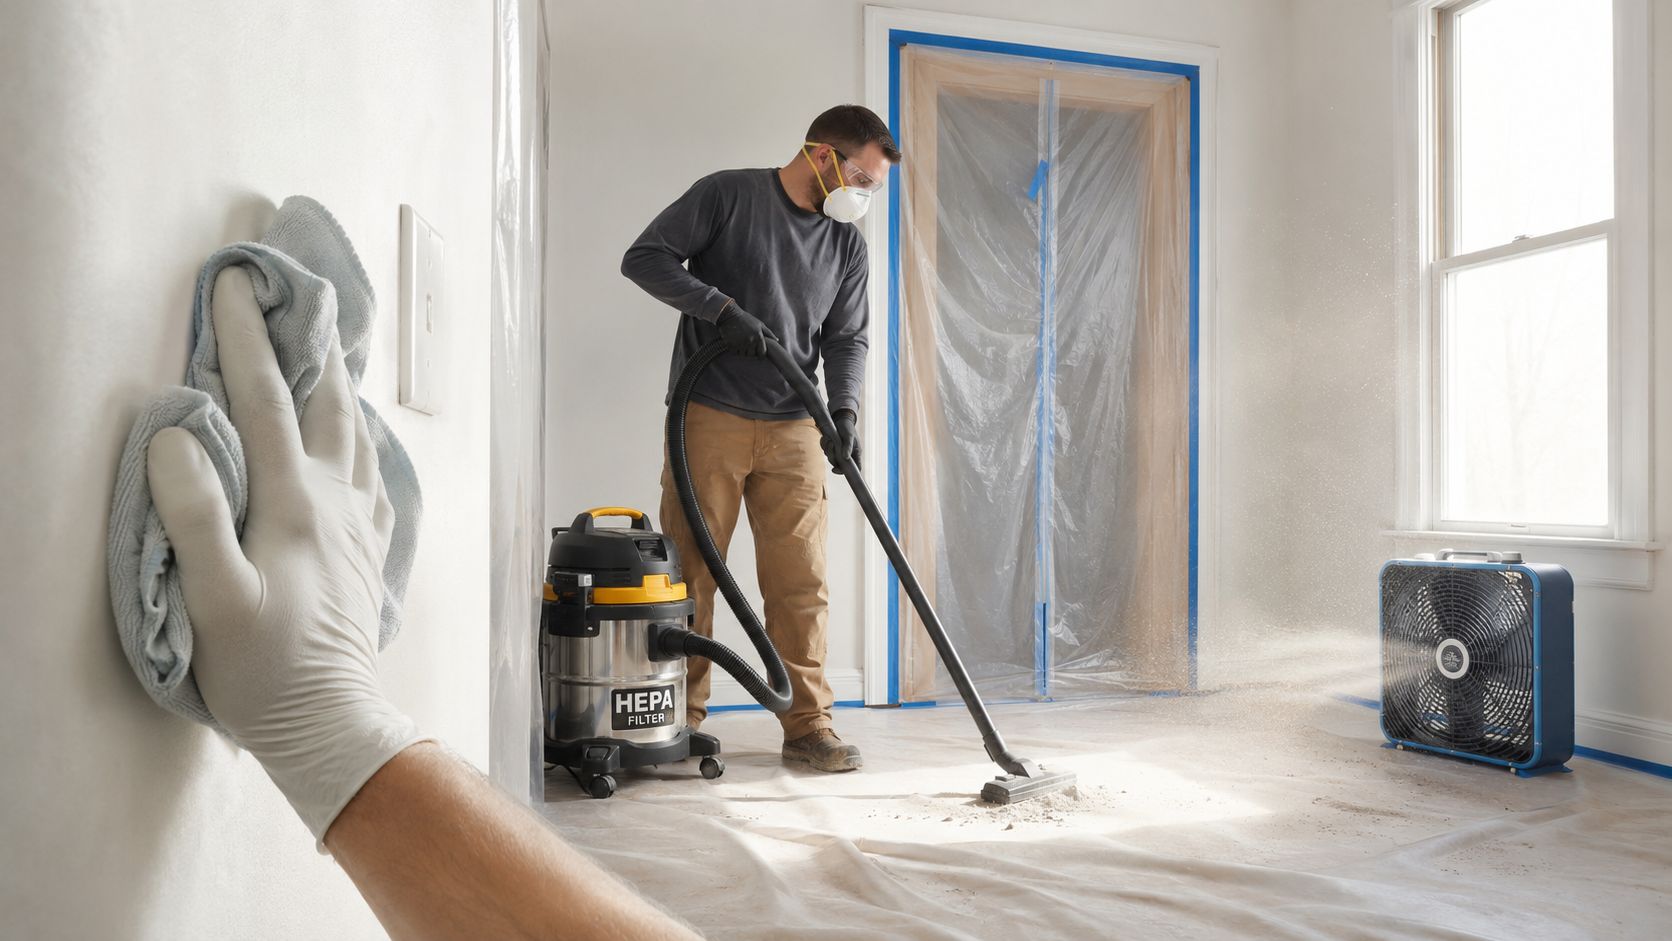
Congratulations on completing your home renovation project! The new walls look fantastic, but now you're faced with the inevitable aftermath: a fine, white powder coating every single surface. This is drywall dust, and if you've never dealt with it, you’ll quickly find it’s nothing like regular household dust.
Why Is Drywall Dust So Difficult to Clean?
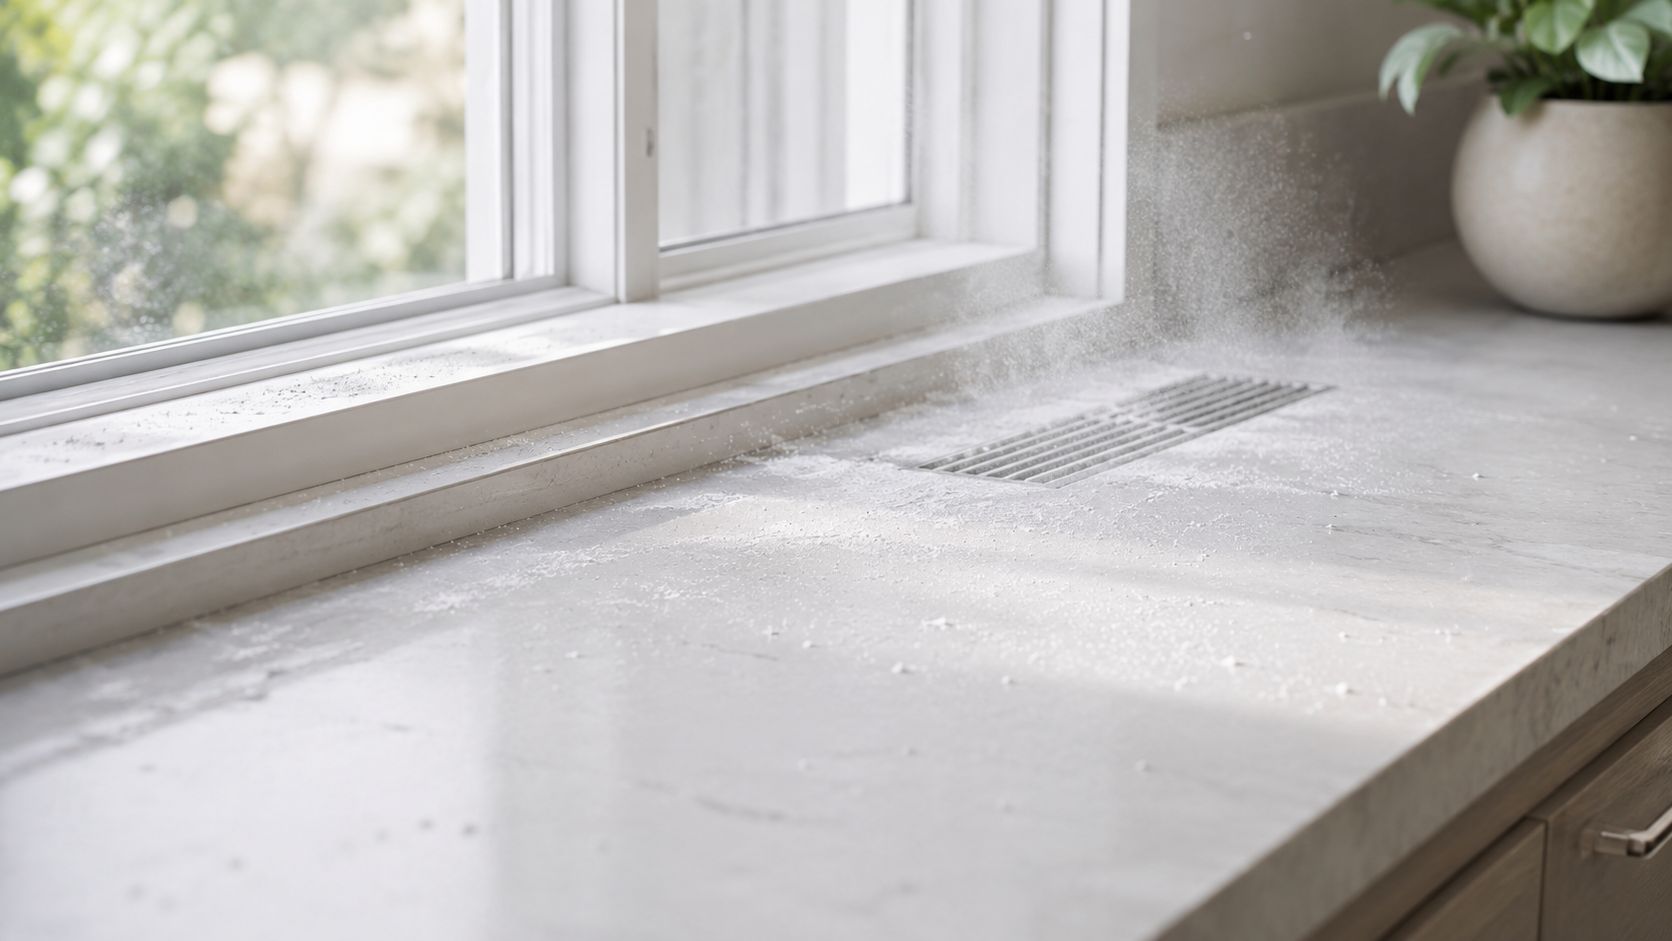
Try sweeping drywall dust with a regular broom, and you'll see the problem instantly. The powder billows into a hazy cloud that hangs in the air, only to settle right back where it started minutes later. It’s incredibly frustrating.
This isn't your average dust bunny. Drywall dust is an ultra-fine powder composed of gypsum and silica particles. Its unique consistency allows it to behave more like a film than a collection of solids, enabling it to creep into every nook, cranny, and crevice of your home.
Here’s what you're up against:
- It's Microscopic: The particles are so tiny they can easily pass through standard vacuum filters, get blown right back into the air, and clog your HVAC system, spreading from one room to the entire house.
- It's Stubborn: Wiping with a dry cloth or using the wrong vacuum attachment only pushes the dust around. This is why it often feels like the dust reappears for days or even weeks after you thought the cleanup was finished.
- It Harms Air Quality: For Massachusetts homeowners, especially those with allergies or asthma, this isn't just a mess—it's a genuine health concern. Inhaling these fine particles can cause significant respiratory irritation.
Because this dust is so pervasive, a strategic approach is essential. Professionals always use a strict top-to-bottom cleaning sequence. The process starts with ceilings and light fixtures, then moves to walls, trim, and furniture, and finally finishes with the floors. This methodical plan is the only way to ensure you're actually removing the dust, not just displacing it. For a deeper look into expert methods, you can learn about the professional approach to post-construction dust removal before you begin.
Table of Contents
- Why Is Drywall Dust So Difficult to Clean?
- Your Essential Cleaning Toolkit
- DIY vs. Professional-Grade Cleaning Tools
- How long does it take to clean drywall dust?
- Is it safe to clean drywall dust myself?
- Can I just use my regular household vacuum?
- When should I hire a professional for drywall dust cleaning?
Choosing the Right Tools for a Dust-Free Finish
When it comes to drywall dust, using the wrong tools is a recipe for disaster. I've seen it countless times: a homeowner grabs their regular household vacuum, and within minutes, the problem is ten times worse. That fine, chalky dust blows right through a standard filter and gets blasted back into the air, settling on every surface you just cleaned.
To get this job done right, you need a specific arsenal designed to trap and remove these microscopic particles permanently.

First and foremost, your most important tool is a shop vacuum equipped with a high-efficiency particulate air (HEPA) filter. This isn't just a suggestion; it's a non-negotiable requirement. A normal vacuum filter is simply no match for drywall dust, but a true HEPA filter is a game-changer.
Expert Insight: A certified HEPA filter is engineered to capture 99.97% of particles as small as 0.3 microns. This level of filtration is the only way to guarantee the dust you're vacuuming up actually stays in the vacuum.
Your Essential Cleaning Toolkit
Even after the heavy lifting with the vacuum is done, a fine layer of dust will still cling to everything. This is where the right wiping and mopping supplies are critical. Forget old cotton rags—they’ll just push the dust around and create a streaky mess.
Here’s what a professional toolkit includes:
- A large supply of microfiber cloths: Their unique fibers generate a static charge that acts like a magnet for dust, grabbing and holding particles instead of just moving them.
- A quality microfiber mop: Absolutely essential for the final pass on hard floors. It will lift the last film of dust without turning your floor into a muddy swamp.
- Two buckets: This is a classic professional technique. Use one bucket for your clean, soapy water and a second one exclusively for rinsing your dirty cloths. This prevents you from contaminating your clean water and wiping grime back onto your surfaces.
- Tack cloths: These resin-impregnated cloths are your secret weapon for a flawless finish. They are perfect for a final, delicate wipe-down on baseboards, trim, and cabinets to pick up any remaining stray particles.
The tools you choose will make or break your cleanup efforts. The equipment a homeowner has on hand is often very different from what a professional team brings to a job site.
DIY vs. Professional-Grade Cleaning Tools
| Tool/Supply | DIY Homeowner Option | Professional Choice | Why It Matters |
|---|---|---|---|
| Vacuum | Standard Shop-Vac | HEPA-Certified Industrial Vacuum | A HEPA filter is critical for trapping microscopic dust particles and preventing them from becoming airborne again. |
| Air Filtration | Box fan with a furnace filter | Commercial Air Scrubber | An air scrubber actively removes dust from the air, drastically improving air quality and reducing settling dust. |
| Wiping Cloths | Cotton rags, paper towels | High-GSM Microfiber Cloths | Microfiber's static charge and split fibers trap dust far more effectively than cotton, which tends to just push it around. |
| Mopping | Sponge mop, string mop | Flat Microfiber Mop System | A microfiber mop pad picks up the finest dust particles without oversaturating the floor, preventing muddy streaks. |
Ultimately, having the right equipment isn't just about efficiency—it's about achieving a truly clean, healthy, dust-free home. If you're curious about what other essentials the pros rely on, our comprehensive guide to building a professional house cleaning supplies list is a great resource.
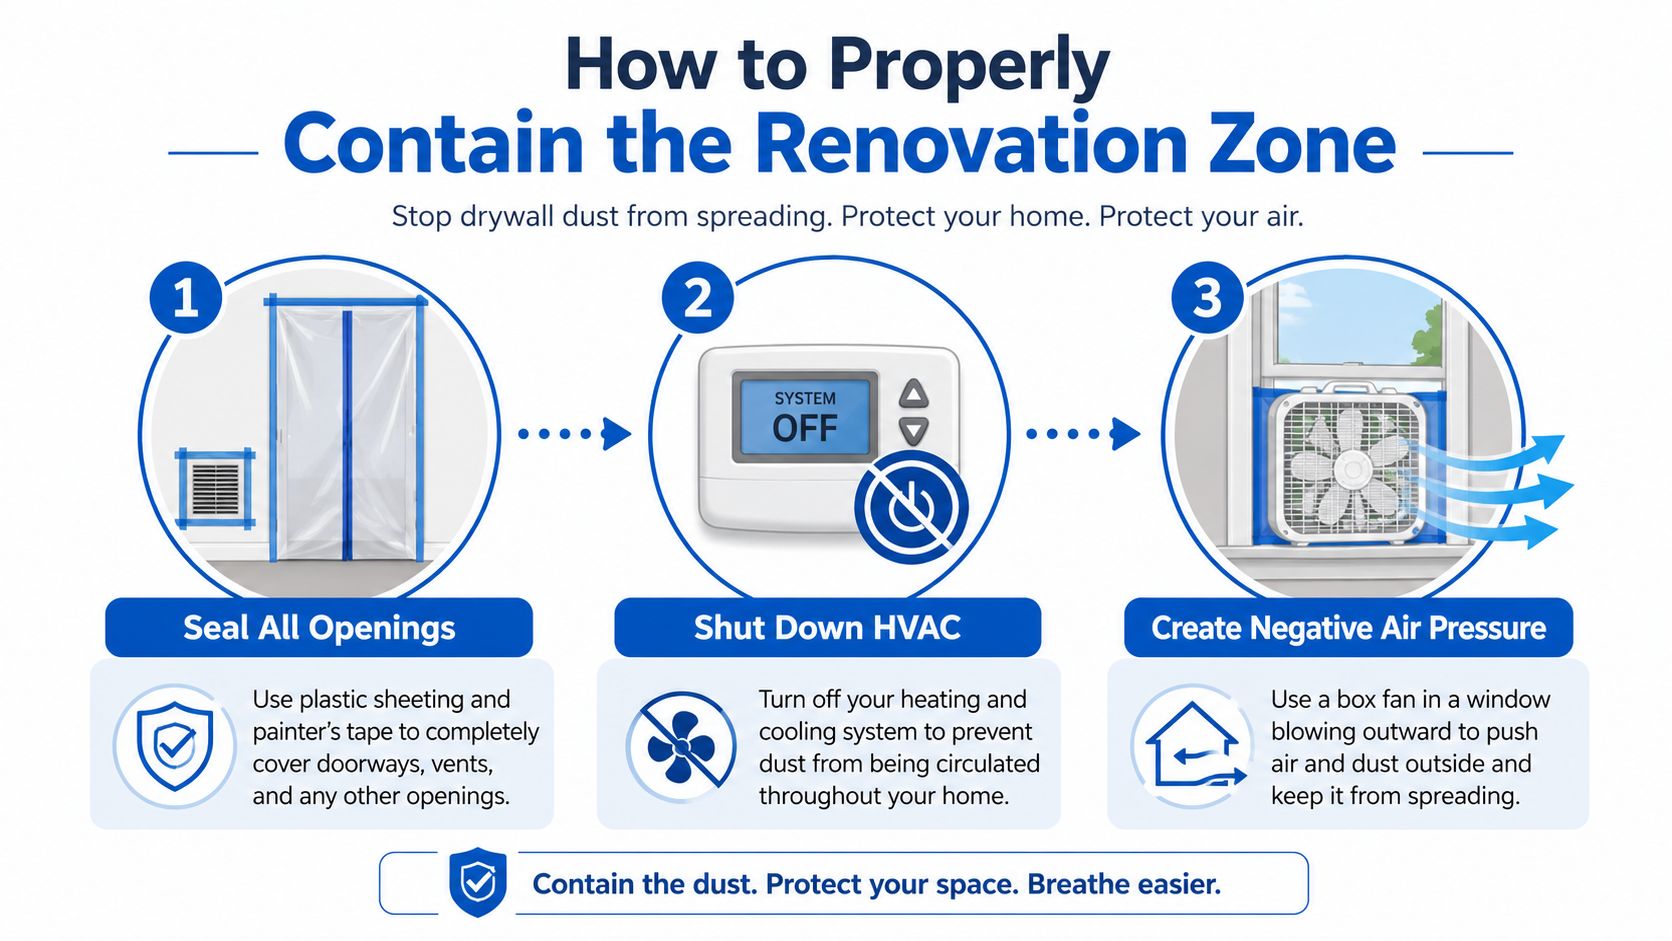
How to Properly Contain the Renovation Zone Before You Start
If there’s one lesson I’ve learned from countless post-construction cleanups, it’s this: don't start cleaning until you've properly contained the room. Spending an hour on preparation will save you days of chasing that fine, white powder out of every corner of your house. Your goal is to create a sealed-off work zone.
Start with the doorways. Use heavy-duty plastic sheeting and quality painter's tape to completely cover any entrances or exits. Tape it securely on all four sides to create an airtight barrier. If you need to enter and exit, you can buy a pre-made zippered plastic door or simply cut a vertical slit in your sheet and tape a second piece over it as a flap.
Next, and this is crucial, shut down your home's HVAC system at the thermostat. This system is the number one way drywall dust travels from one room to another. Once it’s off, use more plastic and tape to seal every single air supply and return vent inside the work zone. This one step prevents your ventilation from becoming a superhighway for dust.
Creating Negative Air Pressure to Control Dust
For a professional-level containment strategy, you must manage the airflow. The secret is to create negative air pressure in the room, which ensures air (and dust) flows out of your house, not into other living spaces. It sounds complex, but it's surprisingly simple to execute.
Here’s the step-by-step method:
- Place a box fan in an open window, facing outward to push air outside.
- Fill the gaps around the fan with cardboard or plastic sheeting and tape it securely to the window frame to create a snug fit.
- Turn the fan on. You are now actively pulling dusty air out of the room and preventing it from migrating elsewhere.
This is a core technique in professional source capture and containment. By keeping the room under negative pressure, you’re controlling where every airborne particle goes. To learn more about professional safety standards, you can read about employing the best safety practices for drywall dust.
A Methodical Plan for Effective Dust Removal
With the room sealed off and your gear ready, it's time for the main event: removing the dust for good. There's one non-negotiable rule when it comes to drywall dust cleaning: always work from the top down. Ignoring this will force you to re-clean surfaces as dust from above settles on them—a frustrating and common mistake.
Begin by attaching a soft brush to your HEPA vacuum and going over the ceilings first, paying close attention to corners where dust loves to accumulate. Next, vacuum the tops of door and window frames, light fixtures, and ceiling fan blades. This initial dry pass removes the loose, heavy dust before you introduce any moisture.
Wiping Down Walls and Surfaces
Even after thorough vacuuming, a stubborn, chalky film will cling to your walls. This is where your microfiber cloths and a two-bucket system come into play. Add a few drops of a mild cleaning soap to your water bucket.
Dampen a cloth—don't saturate it—and wring it out well. Starting at the top of a wall, wipe downwards in smooth, even strokes. Your goal is to lift the dust, not smear it into a paste. This process is tedious but essential for achieving perfectly clean walls.
Pro Tip: Keep a close eye on your rinse water. The moment it looks cloudy, discard it and get fresh water. Cleaning with dirty water is the number one rookie mistake; it just spreads a thin layer of grime back onto the surface you’re trying to clean.
Once the walls are done, use the same damp-wiping technique on all trim, baseboards, window sills, and doors. Don't forget small details like outlet covers and switch plates.
Tackling the Floors Last
The floor has caught all the debris from above, making it the final piece of the puzzle. Your approach will depend on your flooring type.
- Hardwood, LVP, or Tile: Vacuum every inch first to pick up loose particles. Then, use a damp microfiber mop, working from the back of the room toward the door to avoid leaving footprints.
- Carpet: This is challenging because the dust works its way deep into the fibers. You'll need to vacuum slowly and methodically. Go over the entire room in one direction (e.g., north-to-south), and then repeat the process in the perpendicular direction (east-to-west). This agitates the pile from all angles to pull up stubborn, embedded dust.
Before you begin this cleaning blitz, remember that proper containment is what makes it all manageable.
Following this top-to-bottom method is the only way to get a truly professional result. If the job feels too big, or you want to be 100% certain every particle is gone, calling in a professional dust removal service can be a real sanity-saver.
Final Steps for Improving Your Home's Air Quality
You’ve wiped every surface and the floors are sparkling, but don't pack up yet. The final challenge is the microscopic drywall dust you can't see—the particles still floating in the air, waiting to settle all over again.
These last steps are what separate an amateur cleanup from a professional one. They focus on clearing the air for good.
First, address your HVAC system. With the system still off, carefully remove the vent covers in the renovated room. Use your HEPA vacuum's brush attachment to clean inside the ducts as far as you can reach. A final wipe-down of the grilles with a damp microfiber cloth will catch any lingering residue.
Change Your Furnace Filter Immediately
If you do only one thing from this section, make it this. Your old furnace filter is now completely clogged with fine, gritty dust. Turning your system back on with that filter in place will blast all that trapped dust into every room of your house.
Install a fresh, high-quality filter immediately. For the next month, check the new filter weekly. If you see a gray film, replace it again. This simple step is your best defense against re-contaminating your home.
Finally, to capture any remaining airborne particles, run a portable HEPA air purifier in the renovated room for at least 24 to 48 hours. For Massachusetts homeowners, especially those with family members who have allergies or asthma, this is a non-negotiable step for restoring healthy indoor air.
Over the next few days, you might notice a light film of dust reappear. This is normal. Address it with quick spot cleanings. Using gentle, low-VOC cleaning products for these final touch-ups will help you maintain that fresh, clean air.
Frequently Asked Questions About Drywall Dust Cleanup
After a renovation, homeowners often have questions about that fine white powder that seems to linger everywhere. Here are expert answers to the most common queries.
How long does it take to clean drywall dust?
This depends entirely on the scale of your project. For a small patch job in a bathroom, you could likely have the room spotless in 4-6 hours of focused effort. However, for a major remodel, like a new kitchen or a full basement renovation in your Newton home, you should realistically set aside an entire weekend. The biggest mistake is rushing; dust that is still suspended in the air will settle overnight, forcing you to clean all over again.
Is it safe to clean drywall dust myself?
For smaller jobs, yes—provided you take the proper precautions. The fine dust is a significant respiratory irritant.
Always use this essential safety gear:
- An N95-rated dust mask: This is non-negotiable for protecting your lungs.
- Safety glasses or goggles: Keep gritty dust out of your eyes.
- Gloves: Protect your skin from drying out and irritation.
Proper ventilation is also key, so open windows before you begin. If anyone in your home has asthma or other respiratory conditions, the risk increases. For large-scale projects or if health is a concern, hiring a professional service is the safest choice to ensure your home's air is truly clean.
Can I just use my regular household vacuum?
Please do not. We cannot stress this enough: using a standard household vacuum is a recipe for disaster. Drywall dust particles are microscopic and will pass right through a normal vacuum filter, getting blown back into the air. Even worse, this abrasive dust is notorious for clogging and destroying the motors of residential vacuums. You need a heavy-duty shop vacuum equipped with both a fine-dust filter bag and a certified HEPA filter. It's the only way to trap the particles effectively without damaging your equipment.
When should I hire a professional for drywall dust cleaning?
It’s time to call in the pros when the job feels overwhelming. Consider a multi-room renovation in your Wellesley home or any project that has spread dust throughout your entire house. Hiring a post-construction cleanup crew is also a smart move if you have delicate new flooring to protect, lack specialized gear like a HEPA vac or air scrubber, or simply can't spare a full weekend for a deep clean. A professional team ensures every last speck is gone, letting you enjoy your new space without the final, frustrating cleanup headache.
Ready to skip the mess and get back to enjoying your beautifully renovated home? The experts at Sunny Day Pro Services offer meticulous post-construction cleanup services throughout the Wayland area. Get your fast, free estimate today!

