
How to Install a Kitchen Backsplash with Large Tiles
Learn how a kitchen backsplash with large tiles stays flat and seamless, from wall prep and grout joints to layout, cuts, and care.
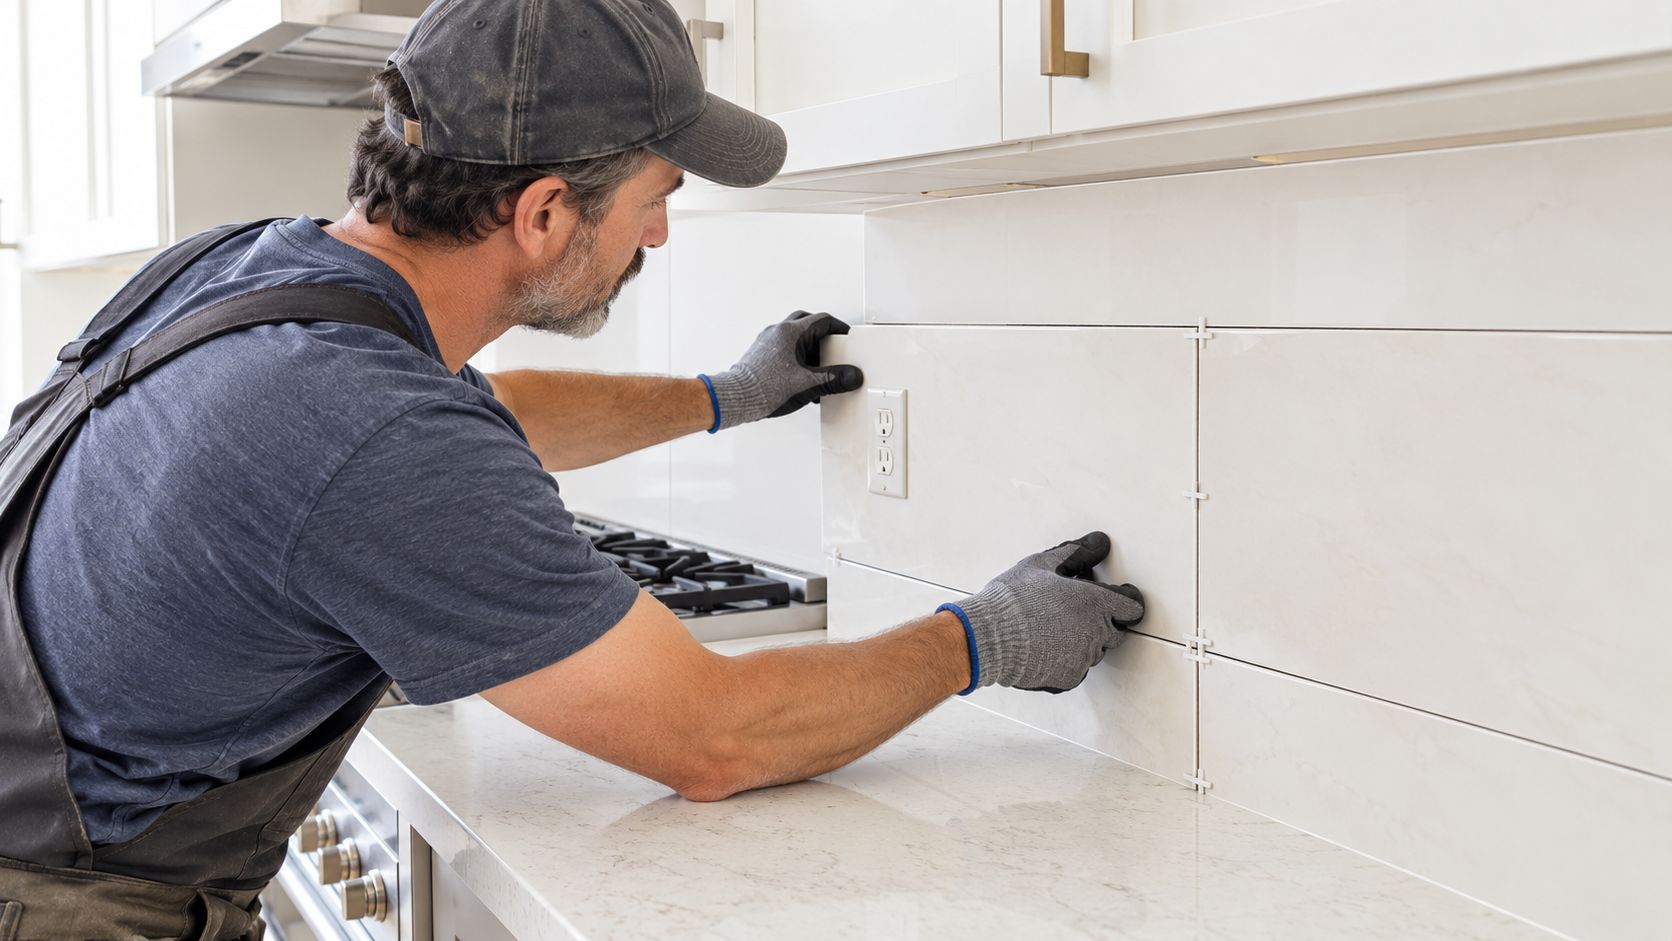
Bigger tile is not the easy version of a backsplash. A kitchen backsplash with large tiles looks calm because the grout nearly drops out of the picture, and that is exactly why the work gets stricter. The usual advice treats fewer joints as less scrubbing and a faster weekend. On a real kitchen wall, those wide pieces show every dip, every crooked outlet, and every tile that isn't quite flat.
Homeowners in older Massachusetts houses often find this after the first course goes up. Plaster, a second layer of drywall, or the leftover bed from a previous splash can hide a wave you never saw under small subway tile. Large pieces won't average that wave out. They'll publish it.
Table of Contents
Why Large Backsplash Tiles Demand More Precision
Large backsplash tile is not a shortcut to an easier installation. Fewer grout joints leave less room to disguise uneven edges, a wall that is out of plane, or a cut that lands awkwardly. The calmer look comes from tighter preparation and setting.
Larger formats are common now, including 12 × 24 inch, 18 × 18 inch, and 24 × 24 inch pieces. A broad tile face can create a quieter backdrop than mosaics or a dense subway pattern, letting cabinets, stone, and paint draw the eye. The 2025 Houzz U.S. Kitchen Trends Study provides consumer trend context, not technical installation tolerances.
What a continuous look demands from the wall
A 24 inch tile can bridge a dip instead of following it. If the center sits high while the ends fall away, the adjoining tile may meet it at a different height. With narrow grout joints, that lippage is easy to see and hard to hide.
Older Massachusetts kitchens can hold surprises beneath the paint. In a Wellesley or Newton home, plaster over lath, a patch where a window was moved, or old thinset left behind can create a shallow hollow or raised spot. A straightedge or a dry-laid tile can reveal the change before setting begins. The tile did not cause the unevenness, but its broad face makes it more apparent.
Practical rule: Fewer grout lines usually demand more precise work, not less. Tile size alone does not produce a smooth-looking wall.
What gets harder as the piece gets larger:
- Edge alignment: Small shifts become noticeable across a long run, because a narrow joint gives little room to disguise them.
- Wall preparation: High spots and hollows need correction before setting, or they can lead to visible lippage.
- Cuts: An outlet that divides a 12 by 24 tile needs careful placement. A poorly planned cut can look like an afterthought.
Large tiles can give the backsplash a quieter appearance, but that benefit comes with trade-offs. Check wall flatness, plan cuts around outlets and cabinet edges, and set each piece with close attention to its neighbors. On an older wall that has been patched repeatedly, the work often starts with preparation, not tile.
Choosing a Large Tile Kitchen Backsplash
Choose the tile format to suit the backsplash field, not a catalog photo. A short run between the counter and low upper cabinets often looks calmer with 12 by 24 rectangles laid horizontally. A taller backsplash or wider cabinet-to-cabinet span can accommodate 18 by 18 or 24 by 24 squares without making the grid feel cramped. Dry-lay the pattern against the actual wall dimensions before settling on a size, especially where outlets or cabinet edges will interrupt the pattern.
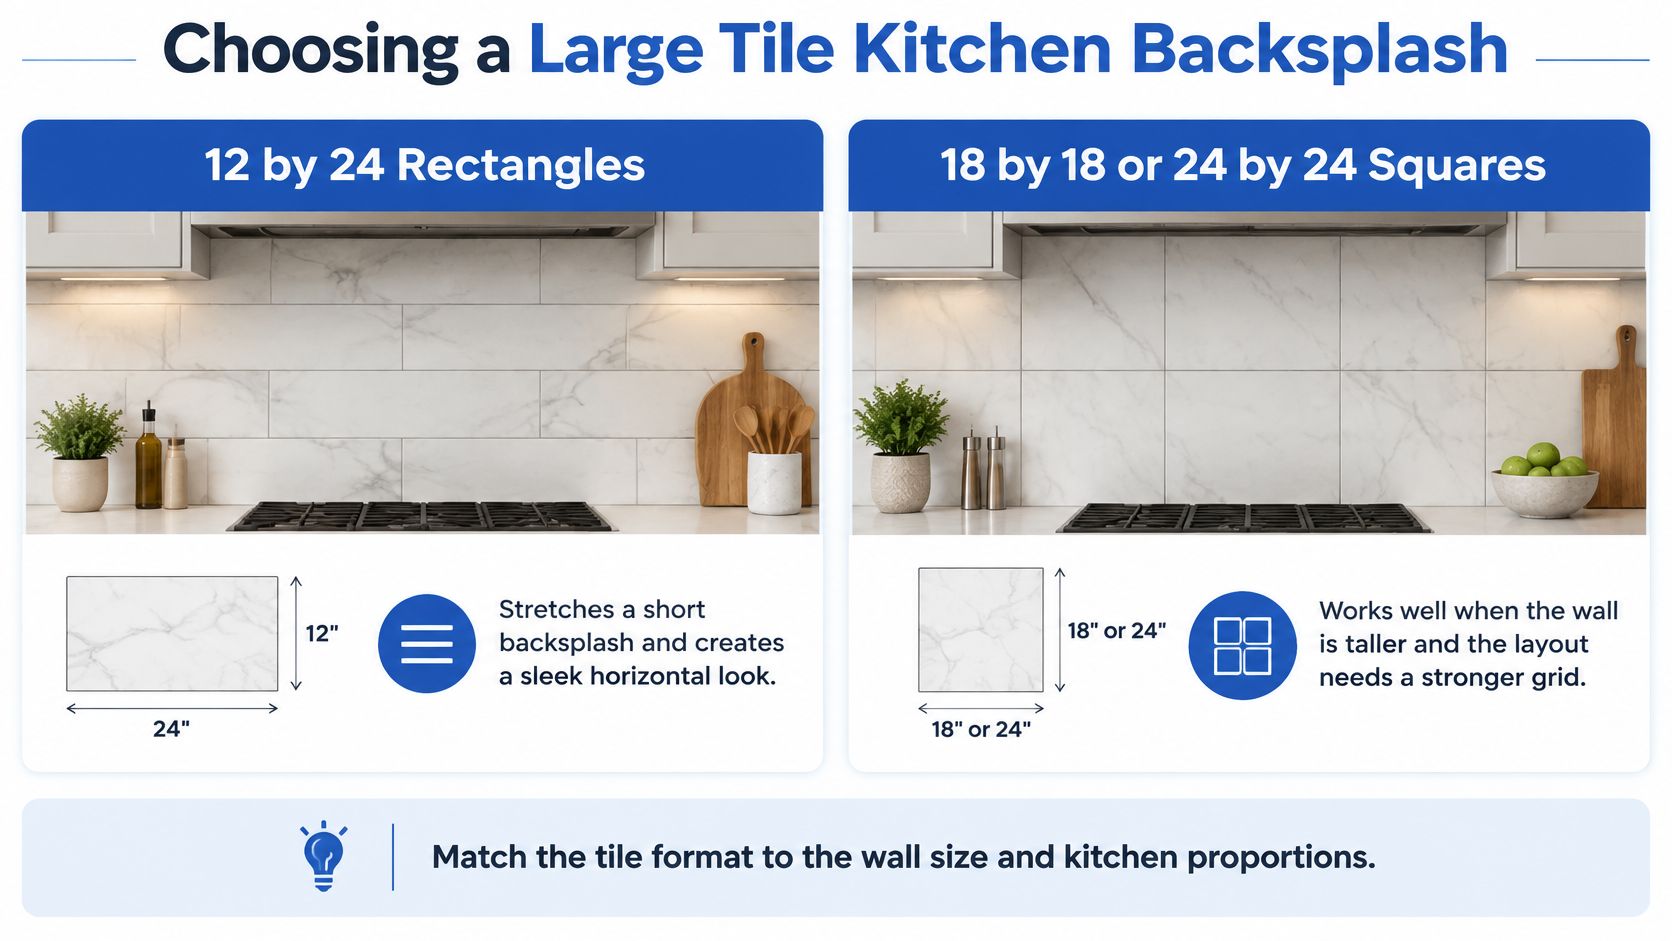
Rectangles and squares create different rhythms, but either format demands accurate cuts and alignment. Fewer grout lines leave less room to disguise a small layout drift, so large tiles are not automatically a simpler installation. On older Massachusetts walls, the tile choice should account for the shape of the field and the places where the pattern must end.
Material next to heat, water, and stone
Porcelain is a practical choice behind a range. It handles ordinary splashes and is generally easy to clean with suitable products for its finish. Ceramic can have a similar appearance and may cost less, depending on the product. Its body can be more prone to chipping at exposed cut edges, so outlet openings and other visible cuts need care.
Marble and granite can continue the look of a stone countertop onto the wall. Check the slab or tile finish, how exposed edges will be finished, and the care instructions for the specific product before choosing it. If the counter is quiet quartz and the backsplash field is short, a large porcelain rectangle can provide a related look with less maintenance.
Doing the layout yourself or hiring it out
A careful homeowner may be able to dry-lay a straightforward pattern on a wall that is already flat, with few outlets and no difficult inside corners. The work becomes less forgiving when the wall is uneven, a range hood interrupts the field, or the tile is too heavy to hold securely while the mortar is fresh. Large pieces also leave fewer joints to absorb small alignment errors, so a clean result depends on accurate cuts and a well-planned layout.
Sunny Day Pro Services is a local option for more involved work. The Massachusetts crew installs porcelain, ceramic, marble, and granite, including custom backsplashes, in Wayland, Newton, Needham, Wellesley, Weston, and nearby towns. The company states that its crews are background-checked and that its work carries a satisfaction guarantee. A quote can help determine whether professional installation makes sense for the wall, tile, and cuts involved.
The product's installation guidance matters, too. LATICRETE technical guidance on large tile covers considerations for large tile installation, but the tile manufacturer's requirements should guide the specific product choice.
Checking the Wall Before Any Tile Is Set
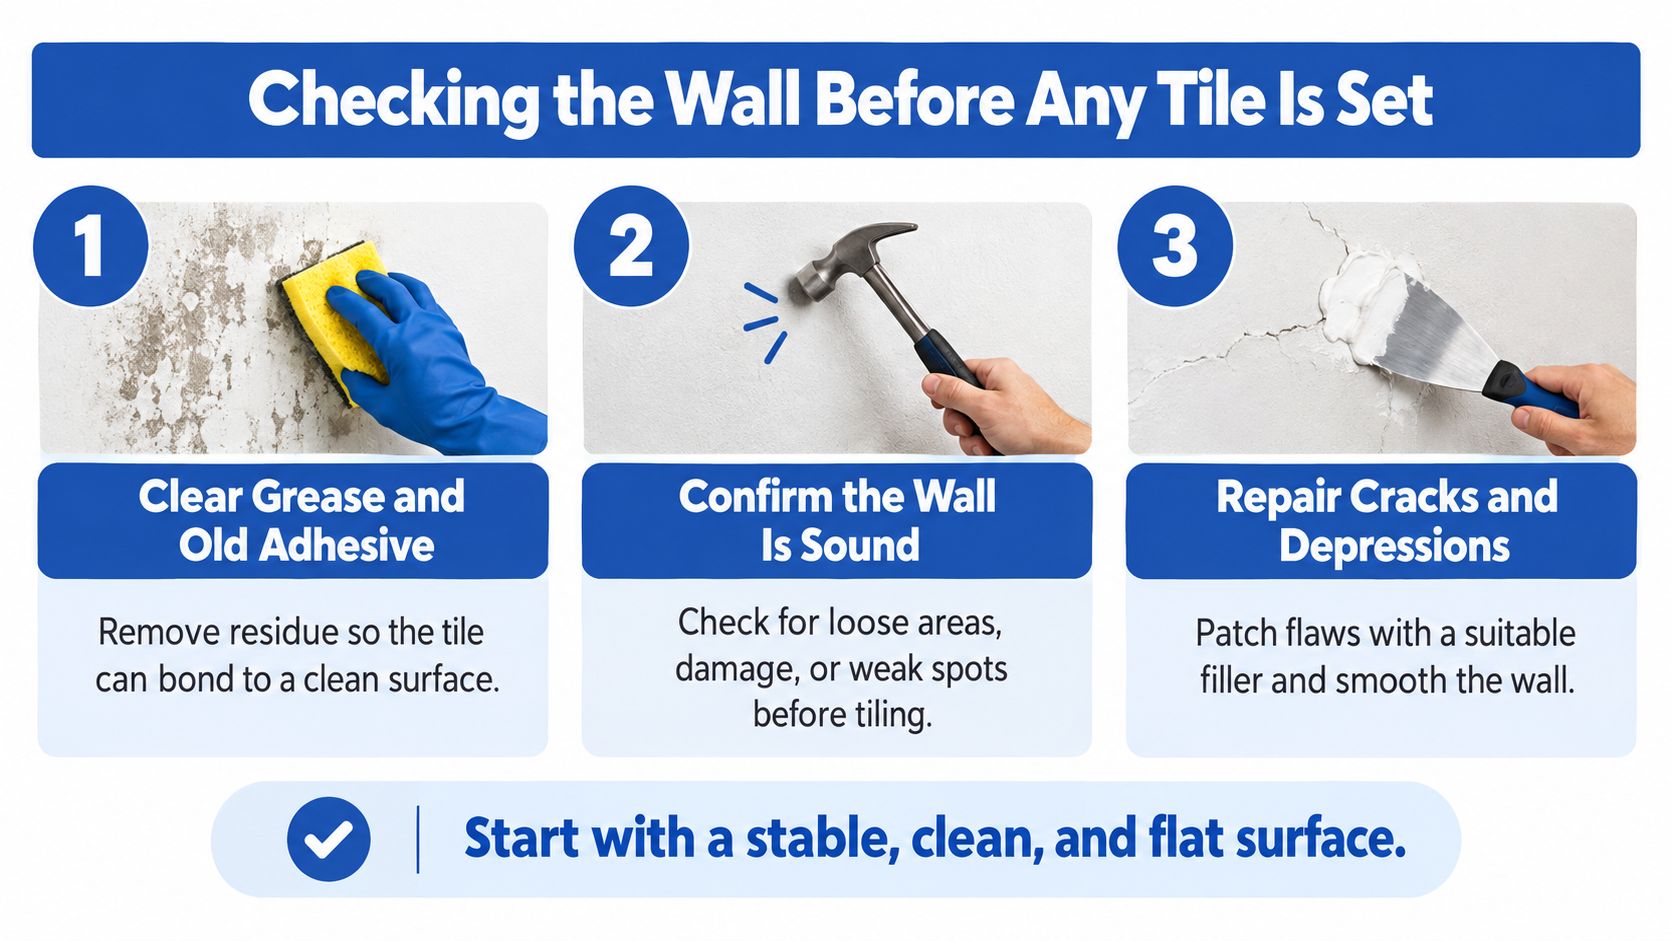
Product choice doesn't matter if the plane is wrong. Clear grease and old adhesive first, confirm the wall is sound, patch cracks and depressions, then recheck flatness before you ever dry-lay a piece.
The straightedge test
A 10-foot straightedge is a practical check. Hold it across the splash, then again on the vertical, and mark every place light shows under the edge. Industry guidance commonly limits substrate variation to no more than 1/8 inch in 10 feet and 1/16 inch in 24 inches for large-format work. Don't use mortar to hide a seriously irregular wall. Prep the surface first, and choose a mortar rated for large and heavy tile when the embedded thickness will exceed about 3/16 inch, per the Tile Council of North America note on large format and narrow joints.
ANSI-based guidance uses the same idea for tiles with at least one edge 15 inches or longer: no more than 1/8 inch over 10 feet, and 1/16 inch over 2 feet, as set out in LATICRETE TDS 193. Two feet and 24 inches describe the same local check. If you fail either reading, you're not ready to set tile.
Lippage is the raised edge you get when neighboring tiles leave the same plane. A hollow you could ignore under small tile becomes a lip you feel with a fingernail once the pieces are 18 or 24 inches long. Thinset is not a patching compound. A thick blob under one corner and a skim under the other leaves hollow spots, and those spots crack or sound dead when you tap them later.
A go or no-go before adhesive
Work in this order, and stop if a step fails:
- Clear the face: Degreaser, then a scrape of old mastic or thinset, so the new bond isn't sitting on kitchen film.
- Test the structure: Push on soft drywall, loose backer, and any plaster that powders. A tile this size is heavy, and a weak spot will telegraph.
- Fill, then measure again: Use a patch meant for the substrate, not a heap of thinset. Recheck with the straightedge after it cures.
- Dry-lay against the counter and the uppers: Mark outlet cuts, inside corners, and the return at the end of a cabinet before any mortar starts.
If the straightedge still rocks after patching, the wall isn't a tiling problem yet. It's a prep problem, and setting tile on it only makes the repair more expensive.
In Wayland and Weston houses that have been remodeled in layers, this check is the whole decision. Flat enough, and the splash can be large tile. Not flat enough, and no layout trick will save it.
Planning Layout and Grout Lines
Large tiles do not make layout easier. Fewer grout lines leave less room to disguise uneven cuts, shifting joints, or a wall that is out of plane. Start the grid at the countertop and work from the most visible open run, rather than from a corner hidden beside the fridge. Adjust the layout so a narrow sliver does not end up beside the range or under a cabinet door you use every day. The smallest cut should still look intentional.
Joint width on a running bond
For a kitchen backsplash with large tiles in a running-bond or brick pattern, ANSI A108.02 requires an average grout joint of at least 1/8 inch for rectified tiles and 3/16 inch for calibrated, non-rectified tiles when any side exceeds 18 inches. Warpage along the longest edge can require a wider joint. On the same running bond, when a side is longer than 18 inches, limit the offset to 33 percent unless the manufacturer allows more, as specified in LATICRETE TDS 164.
A 50 percent stagger can place a tile's high point beside the next tile's low point. That creates lippage through the layout itself. If you prefer more than a one-third offset, make a mock-up first and judge the resulting edge before setting the full backsplash.
| Situation | Minimum joint or limit | Why it matters |
|---|---|---|
| Running bond, rectified tile, any side over 18 inches | 1/8 inch average joint | A hairline joint makes edge variation obvious |
| Running bond, calibrated non-rectified tile, any side over 18 inches | 3/16 inch average joint | Factory size variation needs room to disappear |
| Same running bond, side longer than 18 inches | Offset no more than 33 percent, unless the maker allows more | A half-bond stacks a high center against a low end |
| Warpage along the long edge | Widen the joint beyond those minimums | The joint has to absorb the bow the tile already has |
Stack bond when the lines should stay quiet
A stack bond, with vertical and horizontal joints aligned, avoids the center-to-end mismatch of a running bond. It leaves little room to hide a drifting joint, though, so keep the lines true. It suits rectified tile and a wall that has passed the straightedge check. Choose a one-third bond for a brick look, and keep the grout joint at the required width rather than narrowing it to make the pattern appear uniform.
Set the horizontal grid only after deciding where the backsplash ends. A standard cabinet run and a taller area near a hood can give you different course counts and top cuts. Check the planned kitchen backsplash height before fixing the joint positions.
Skip hairline joints, even if the showroom sample uses them. Narrow joints make tile-size differences harder to disguise, especially around the sink and cooktop, where water and heat reach the wall. On older Massachusetts kitchens, careful layout also means checking how the planned cuts meet uneven corners and cabinet edges before installation begins.
Setting Large Tiles Without Lippage
Fewer grout lines make a backsplash harder to set well, not easier. Large tiles expose dips in the wall, small differences in tile thickness, and cuts that a smaller grid might disguise. On an older Massachusetts wall, check the surface before mixing mortar. A leveling system cannot correct a substrate that is out of plane.
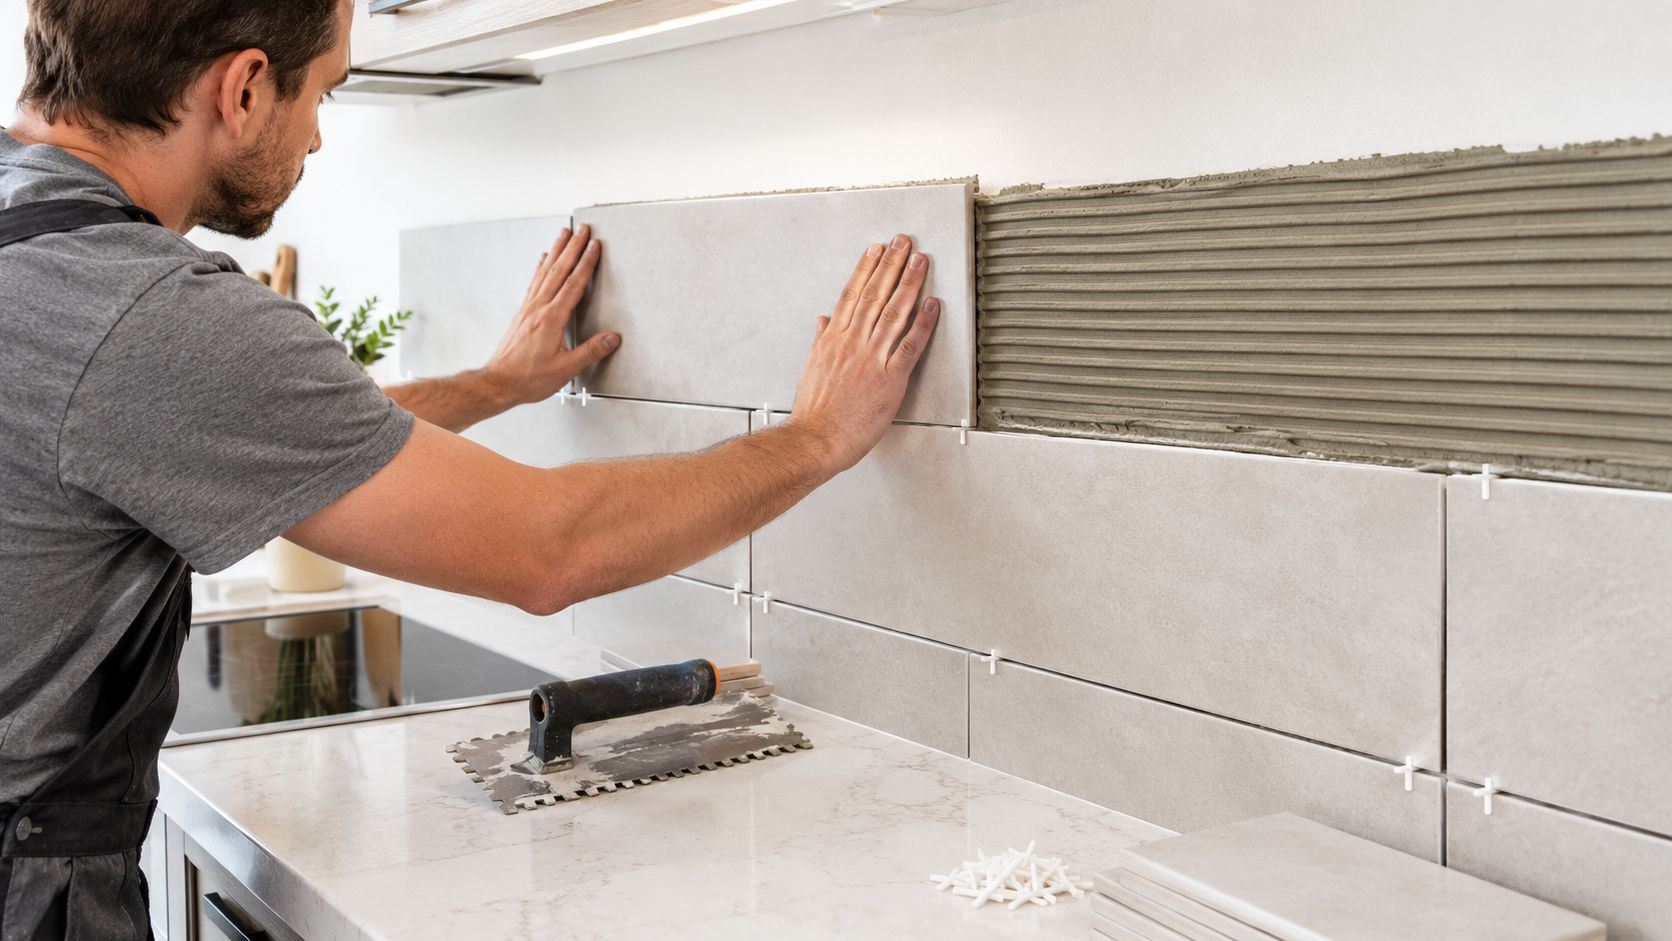
Coverage matters more than a face that merely looks level. Comb mortar in one direction, typically perpendicular to the tile's long side, then press and slide the tile across the ridges to collapse voids. The Tile Shop's large-format install guide specifies at least 80% mortar coverage in interior dry areas and 95% in wet areas. It also calls for a joint at least three times the tile's facial-dimension variation, and never less than 1/16 inch.
The strip behind a sink or range deserves the higher coverage standard. Support edges and corners fully. A hollow corner can chip when struck by a pan.
Clips, cuts, and short courses
Spacers and a leveling system hold alignment while mortar is soft. They do not flatten a bowed wall or a warped tile. If a clip has to force an edge into place, check the tile and substrate. The lip may return after the clips come off.
Cuts need the same care as the open field:
- Outlets: Center the box in a tile when possible, or place the cut at a joint. A small notch in the middle of a 24 inch face draws the eye.
- Windows and exposed ends: Leave a piece large enough to look intentional and finish its edge. A raw factory-cut side on porcelain or stone leaves the field unfinished.
- Cabinet returns: Dry-fit the return before spreading mortar, so its corner joint lines up with the joint on the open wall.
Work in short courses. Set a row, check it against a straightedge and the course below, then clean the joint before the mortar skins over. A heavy tile takes time to position, and mortar can begin to set while you adjust it. If the tile rocks, pull it and correct the bed. Adding a dab of thinset beneath one corner risks leaving a hollow spot.
The same handling principles apply to large-format tile installation on walls and floors. On a backsplash, lippage and uneven cuts sit at eye level, beside outlets used every day.
Caring for the Backsplash and Getting It Installed
Large tiles can simplify daily wiping, but fewer grout lines do not make the backsplash maintenance-free. Wipe splatters near the range before they dry. Clean the tile face with a pH-neutral cleaner, and avoid abrasive pads that can dull a reflective glaze. For stone or textured porcelain, follow the maker's cleaning guidance. Haze stands out across a broad face.
Grout still protects the tile edges, especially near the sink and cooktop, where water and grease reach the joints. Seal cement grout, then reseal it when water no longer beads on the surface. The guide to grout cleaning and sealing explains how to care for those joints.
What you gain and what you accept
Worth it when the wall cooperates:
- A calmer backdrop: Cabinets and counters take visual priority.
- Less grout to clean: Fewer joints collect sauce and dust, though spills still need prompt attention.
- Clear horizontal lines: Rectangular tiles can reinforce the line of the counter.
The trade-offs:
- Heavier pieces: Large tiles can take two people to position and adjust safely.
- Less tolerance for uneven walls: Older plaster and layered drywall, common in Massachusetts kitchens, may need repair before setting begins.
- More visible cuts: Outlets, windows, and exposed ends have fewer joints to disguise awkward pieces.
- Joints still need room: Forcing them too tight can make lippage more noticeable and leave grout prone to failure.
A large-tile backsplash is a precision job, not a shortcut for a free weekend. If the wall is out of plane, the broad faces make unevenness harder to hide, and the cuts demand careful layout. Homeowners in Needham, Newton, Wellesley, Weston, Wayland, and nearby towns can have the wall assessed before installation. Sunny Day Pro Services installs custom kitchen backsplashes and full-room tile in porcelain, ceramic, marble, and granite across those communities. The company provides quotes, scheduling, and a satisfaction guarantee.
For a kitchen in Wayland, Newton, Needham, Wellesley, Weston, or a nearby town, a measured quote can help determine whether the plaster is flat enough for large tile or needs repair first. Sunny Day Pro Services installs porcelain, ceramic, marble, and granite backsplashes, with attention to wall preparation, planned cuts, and durable grout joints. Request a quote and choose a time that fits the remodel.

