
Marble Tile Installation: A Homeowner's Step-by-Step Guide
Plan your marble tile installation with confidence. Learn substrate prep, cutting, setting, grouting, sealing, and when to hire a pro in Massachusetts.
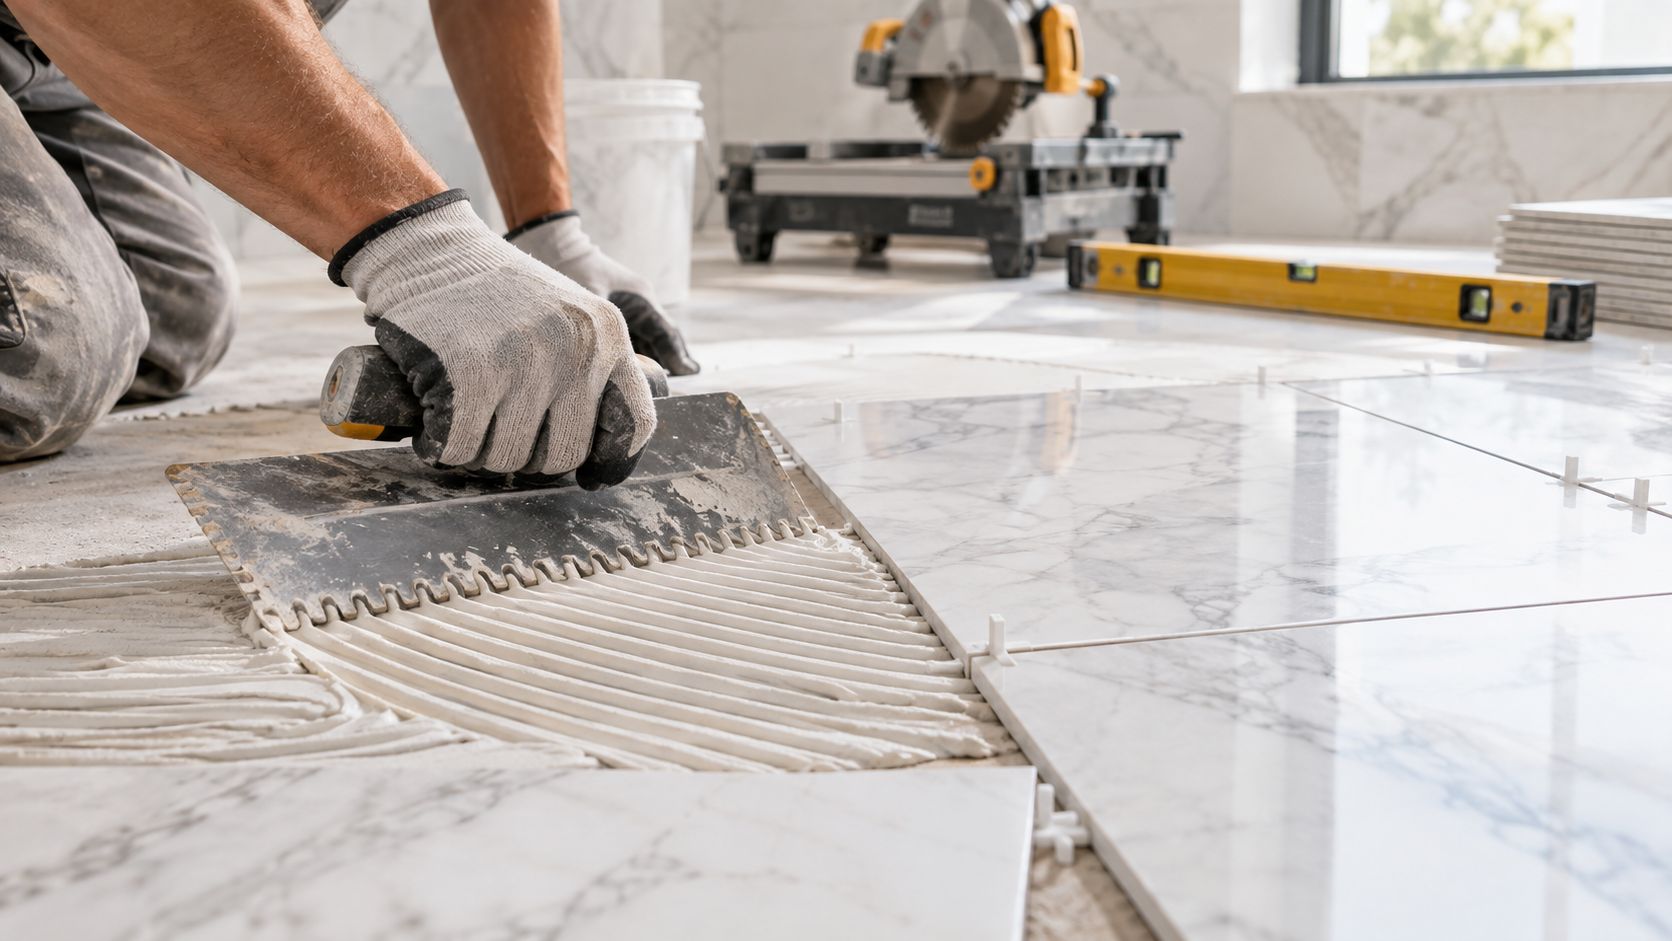
You've chosen the marble, approved the color, and started imagining the finished bathroom or entryway. Then someone mentions the subfloor, moisture testing, movement joints, and a wet saw, and the project suddenly sounds less like a weekend upgrade and more like a small construction job. That reaction is reasonable. Marble tile installation rewards careful preparation and punishes shortcuts, especially in Massachusetts homes exposed to freeze-thaw cycles, older framing, and damp conditions around stone foundations.
Marble can deliver a distinctive, high-end finish, but the visible tile is only one part of the system. The structure beneath it, the mortar, the layout, the joints, the grout, and the sealer all affect whether the floor stays flat, clean, and bonded. The natural-stone tile market is substantial, with one report estimating USD 12,850.75 million in 2024 and projecting USD 22,840.55 million by 2032, while marble represented 32.4% of the material segment in that report (natural stone tile market data). Marble installation is common, but common doesn't mean forgiving.
Table of Contents
What Marble Tile Installation Really Involves
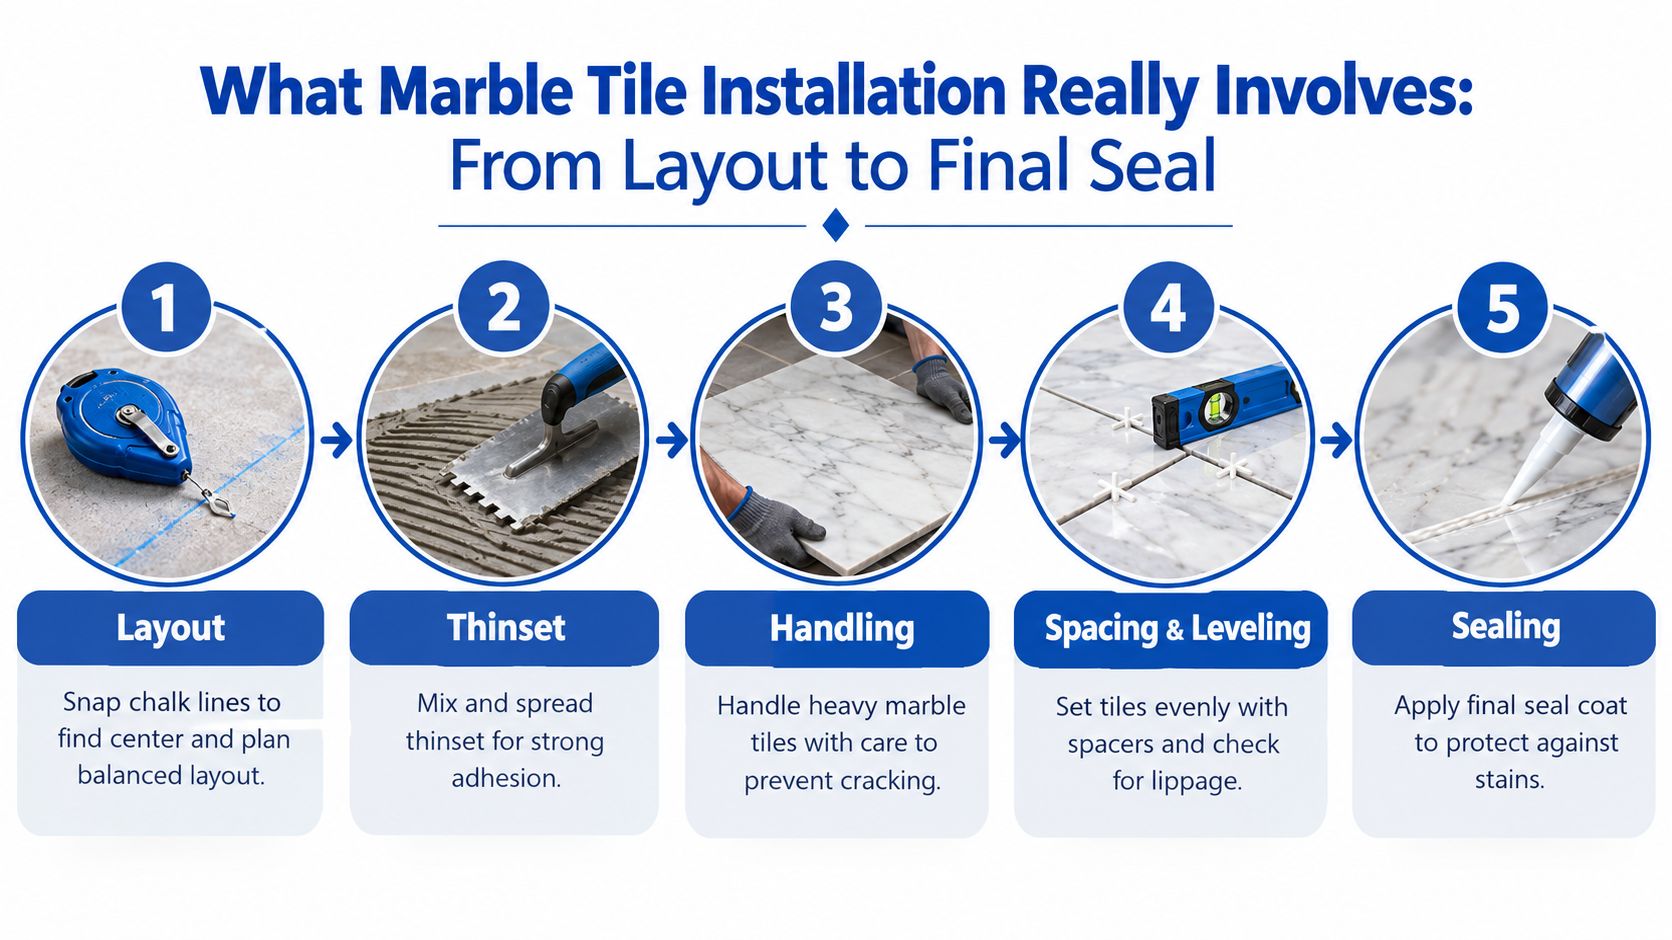
A successful marble tile installation has five connected phases: substrate preparation, layout, cutting, setting, and finishing. Each phase affects the next. If the floor isn't flat, the layout won't rescue it. If the dry layout ignores veining, the finished room can look disjointed even when every tile is technically level. If the surface isn't protected before grouting, pigment can settle into the stone and leave a permanent reminder of the shortcut.
Marble is heavier and more brittle than ordinary ceramic tile. It also shows small height differences more clearly, particularly when the surface is polished and the pattern has strong veining. The installer needs a clean work area, accurate measuring tools, a stone-rated wet saw, suitable mortar, and enough time to inspect every tile before it disappears into the layout.
The five phases of the job
Prepare the substrate. Check structure, flatness, cleanliness, and moisture. Correcting a floor after tile is installed is expensive and disruptive.
Plan the layout. Establish reference lines, balance the cuts at walls, and arrange tiles so the veining flows intentionally. A dry layout is where awkward slivers and visual surprises get caught.
Cut the stone. Marble needs controlled wet cutting with a diamond blade designed for stone. Sink cutouts, door jambs, vents, and plumbing penetrations require patience because a small chip can spoil a visible edge.
Set and align the tiles. Mortar coverage must be high, edges need support, and the installer has to check for lippage continuously rather than discovering it after the mortar cures.
Grout and seal. The final appearance depends on joint filling, haze removal, stone protection, and correct curing time. A sealer won't repair poor bonding or flatten an uneven floor.
A capable homeowner may manage a small, simple bathroom floor with modest tile sizes and few penetrations. A kitchen, foyer, shower, or large-format design raises the difficulty quickly. Bookmatched slabs, continuous veining, diagonal patterns, tight transitions, and rooms with multiple doorways all increase planning and cutting demands.
Practical rule: Marble doesn't make a bad substrate acceptable. It makes the substrate's defects easier to see.
DIY can work when the room is small, dry, structurally sound, and geometrically simple. Hiring a professional makes more sense when the floor moves, moisture is uncertain, the stone is expensive, or the layout has no forgiving place for mistakes. One misaligned tile can carry lippage through an entire row, and a poorly applied seal can leave streaks, dark patches, or etching that won't disappear with ordinary cleaning.
Substrate and Moisture Preparation
The most common Massachusetts mistake is setting marble directly over plywood, plank boards, or a concrete slab that hasn't been evaluated for movement and moisture. In older homes, the visible floor may hide uneven joists, patched framing, a damp stone foundation, or a slab that continues to release moisture into the room.
Start with the structure. Natural stone needs a rigid floor, and industry guidance commonly uses L/720 deflection as the benchmark for stone and large-format tile (natural-stone installation guidance). For a floor structure, another technical guideline identifies a maximum deflection of L/480 and calls for at least 95% mortar coverage on the back of each tile (LATICRETE technical guideline). Because the applicable requirement can depend on the complete assembly, a professional should verify the framing rather than relying on a visual inspection.
Three checks before installation
Structural check: Walk the room, inspect exposed framing where possible, and look for bounce, damaged joists, loose boards, and unsupported seams. Older Massachusetts homes may need reinforcement before a stone-rated underlayment is installed.
Flatness check: Use a long straightedge or level in multiple directions. Natural stone and large-format tile often call for about 1/8 inch over 10 feet, while a technical benchmark also describes roughly 3 mm over 3 m (stone installation specifications). Grind high spots and use an appropriate patch or leveling system for low spots. Thinset isn't a floor-leveling compound.
Moisture check: Concrete needs testing before stone is installed. One installation guide cites approximately 4% relative humidity for concrete, 2% CM for screeds, and a 28-day minimum cure for fresh concrete before stone placement (marble installation best practices). In homes with fieldstone or other porous foundation walls, don't assume a dry-looking surface is ready.
A cement backer board or an uncoupling membrane can help create a suitable tile surface, but it isn't a substitute for structural correction. Products such as Schluter Ditra or comparable membranes may be appropriate over prepared wood or concrete, depending on the manufacturer's requirements and the room's moisture conditions. Crack-isolation membranes can address certain existing cracks, but they don't make active movement or water intrusion safe to cover.
Leave movement space at room boundaries, transitions, and changes in plane. Guidance for marble installation calls for movement joints at boundaries and at intervals of 3 to 5 m, with calibrated tile joints commonly around 1.5 to 2 mm and non-calibrated tile joints around 2 to 3 mm (movement and moisture guidance for marble). Seasonal humidity changes and winter temperature swings can turn a tightly restrained floor into a cracked or tented floor.
| Substrate Type | Flatness Tolerance | Required Prep | Notes |
|---|---|---|---|
| Wood framing | About 1/8 inch over 10 feet for stone and large-format tile | Verify stiffness, repair movement, install an approved tile underlayment | Older framing may need reinforcement before marble is considered |
| Concrete slab | About 1/8 inch over 10 feet for demanding stone layouts | Remove contamination, correct highs and lows, complete moisture testing | New concrete needs adequate curing before stone installation |
| Existing tile assembly | Must be flat, sound, and well bonded | Check for hollow areas, cracks, height conflicts, and suitable overlay conditions | Loose or moving tile should be removed, not buried |
| Basement or foundation-adjacent floor | Must meet the same stone flatness requirements | Investigate vapor movement, damp walls, drainage, and waterproofing | Stone foundation moisture can cause staining and bond problems |
For related underlayment details, review this guide to tile backer board installation before choosing a system.
Tools and Materials You Will Need
Marble requires more than a standard ceramic-tile starter kit. Organize purchases by the phase where each item earns its place, and don't treat the mortar or sealer as interchangeable with products intended for ordinary tile.
Layout equipment
Use a chalk line, laser level, four-foot level, tape measure, square, and spacers matched to the planned joint. A dry layout should include the actual marble, not just a drawing, because natural veining and shade variation influence where each piece belongs. A pencil, straightedge, and removable labels help preserve the sequence once tiles are lifted for installation.
Cutting equipment
A wet saw with a stone-rated diamond blade is the central cutting tool. Keep water flowing cleanly and replace contaminated water before it carries abrasive grit across the cut. Tile nippers or nibblers can help with small adjustments around pipes, but they won't produce the clean, controlled edges needed at a doorway or exposed wall.
Setting materials
For many 12-inch marble tiles, installers commonly reach for a 1/2-inch by 1/2-inch notched trowel, adjusting to the tile and substrate after checking coverage. Use a white or light-gray polymer-modified mortar rated for the stone and assembly. Dark mortar can telegraph through light marble, and mastic isn't appropriate for stone or below-grade locations.
A margin trowel, mixing paddle, clean buckets, rubber mallet, leveling tool, and grout float round out the setting kit. Use the mortar manufacturer's mixing and slaking directions rather than adding water whenever the mix feels stiff.
Finishing supplies
Choose unsanded grout for joints under 1/8 inch, unless the stone and grout manufacturer specifies another compatible product. Keep a penetrating sealer made for marble, clean microfiber cloths, sponges, and a pH-neutral stone cleaner available before grouting begins.
Acidic cleaners are a poor choice for marble. Marble can etch when exposed to acidic products, and a cleaner intended to remove cement haze from some tile types can dull the polished face of natural stone. Sealing recommendations also apply to the grout, because unprotected joints can absorb staining and discoloration (marble care and maintenance guide).
Cutting, Layout, and Setting the Tile
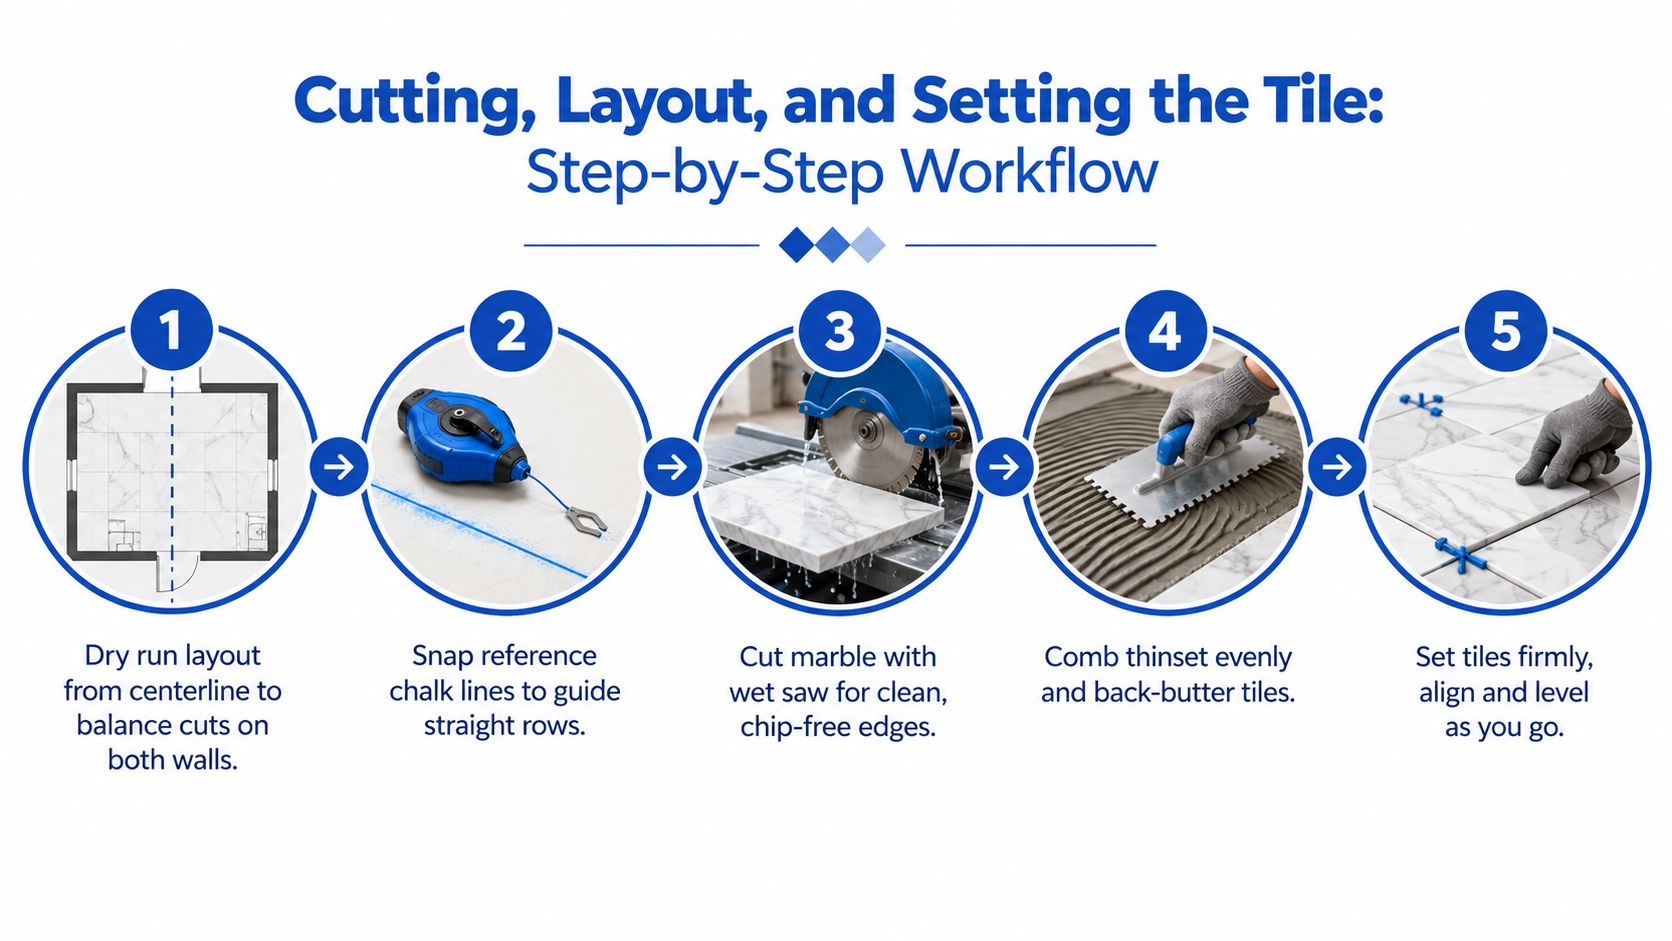
Begin with a dry run. Find the room's center or the dominant visual axis, then lay out enough tile to see how the pattern meets each wall, cabinet, threshold, and plumbing fixture. A centered layout doesn't always produce the best result. If one side ends with a narrow sliver while the opposite side receives a generous cut, shift the starting line so the room looks balanced.
Snap reference lines that are square to one another. Check the diagonals of the layout or use a laser and framing square, because a small error at the beginning can become obvious as the rows advance. Arrange marble from multiple cartons before setting so strong color or vein changes don't form accidental blocks.
Natural stone needs a visual plan as well as a geometric one. Rotate pieces to continue a vein, reserve the most attractive tile for the most visible locations, and photograph the dry layout before removing it. This matters even more in a drenching-style room with large areas of uninterrupted marble, where alignment and prep become part of the design decision rather than a minor detail (marble trend and installation considerations).
Cut slowly and set deliberately
Use a wet saw with a continuous flow of clean water. Feed the marble steadily instead of forcing it through the blade, and support the tile on both sides of the cut. The last part of a cut is where unsupported stone can chip, so slow down and keep the edge stable.
Spread mortar with the notched trowel held consistently. Comb the ridges in one direction, then press the tile across them to collapse the ridges. For larger pieces, back-butter the tile with a thin coat of mortar so the back receives continuous support. The goal is high, even coverage, particularly at corners and edges, where unsupported areas are more likely to crack.
Lift an occasional tile while the mortar is fresh. The back should show consistent transfer rather than isolated stripes. If coverage is poor, adjust the trowel angle, mortar amount, or substrate flatness before continuing.
Set spacers, press the tile into position, and check the surface with a long level. Don't wait until the whole room is covered to look for lippage. If one corner sits proud, lift the piece while the mortar is workable, correct the bed, and reset it. A leveling system may help with suitable tile formats, but it can't compensate for a floor that exceeds the required flatness.
The right time to correct a proud corner is before the mortar skins over. After curing, the correction becomes demolition.
Grouting, Sealing, and Final Finishing
Grouting is part of the stone-protection process, not merely the final color choice. Let the set tile cure according to the mortar manufacturer's directions, and don't rush the floor because the room looks finished. The technical sequence should allow the mortar to develop strength before the joints are filled.
Before grout touches marble, apply a compatible grout release or pre-sealer when the stone's porosity and finish call for it. This creates a barrier against pigment entering the pores, particularly with light or textured marble. Test the product on an offcut first, because some sealers can change the appearance of polished or honed stone.
Work cleanly across the surface
For joints under 1/8 inch, unsanded grout is generally the safer starting point for avoiding scratches, subject to the product and stone specifications. Force grout diagonally across the joints with a rubber float, then remove excess without digging into the spaces. Use a damp sponge with light passes, rinsing frequently, and don't flood the surface.
Aggressive wiping can pull grout from the joint. Letting dirty water dry on the stone can leave haze. If the marble darkens temporarily after moisture exposure, don't assume the discoloration is permanent. Some moisture-sensitive stones can absorb water, and technical guidance warns that green, black, and red marbles may warp or stain when installed with unsuitable water-based mortars or mastics (marble moisture sensitivity guidance).
After the grout cures and the surface is dry, apply a penetrating sealer suitable for marble. Many installers use two controlled coats, often wet-on-wet when the product allows it, rather than flooding the room and hoping the excess evaporates evenly. Remove residue before it dries.
Use a pH-neutral cleaner for final haze removal and routine care. Avoid acidic grout-haze removers on polished marble. For ongoing maintenance, follow this practical guide to cleaning marble tile.
Common Mistakes and How Marble Floors Actually Fail
Homeowners often blame marble when a floor cracks, stains, or develops haze. In practice, the failure usually points to the assembly around the stone. Industry guidance identifies substrate preparation, adhesive selection, sealing, uncured screeds, residual moisture, and poor waterproofing as recurring contributors to cracking, delamination, efflorescence, and hollow spots (common marble installation mistakes).
Consider the symptom first, then trace downward.
| Visible Symptom | Most Likely Cause | Fix Direction |
|---|---|---|
| Cracks following a straight line | Deflection or a framing seam beneath the tile | Open the assembly, correct structural movement, and rebuild the tile base |
| White haze that won't wash away | Efflorescence, grout residue, or moisture movement | Identify the moisture path and use a stone-safe cleaning or restoration method |
| Dark staining around a toilet | Moisture entering porous stone or grout near the fixture | Repair the leak, dry the assembly, and assess whether the stone can be restored |
| Efflorescence along an exterior wall | Vapor movement from damp masonry or a missing moisture-control detail | Address water entry and vapor conditions before replacing tile |
| Hollow spots or loose edges | Insufficient mortar contact or a contaminated substrate | Remove affected tile, correct coverage, and reset over a sound base |
| Cracked grout at the perimeter | Missing movement accommodation or rigidly packed edges | Replace the rigid joint with an appropriate flexible movement detail |
Older Massachusetts homes with 16-inch-on-center framing can still have movement problems when joists are undersized, damaged, or poorly supported. A floor may feel solid under normal walking and still move enough to challenge marble. A missing vapor barrier over a stone foundation can create staining and efflorescence even when the tile setter used an otherwise suitable mortar.
Marble isn't automatically failing because it's too soft. It often fails because the structure flexed, the substrate held moisture, the mortar didn't support the tile, or the installer restrained seasonal movement. Diagnose the system, not just the visible spot.
Timeline, Cost, and When to Hire a Pro
For a typical 100 to 150 square foot bathroom or entryway, a realistic sequence includes 1 to 2 days for substrate preparation, 1 day for layout and dry fitting, 2 to 3 days for setting tile with curing time, and 1 day for grouting, followed by 24 to 48 hours before sealing. The calendar can stretch when demolition reveals damaged framing, wet concrete, uneven plank subflooring, or a foundation-related moisture issue.
Material selection also changes the budget. One industry overview places installed marble material costs around $10 to $40 per square foot, with premium grades reaching $60 or more per square foot (marble flooring cost and installation overview). The following planning ranges use the requested 100-square-foot example and should be treated as budgeting guidance rather than a quote.
| Item | DIY Cost Range | Pro-Installed Range |
|---|---|---|
| Marble tile | $1,000 to $4,000, premium grades can exceed $6,000 | $1,000 to $4,000, premium grades can exceed $6,000 |
| Thinset and grout | $50 to $150 | Usually included in the installation proposal |
| Sealer | $30 to $60 | Usually included or listed as a finishing allowance |
| Tool rental | $50 to $200 | Usually included in labor overhead |
| Labor | Personal labor | $15 to $25 per square foot for marble labor in Massachusetts |
For more planning context, compare the details in this marble tile installation cost guide.
Know when the project has outgrown DIY
Stop and get an evaluation if the floor has significant deflection, the slab is cracked, moisture is active, or the design includes a custom shower pan, linear drain, multiple transitions, or complex vein matching. These aren't cosmetic complications. They affect waterproofing, movement, drainage, and the order in which the work must be completed.
Massachusetts homes with balloon framing, fieldstone foundations, or older additions deserve extra caution. Structural surprises can turn a controlled tile project into framing, drainage, or moisture remediation, and the cost of continuing without an assessment can exceed the cost of hiring help at the start.
A professional installer should be able to explain the substrate system, mortar selection, movement joints, moisture plan, layout, and finishing sequence before setting tile. Ask what happens if the slab fails its moisture test or the floor doesn't meet the flatness requirement. Clear answers are more useful than a low initial number.
Sunny Day Pro Services provides marble, porcelain, ceramic, and granite tile installation for kitchens, bathrooms, entries, and full-room remodels across Massachusetts communities including Wayland, Newton, Needham, Wellesley, and Weston. If your project needs careful substrate evaluation, stone-specific setting, and a dependable finishing schedule, visit Sunny Day Pro Services to request a quote and discuss the installation plan.

