
8 Tile Installation Tools Needed for a Pro Finish in 2026
Your complete checklist of the tile installation tools needed for a flawless project. See our expert guide on what to buy, rent, and when to call a pro instead.
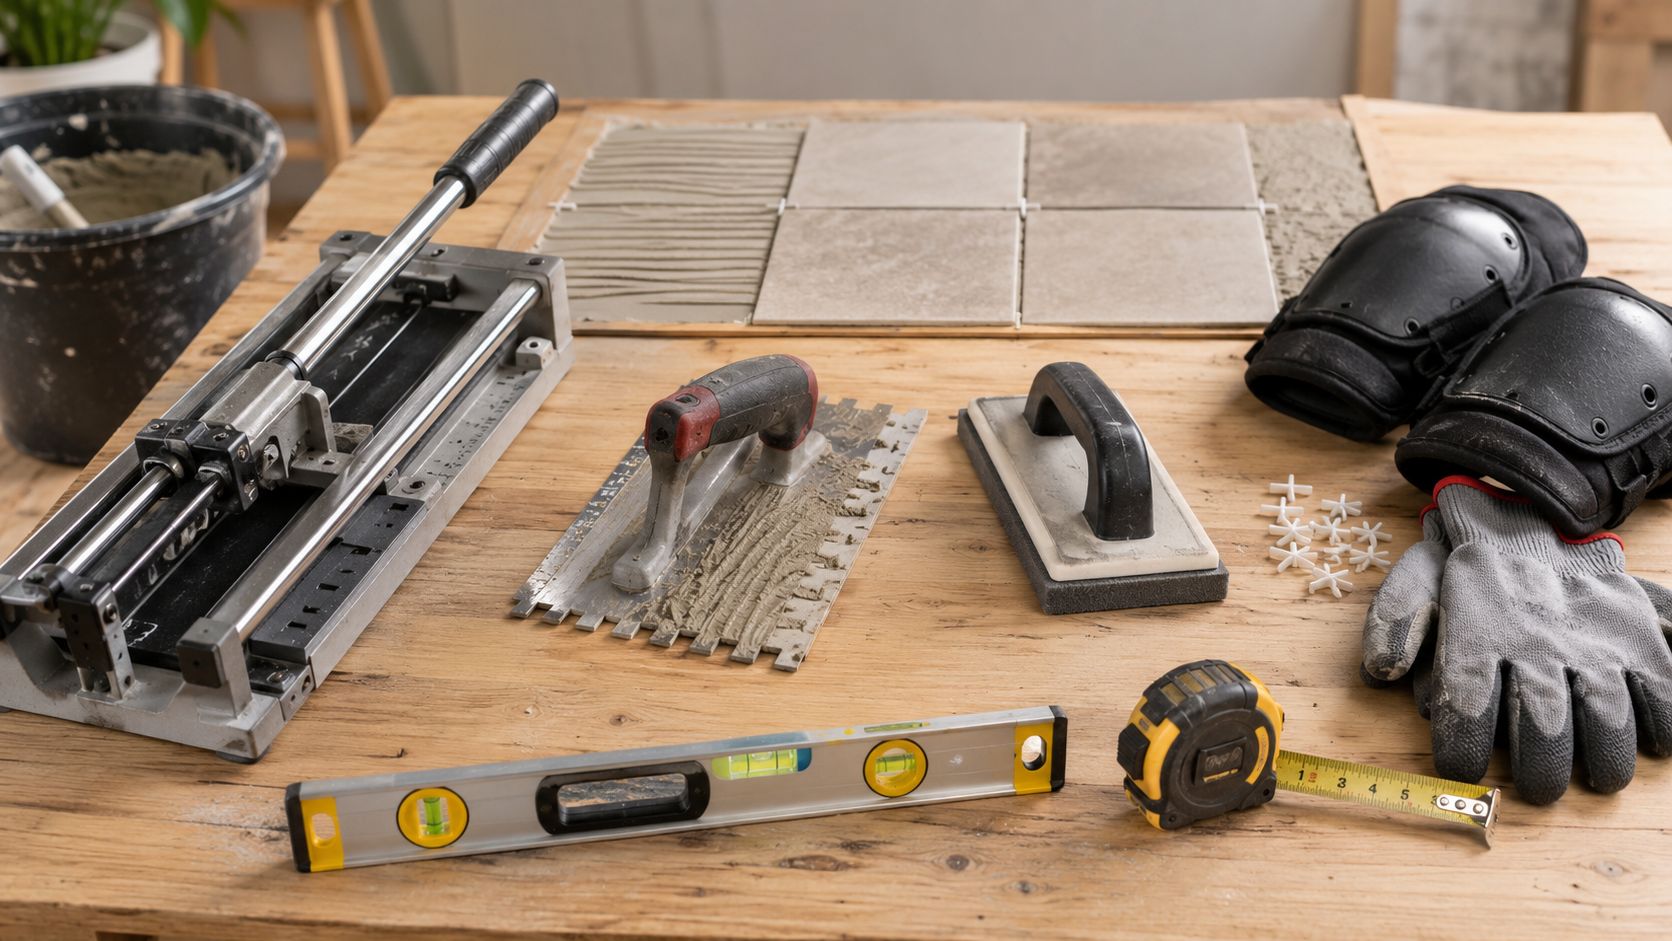
Dreaming of a new tile backsplash or a fresh floor, but not thrilled about chipped edges, crooked joints, or grout haze that never quite comes off? The finish starts long before the first tile goes down. It starts with having the tile installation tools needed for the job, matched to the tile, the cut, and the room.
For a clean result, the gear has to do more than “work.” It has to control layout, protect the substrate, keep mortar coverage even, and help you finish grout lines without dragging water or grit back into the joints. That matters even more with larger tiles, because modern installs often rely on tighter tolerances, like a flat substrate target within 3 mm per 2 m and grout joints as narrow as 1 to 2 mm for rectified tile, which is why precision tools matter so much for avoiding lippage and uneven joints (Tile Catalogue).
Homeowners in Wayland, Newton, Needham, Wellesley, and Weston run into the same decision every time. Buy the basics, rent the expensive items, or hand the whole job to a pro. The right answer depends on the tile, the room, and how much rework you can live with.
Table of Contents
1. Tile Cutter
A tile job often looks fine on paper until you start fitting pieces around outlets, corners, valves, or an out-of-square wall. That is where a wet tile saw earns its place. It gives cleaner control on ceramic, porcelain, marble, and granite, and it helps the installer keep the finished edge looking deliberate instead of patched together.
Water keeps the blade cooler and cuts down on dust while the blade is working. That matters on large projects, complex cuts, or natural stone, where a dry cut can chip the surface or leave a weak edge that shows after grout goes in (DIY Tile Installation Tools & Equipment Guide). In a kitchen backsplash, that difference shows up fast. A clean cut disappears into the layout, while a rough one draws the eye right to the mistake.

Buy or rent
For a single backsplash, rent the saw if you can. For repeated work, a renovation, or a project with a lot of custom cuts, buying starts to make more sense because blade quality and setup consistency matter more than people expect. In a Wayland kitchen backsplash or a Newton bathroom with marble trim, the saw stops being a convenience and becomes part of quality control. If the tile is expensive, thick, or brittle, the saw choice matters as much as the tile choice itself.
The trade-off is simple. Rental gear can be economical for a one-off job, but a worn rental blade or a sloppy tray can waste material fast. A homeowner who plans to do more than one room may be better off buying a better saw and keeping control over the cut.
A few habits save tiles and time:
- Mark every cut clearly: A clean pencil line reduces guesswork before the blade starts.
- Keep the reservoir filled: Weak water flow means more heat and a rougher cut.
- Cut slowly: Forcing the blade usually causes chips, especially at the glaze line.
- Let the piece cool: Fresh cuts can be hot enough to crack if you handle them too fast.
- Replace worn blades promptly: A tired blade leaves a ragged edge that shows after grout goes in.
For a backsplash walkthrough, compare the saw's role with the rest of the process in Sunny Day Pro Services' tile installation steps guide.
3. Tile Spacers
A backsplash can look fine while the tile is still on the wall, then the grout goes in and every uneven joint shows. Tile spacers prevent that problem by holding the lines steady while the adhesive sets. On a floor, they also help the layout read as deliberate instead of patched together, which matters even more once light starts raking across the surface.
The value is consistency under pressure. Rectified tile often calls for tight joints, and those joints need to stay accurate while you are still nudging each piece into place. For that reason, the small plastic spacer does a lot more than it looks like it should. It keeps the spacing honest while you work, which is why pros still use it on jobs where the finish has to hold up under close inspection.
Choose the right type, not just the right size
Cross spacers work well on flat layouts with straightforward lines. Wedge spacers are a better fit when the substrate needs a little correction and you do not want to disturb the course. In a Newton kitchen with decorative tile, or a marble install in Weston, removable spacers can make cleanup easier because they come out without fighting the setting process.
A spacer should disappear into the job. If it is still demanding attention at the end, the layout or the setting speed needs a closer look.
A few practical habits make the difference:
- Set them before adding more mortar: Once the tile is loaded, shifting the spacer gets harder.
- Check the lines every few tiles: Small drifts grow fast across a wall or floor.
- Keep extras nearby: Cuts, corners, and layout changes use more pieces than the box suggests.
- Pull them at the right time: Leave them too long and they can complicate grout work.
- Match them to the joint width: Forcing the wrong spacer into the layout usually shows up later.

The cost of spacers is small. The cost of fixing a wandering grout line is not, especially in older Wayland and Newton homes where walls and floors are rarely as square as the plan says they are. A homeowner can buy a basic pack for one job, but repeated work often benefits from having several spacer types on hand so the layout can be adjusted without improvising.
That trade-off is where experience pays off. On a simple backsplash, basic spacers are usually enough. On a larger room, or any project with uneven framing, the spacing tool is only part of the solution, and professional installation helps keep the joints straight when the surface itself wants to pull them off line.
3. Tile Spacers
A tile layout can look fine during dry fit and still drift once the first few rows go in. Spacers keep the joints even, and even joints are what make a backsplash or floor read as planned instead of patched together. On tight grout lines, a small shift shows quickly because modern tile leaves less room to hide it.
Rectified tile usually calls for narrow joints, so the spacer has to hold its place while the tile is still being adjusted. That is why these small plastic pieces stay in the kit even on higher-end work. They cost little and prevent a lot of layout trouble.
Choose the type that fits the job
Cross spacers work well on flat, simple layouts. Wedge spacers give a little more adjustment when the substrate is not perfect and the line needs to stay true. For decorative work in a Newton kitchen or marble in Weston, removable spacers make cleanup easier because they do not get in the way once the tile starts to set.
A spacer should disappear by the end of the job. If it is still the thing you notice, the layout needed more control earlier.
A few practical habits matter more than brand names:
- Place them before adding more mortar: Once the tile is loaded, moving the spacer gets harder.
- Check alignment every few tiles: Small errors spread fast across a wall.
- Keep extras nearby: Cut pieces and edges always take more than the box suggests.
- Do not expect spacers to correct a bad layout: They hold spacing, they do not create it.
In Wayland kitchens, the cleanest installs use spacers to keep a steady visual rhythm around outlets, corners, and the ends of a run. On floor work, they also help keep one tile from creeping higher than the next. The job only looks easy after the spacers have already done the hard part.
4. Grout Float
The grout float is where a lot of DIY jobs lose their polish. It pushes grout into the joints and scrapes the excess off the tile face, which sounds simple until you're dealing with sticky joints, textured porcelain, or natural stone that holds onto residue. The right float helps you pack the joints without pulling material back out.
A float with a rubber, foam, or felt face gives you enough control to shape the joint and keep the surface cleaner during the first pass. That matters on bathroom work in Newton or custom marble in Weston, where the grout line has to look deliberate, not smeared. It also matters when you're working quickly on larger floors and need the joint fill to stay consistent from one section to the next.
Use the float like a finishing tool
Set the float at about a 45-degree angle and move it diagonally across the tile face. That motion pushes grout into the gaps without dragging straight down the joint. Work in small sections, because grout starts firming up before the whole room is done.
A few habits make the difference between a clean line and a messy one:
- Pack, then clean: Do not try to do both in one rushed pass.
- Work in manageable sections: Smaller areas give you more control before the grout firms up.
- Match the float to the grout type: Sanded grout and unsanded grout do not behave the same.
- Keep the float clean: Dry buildup changes the way it rides across the tile.
- Practice on scrap board: A few minutes of practice can save a whole wall.
On most jobs, the float is worth buying instead of improvising with a substitute. A decent one is inexpensive compared with the time it takes to fix shallow joints, but the cheap versions can wear down fast or leave the face uneven. If you only tile once in a while, renting does not usually make sense here, since floats are low-cost hand tools and easy to keep on site for touchups or future repairs.
The float rewards feel. Once you learn the pressure and timing, you can tell when the joints are full and when they still need another pass. That difference shows up in the final line work, especially on a professional install where the grout has to look even under daylight from a Wayland kitchen or the sharp lighting of a finished bath.
5. Tile Sponge and Grouting Bucket
A clean grout line usually depends on what happens after the float work. The sponge and bucket handle that part, and they do it best when the cleanup stays controlled. A large open-cell sponge lifts haze from the tile face without pulling grout out of the joint, and the bucket keeps rinse water from turning into a slurry that gets spread right back across the room.
The timing has to be right. If the sponge comes in too soon, it drags grout out of the joints. If it comes in too late, the surface starts to set and the haze becomes harder to remove without scrubbing too hard. In a Wayland backsplash or a polished Needham bath, that difference shows up fast, because one sloppy cleanup pass can leave the whole room looking dull.
Clean in stages, not all at once
This part of the job is about control, not speed. Rinse the sponge often, wring it until it is only damp, and keep the water in the bucket clean enough that you are not wiping dirty residue back over the tile. A nearly dry final pass usually leaves a cleaner finish than a saturated sponge ever will.
Practical rule: If the sponge leaves water trails, it is too wet for final cleanup.
A few habits make the difference:
- Wait for the grout to firm up: The joint should hold its shape before you start wiping.
- Use light circular motions: That lifts residue without cutting into the lines.
- Change rinse water often: Dirty water puts haze right back on the tile face.
- Keep the sponge barely damp on the last pass: Too much water weakens the fresh joint.
- Allow cure time before moisture exposure: Fresh grout needs time before showers or heavy cleaning.
The cost of these tools is low, and that changes the buy-versus-rent decision. A sponge and grouting bucket are worth buying for nearly any homeowner, because they are inexpensive, easy to keep on hand, and useful for touchups or future repairs. Renting does not make much sense here. If you are doing a one-time project, the challenge is not the price of the tools, it is using them with enough discipline to avoid haze, weakened joints, or a cleanup that has to be redone.
7. Safety Equipment
A tile job can go wrong fast if the protection is wrong. Sharp edges cut skin, silica dust reaches the lungs, and grout or setting materials can irritate eyes and hands. Gloves, eye protection, and dust masks or respirators belong on the same checklist as cutters and trowels.
Protection also changes the way you work. A wet saw still throws splash and fragment risks, and the right respirator matters any time cutting or sanding puts fine dust into the air. For homeowners in Wayland, Newton, or nearby towns, that can mean the difference between a clean weekend project and a job that leaves dust in the house and irritation on your face. If you want a practical reminder on post-install care, the tile cleaning and sealing guide from Sunny Day Pro Services is a useful follow-up once the installation is done.
Match the gear to the job
Different tasks call for different protection. Chemical handling needs gloves that can handle the product, not just resist a tile edge. Dust-heavy work calls for more than a casual paper mask, and wet cutting still brings splash risks that catch people off guard.
Good practice looks like this:
- Wear cut-resistant gloves: Tile edges can bite harder than they look.
- Use ANSI-rated safety glasses: Flying chips are a real risk on every cut.
- Choose a proper dust mask or respirator: Not all masks protect the same way.
- Keep fit testing current: Respirators only work when they fit correctly.
- Change cartridges on schedule: Don't wait until they look used up.
The buy-versus-rent call is straightforward here. Safety gear is usually worth buying because it is low cost, fits one person, and can be used again for repairs, demo work, or future tile projects. Renting does not make sense for masks, gloves, or eye protection. The trade-off is not price, it is whether the gear fits the task and stays comfortable enough that you keep it on while working.
8. Grout Sealer and Maintenance Products
Once the grout cures, the work still is not finished. Grout sealer helps protect joints from water, stains, and mold growth, which matters in kitchens and bathrooms where spills and moisture are part of daily use. It also makes routine cleaning easier, so it belongs in the tool plan, not the afterthought pile.
The timing matters. Wait until the grout has had time to cure before sealing it, and follow the product directions for the exact window. Sealing too early can trap moisture and leave the finish looking uneven. In a Wayland backsplash or a Newton bath, that patience usually means cleaner joints and fewer headaches later. For a practical overview of what to do after the tile is in place, the tile cleaning and sealing guide from Sunny Day Pro Services is a useful follow-up.
Choose the sealer to match the surface and the use
Penetrating sealers and membrane sealers do not behave the same way, so a test spot is smart before you coat the whole area. Some products change the look of the grout slightly. That can be fine if you expect it, and frustrating if you do not. On marble grout in Wellesley or a high-use Needham floor, the wrong product can make upkeep harder instead of easier.
The maintenance routine is simple, but the details matter:
- Apply thin, even coats: Heavy application can leave streaks.
- Wipe excess from tile right away: Dried sealer haze is a pain to remove.
- Follow the drying instructions: Moisture too soon weakens the result.
- Check when resealing is due: High-use areas wear faster than low-traffic ones.
- Keep the cleaner compatible with the finish: Harsh products can break down the protection faster.
Buy versus rent is straightforward here. Sealer, grout cleaner, and maintenance supplies usually make more sense to buy because they are inexpensive, easy to store, and useful for touch-ups after the main job. Renting does not help with this part of the project. The trade-off is choosing the right product for the tile, the grout, and the amount of moisture the room sees.
8. Grout Sealer and Maintenance Products
Once the grout cures, the job still isn't finished. Grout sealer protects joints from water, stains, and mold growth, which is especially important in kitchens and bathrooms where moisture and spills are routine. The right sealer also makes ongoing cleaning easier, which is why it's part of the essential toolkit, not an afterthought.
The timing matters. Wait 48 to 72 hours after grouting before applying sealer so the grout can cure properly (Tile Catalogue). That waiting period is worth it because sealing too early can trap moisture and interfere with the finish. In a Wayland backsplash or a Newton bath, patience here pays off in cleaner joints and less maintenance later.
Pick the product for the surface
Penetrating sealers and membrane sealers behave differently, so test a small area before committing. Some products slightly change the appearance of the grout, which is fine when the effect is expected and frustrating when it isn't. On marble grout in Wellesley or a busy Needham floor, the wrong product can make the surface harder to maintain instead of easier.
A practical maintenance routine includes:
- Apply thin, even coats: Heavy application can leave streaks.
- Wipe excess from tile immediately: Dried sealer haze is a pain to remove.
- Follow the drying instructions: Moisture too soon undermines the job.
- Track resealing in customer files: Future maintenance is easier when you know the product used.
- Start with preventive sealing: New grout is easier to protect than old grout is to rescue.
For more detail on product care and post-install cleanup, see Sunny Day Pro Services' tile cleaning and sealing guide. That kind of maintenance is part of what keeps a tile surface looking finished long after the installer leaves.
8-Point Tile Installation Tools Comparison
| Item | Core Function | Key Features | User Experience & Quality | Value Proposition | Typical Cost |
|---|---|---|---|---|---|
| Tile Cutter (Manual Wet Saw) | Precise wet cutting of ceramic, porcelain, marble, granite | Diamond blade, water cooling, adjustable depth, miter/bevel, 24–36" tables, portable models | Chip-free edges, faster cuts, reduced dust; learning curve for technique | Professional-quality cuts for visible surfaces and complex patterns | $300–$800 |
| Notched Trowel | Apply thin-set with consistent ridges for adhesion | Multiple notch sizes (1/4"–3/4"), V/U/square notches, angled handle, reversible blades | Ensures coverage and prevents hollow spots; skill-dependent technique | Low-cost way to secure tile adhesion and reduce callbacks | $15–$40 |
| Tile Spacers | Maintain uniform grout joint width and alignment | Sizes 1/16"–1/2", cross/T/wedge shapes, plastic, removable/reusable options | Produces consistent grout lines and prevents lippage; placement care needed | Inexpensive control over aesthetics and grout performance | $10–$30 (pack) |
| Grout Float | Pack grout into joints and remove excess from surfaces | Rubber/foam/felt faces, ergonomic handle, beveled edges, lightweight | Professional grout finish when used at 45°; requires practiced technique | Efficient, consistent grout joints and clean surfaces | $15–$35 |
| Tile Sponge & Grouting Bucket | Final grout cleanup and water control for finishing | Open-cell sponges, 2–5 gal bucket, wring rims, mixing grooves | Produces haze-free finish if timed correctly; delicate timing | Low-cost system that directly impacts final appearance | $10–$25 (system) |
| Laser Level / Straight Edge | Ensure level, plumb and even substrate/layout | Green/red laser lines, 360° lasers, self-leveling, 4–8' straight edges | Prevents lippage and drainage issues; improves layout accuracy | Reduces installation errors and rework for professional results | $100–$300 |
| Safety Equipment (Gloves, Eye Protection, Masks) | Protect workers and homeowners; meet safety/compliance | Cut-resistant gloves, ANSI eyewear, N95/respirators, hearing protection | Reduces injuries and long-term risks; may require fit-testing | Compliance, reduced liability, and professional trust | $10–$150 (item range) |
| Grout Sealer & Maintenance Products | Protect grout from stains, moisture and mold | Penetrating & membrane sealers, color-enhancers, low-VOC options | Extends grout life; requires correct timing and periodic reapplication | Lowers maintenance, preserves appearance and durability | $50–$150 (project) |
Your Tiling Project DIY or Call Sunny Day Pro Services?
You can buy the right tools and still end up with a job that looks unfinished. Tile work rewards patience, but it also punishes shortcuts. A wet saw won't fix a bad layout. A spacer won't fix a crooked wall. A grout float won't save a joint that was never packed properly in the first place.
That's why the DIY question comes down to more than budget. If you're working with expensive porcelain, marble, or granite, the margin for error gets smaller fast. If the room has odd corners, long runs, shower drainage, or large-format tile, you're really managing a precision system, not just setting squares on a wall. The market data reflects that shift, with tile installation tools now treated as a meaningful global category rather than a casual accessory set, and with precision workflows becoming more common alongside laser-guided cutters and automated leveling systems (Market Report Analytics), (Archivemarketresearch).
For homeowners in Wayland, Newton, Needham, Wellesley, Weston, and nearby Massachusetts communities, the trade-off is time, finish quality, and cleanup. A pro crew brings the equipment, the sequence, and the habits that prevent rework. That's often the smarter choice when the tile is visible every day and the room can't afford a do-over.
Sunny Day Pro Services installs tile for kitchens, bathrooms, backsplashes, and full-room remodels, which makes them a practical option when the project needs careful cutting, leveling, grouting, and finishing. If you'd rather skip the learning curve and get a dependable result, contact them for a quote and compare that to the cost of buying, renting, and redoing the work yourself.
If your tile project needs precise cuts, clean grout lines, and a finish that holds up in real life, Sunny Day Pro Services can help. Visit Sunny Day Pro Services to request a quote for tile installation, backsplash work, or a bathroom or floor upgrade in Wayland, Newton, Needham, Wellesley, Weston, or nearby Massachusetts communities.

