
Vinegar and Borax: What Really Happens When You Mix Them
Learn what happens when you mix vinegar and borax, whether the combo actually cleans, safe DIY recipes, and surface-by-surface guidance
Mixing vinegar and borax is an acid-base neutralization that cancels much of each ingredient's cleaning power, so the short answer is: don't mix them, use each on its own. Household vinegar is typically about 5% acetic acid with a pH around 2.4 to 2.5 (Alliance Chemical explains vinegar's acidity), while borax is alkaline.
The popular DIY advice sounds logical: vinegar cleans mineral buildup, borax tackles stubborn soil, so combining them should produce a stronger all-purpose cleaner. Chemistry says otherwise. In a Massachusetts kitchen, where hard-water spots, tile grout, sealed counters, and busy family routines all meet, the more useful question isn't “Can I mix vinegar and borax?” It's “Which one matches this soil and surface?”
Table of Contents
Why Mixing Vinegar and Borax Became a Popular DIY Myth
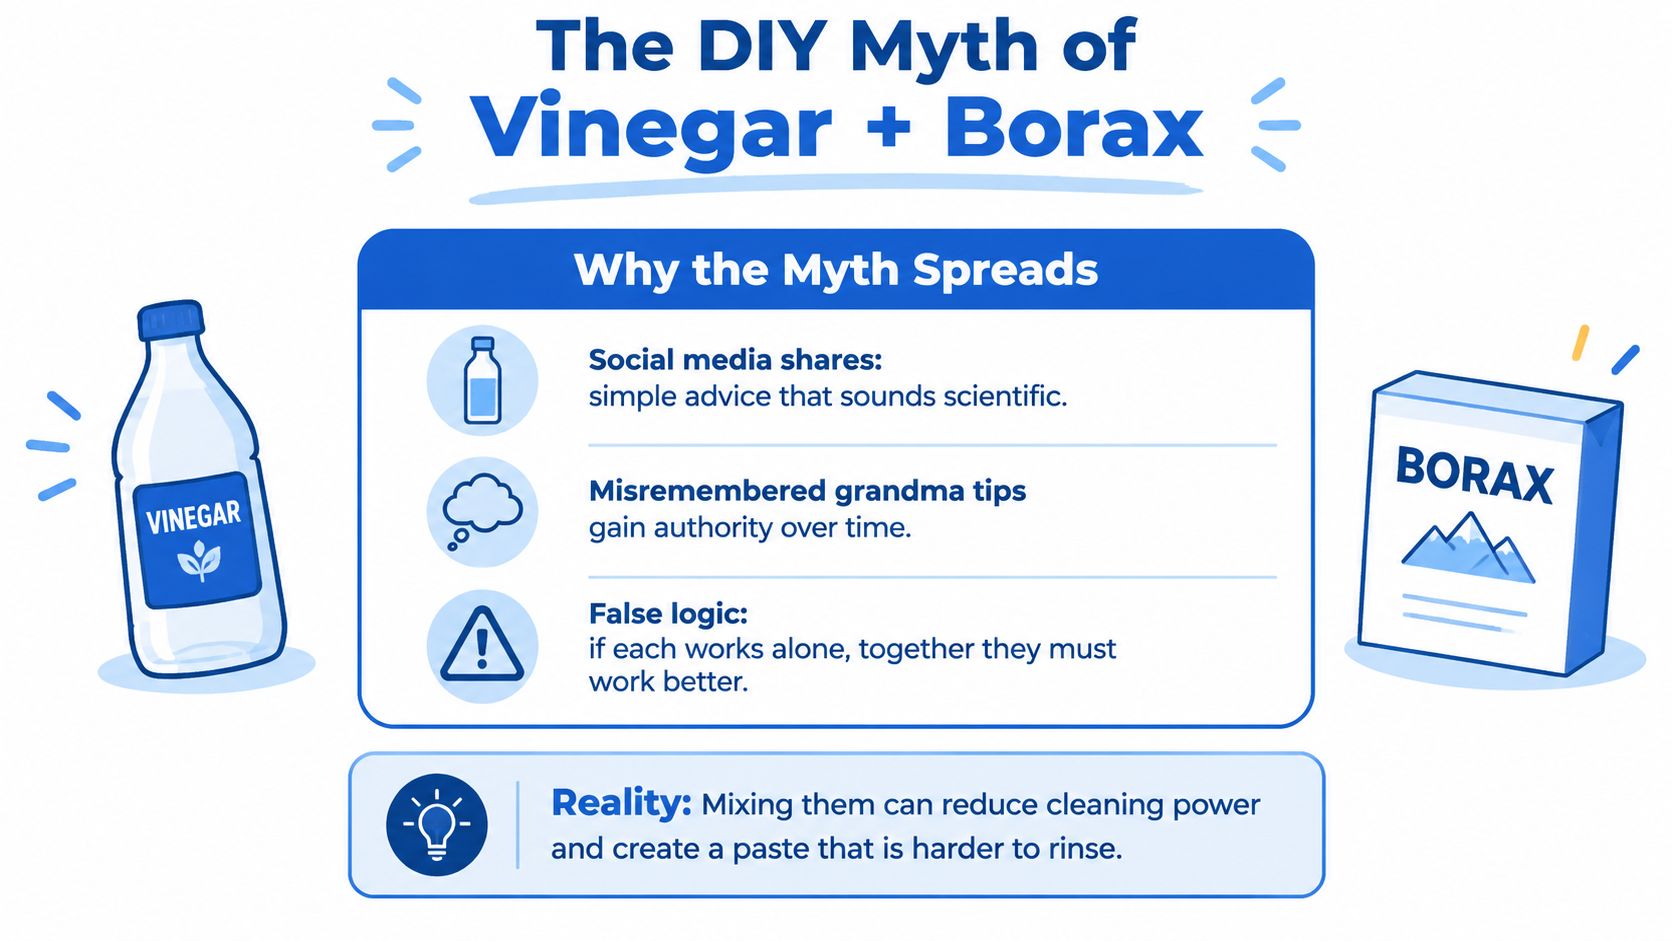
The belief that vinegar and borax supercharge each other comes from a simple but incorrect assumption. If two household ingredients work separately, many people expect them to work even better together. Social posts, old cleaning routines, and recipes passed along without chemical context can make that idea feel established, even when the mixture has no special advantage.
Both ingredients have legitimate uses. Vinegar's acidity helps loosen light mineral deposits, hard-water film, and some soap residue. Borax, an alkaline mineral salt, can support cleaning on compatible greasy or stubborn soils and may add mild scrubbing action when used as a paste. Their strengths point in different directions, though. Combining them doesn't create a stronger all-purpose formula.
Why visible activity can mislead you
A bubbling or changing texture can look like proof that a powerful reaction is happening. Borax and vinegar don't produce the dramatic carbon-dioxide fizz associated with an acid and baking soda, however. A mild texture change, some warming, or a paste forming doesn't show that the mixture cleans better.
If a combined recipe seems to work, the result may come from scrubbing pressure, contact time, the amount of original product, or rinsing water, not from a cleaning boost. The mixture can also leave residue that takes more effort to remove.
Practical rule: A reaction is not the same thing as improved cleaning. Choose the ingredient that matches the mess.
Use vinegar alone for compatible mineral deposits. Use borax alone for selected oily or stubborn soils, with appropriate dilution and rinsing. Apply one product at a time, rinse the surface thoroughly, and never add vinegar or borax to chlorine bleach, ammonia, or another cleaner.
The history of vinegar helps explain why people trust it as a household staple. It's one of the world's oldest prepared foods and preservatives, with documented use around 3000 BCE in ancient Babylon and broader historical summaries placing recorded use at more than 10,000 years (historical overview of vinegar). Borax also developed into a major industrial material through mineral extraction and trade, with early sources believed to include Tibetan lakes and later deposits found in California (environmental health history of borax). Long household use doesn't mean every combination is chemically helpful.
The Chemistry of What Actually Happens in the Bottle
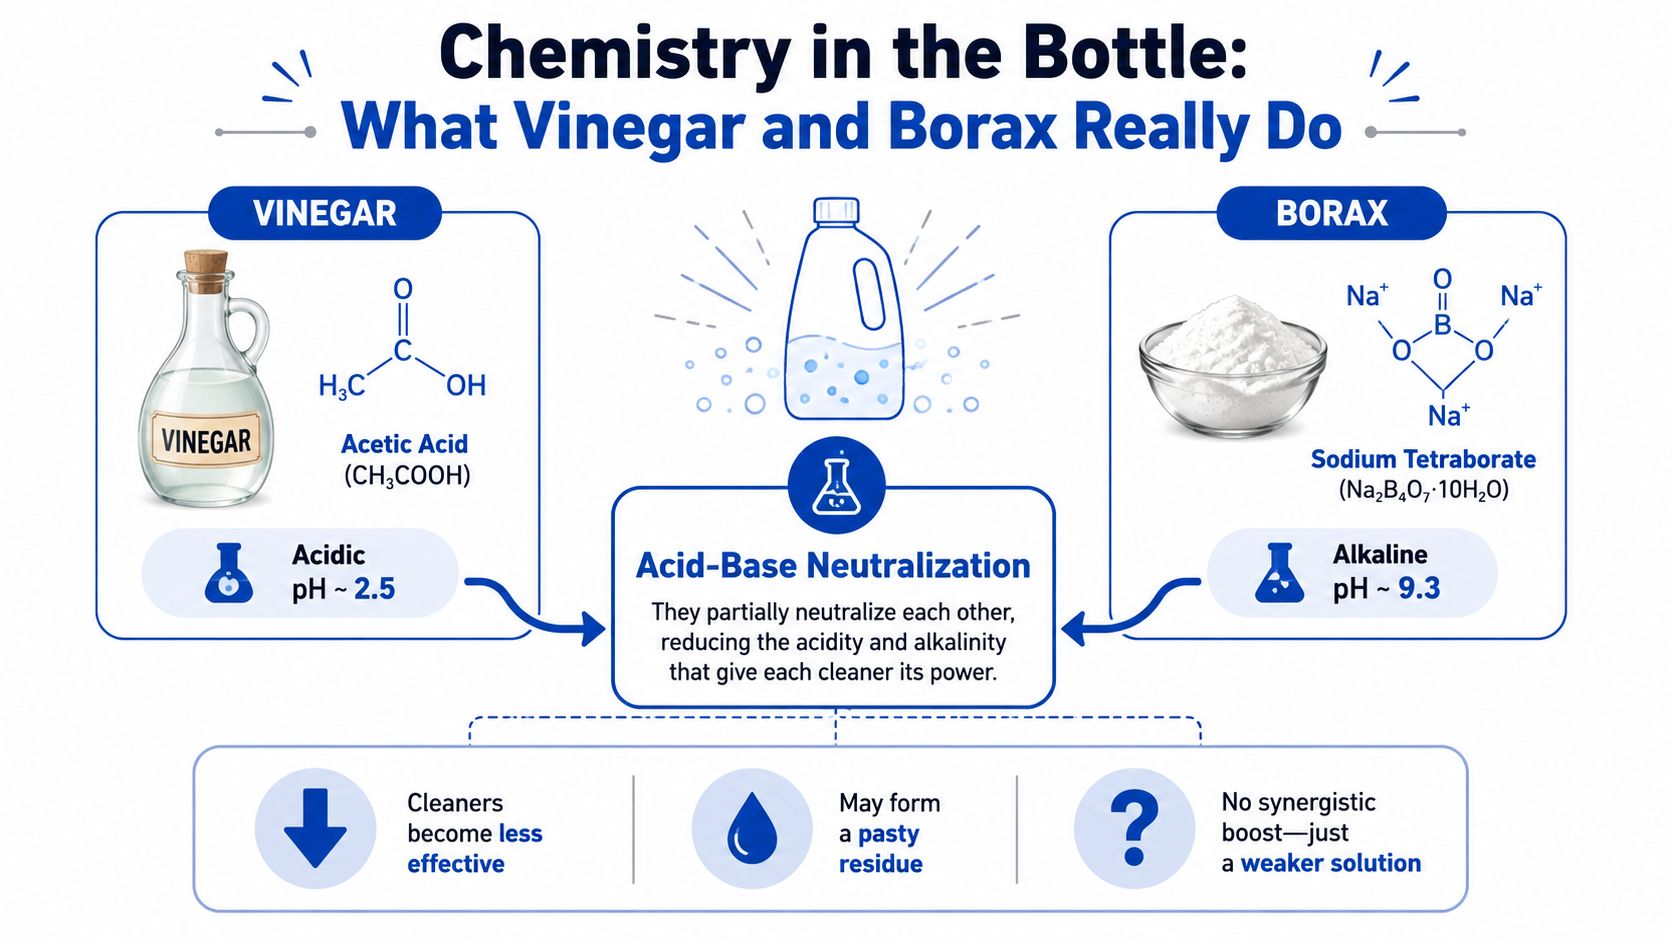
Vinegar is an acidic liquid, and borax is an alkaline compound. Standard commercial vinegar generally falls within a pH range of 2.0 to 3.5 and commonly contains 4% to 5% acetic acid (ScienceDirect's vinegar reference). When you combine the two, the acid reacts with the alkaline borate.
That reaction is called acid-base neutralization. The mixture trends toward a less acidic, less strongly alkaline solution, which means it loses some of the pH-driven behavior that makes each ingredient useful by itself. A published simplified equation represents the reaction as sodium borate, acetic acid, and water forming boric acid, sodium acetate, and additional water (chemical equation for vinegar and borax).
A simple way to picture the reaction
Think of the ingredients as two people pulling a rope in opposite directions. Vinegar pulls the solution toward acidity. Borax pulls it toward alkalinity. When they meet, each reduces the other's influence rather than adding a third, stronger force.
That doesn't mean the resulting household mixture is automatically a dangerous new chemical under ordinary conditions. It means the formula is less predictable and usually less effective than separate applications. It may also become pasty or leave a film that's harder to rinse from grout, textured tile, or a kitchen sink.
The chemistry also explains why borax doesn't behave like baking soda in this situation. Borax is a base, but it isn't the same ingredient as sodium bicarbonate, and vinegar plus borax doesn't create the large carbon-dioxide release that produces familiar fizzing. No dramatic bubbling is not a sign that nothing happened, and bubbling would not prove better cleaning anyway.
The better sequence
Use one cleaner according to the soil, remove it completely, and then decide whether a second step is needed. Vinegar may loosen mineral film on a compatible nonporous surface. After rinsing, a properly diluted borax solution may address a different type of soil, but only if the surface can tolerate it and the label directions support that use.
Never mix either product with chlorine bleach. Don't assume a neutralized mixture is safe to store just because it seems mild. The chemistry favors separate bottles and separate decisions, not a one-bottle shortcut.
Vinegar vs Borax as Standalone Cleaners
Vinegar and borax aren't interchangeable. Vinegar is the more natural fit for alkaline mineral deposits, while borax's alkaline character makes it more useful for certain oily or acidic soils. Independent cleaning-industry testing found vinegar relatively effective at reducing microbial contamination but least effective at removing soil, while borax wasn't effective at reducing microbial contamination in that study (cleaning test discussion).
That distinction matters in a bathroom. Vinegar may help with a chalky hard-water ring on compatible glass or glazed tile, but it isn't a universal disinfectant, degreaser, or stain remover. Borax may loosen stubborn grime or support detergent performance, but it isn't bleach and shouldn't be treated as a disinfectant.
What each cleaner does best
Vinegar is practical for light scale, mineral streaks, and some soap film on acid-compatible surfaces. It rinses readily and works without the powdery residue that borax can leave behind. Its limitation is surface sensitivity. Acid can damage natural stone and some cement-based materials.
Borax is more appropriate for selected greasy soil, laundry support, and stubborn grime on compatible surfaces. A paste can provide mild abrasive action, but the powder must dissolve or rinse away fully. Poor rinsing can leave a pale, gritty residue along grout lines or on floors.
| Feature | Vinegar | Borax |
|---|---|---|
| Basic chemistry | Acidic acetic-acid solution | Alkaline mineral salt |
| Best soil match | Light mineral deposits, hard-water film, and some soap residue | Selected oily soil, stubborn grime, and detergent-supporting tasks |
| Microbial cleaning | May reduce microbial contamination, but isn't a complete disinfecting solution | Not effective at reducing microbial contamination in the cited test |
| Main surface concern | Can etch acid-sensitive stone and cement-based surfaces | Can leave powdery residue and requires careful handling |
| Best practice | Use alone, spot-test, and rinse | Dilute, ventilate, spot-test, and rinse thoroughly |
The practical decision is simple: match the cleaner to the soil, then check the surface. A neutral tile cleaner may be gentler for routine flooring than either pantry ingredient. Vinegar and borax are useful tools, not universal replacements for specialty products.
Safe DIY Recipes and Dilution Ratios for Each Ingredient
The safest DIY approach keeps vinegar and borax in separate recipes. Measure with ordinary kitchen spoons or a measuring cup, label any prepared solution, and test an inconspicuous area before treating a visible surface.
Vinegar recipes
For a routine spray, combine equal parts water and vinegar. This 1:1 mixture works for compatible countertops, glass, and quick bathroom touch-ups. Spray the cloth or surface lightly, wipe, and rinse food-contact areas with clean water.
For heavier soap film in a tub or shower, use 2 parts water to 1 part vinegar. Apply it to the affected area, allow short contact time, scrub with a non-scratch pad, and rinse thoroughly. Don't use this recipe on marble, travertine, limestone, or unsealed concrete.
Undiluted white vinegar can be used as a short grout treatment only when the grout and surrounding surface are acid-compatible. Apply it for 5 to 10 minutes, scrub gently, and rinse completely. For broader grout-care guidance, see Sunny Day Pro's guide to vinegar and baking soda cleaning, but don't interpret a baking-soda recipe as support for mixing baking soda with borax.
Borax recipes
For stained grout or stubborn grime on a compatible surface, make a paste with 1/4 cup borax and 2 tablespoons water. Spread it thinly, scrub with a grout brush, and rinse until no powder remains.
For a floor-mopping solution, dissolve 1/2 cup borax in 1 gallon of warm water. Use a well-wrung mop, ventilate the room, and follow with a clean-water rinse when residue is possible.
As a laundry booster, dissolve 2 tablespoons borax in 2 cups hot water before adding it to the wash. Keep the product away from children and pets, and don't use it as a substitute for a disinfectant.
| Job | Vinegar Recipe | Borax Recipe |
|---|---|---|
| Routine spray | 1 part water plus 1 part vinegar | Not the right format for a spray unless fully dissolved and approved for the surface |
| Soap film | 2 parts water plus 1 part vinegar | Use a separate diluted solution for compatible stubborn soil |
| Grout treatment | Undiluted vinegar for 5 to 10 minutes, only on compatible grout and tile | 1/4 cup borax plus 2 tablespoons water as a paste |
| Floor cleaning | Use only on acid-compatible flooring | 1/2 cup borax in 1 gallon warm water |
| Laundry support | Not a laundry booster for every fabric or machine | 2 tablespoons borax in 2 cups hot water |
Never combine the recipes. If you change products, rinse the surface first so the ingredients don't meet in a concentrated patch.
Surface Compatibility for Tile, Grout, and Natural Stone
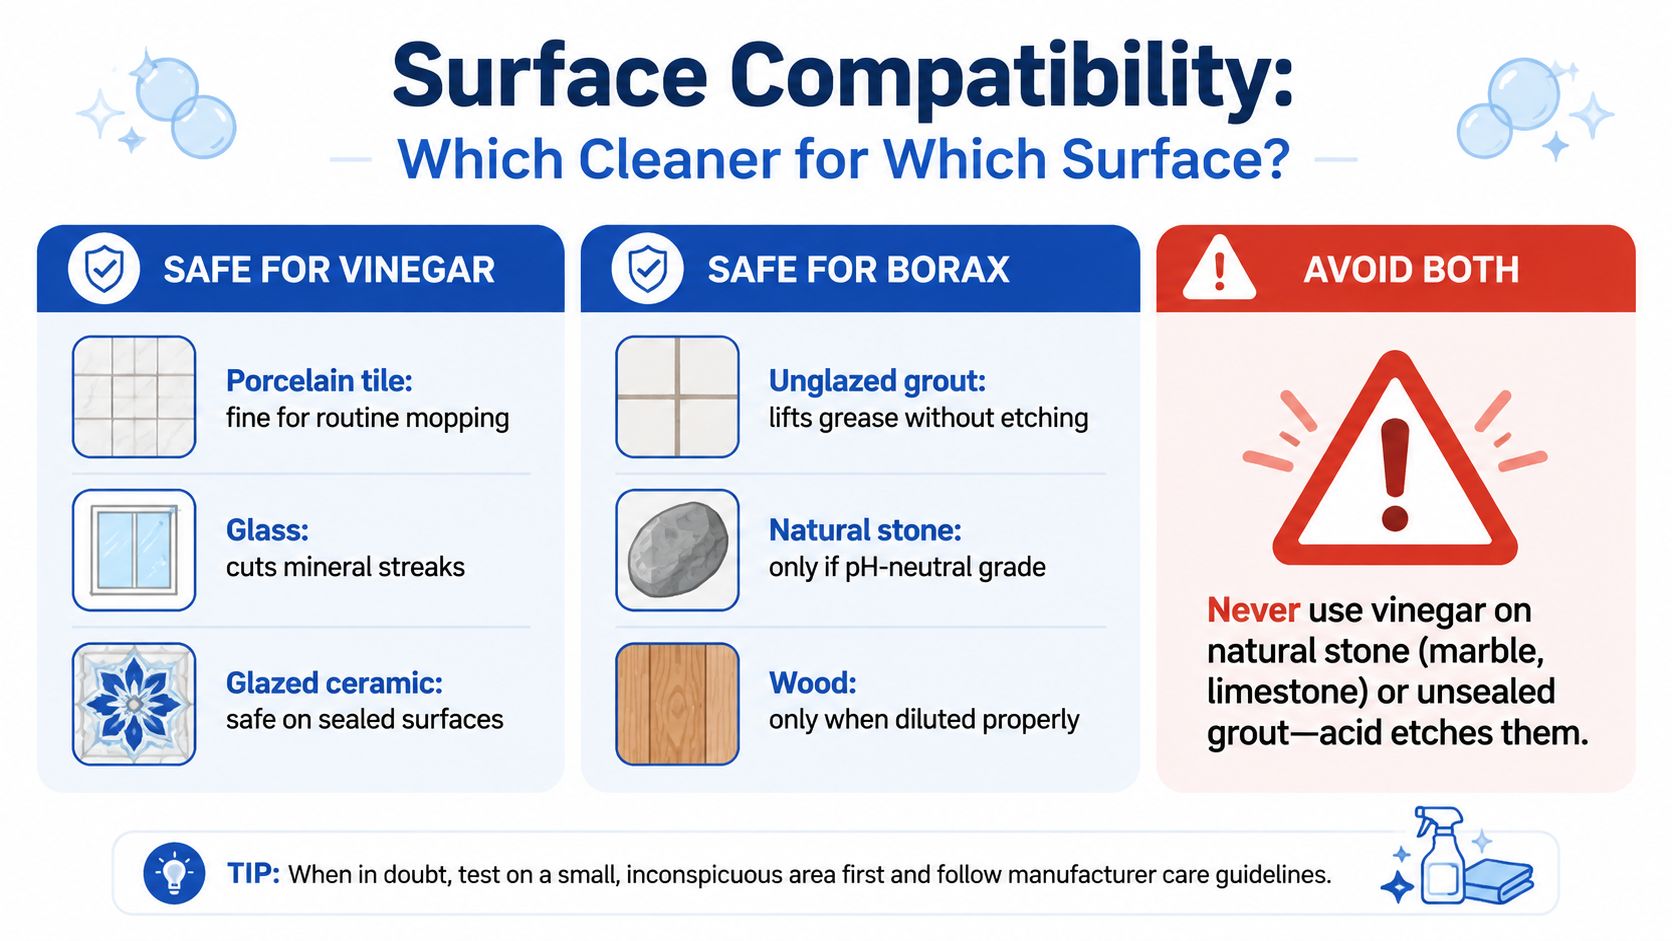
The same bottle can be helpful on one surface and damaging on another. Vinegar is generally suitable for porcelain tile, glazed ceramic tile, and glass, provided the surface is in good condition and the cleaner is rinsed. Its acidity can dissolve mineral deposits, but that same chemistry can attack calcium-rich materials.
Keep vinegar away from marble, travertine, limestone, and unsealed concrete. These materials are acid-sensitive, and etching can leave dull spots quickly. Unsealed or cement-based grout also deserves caution because repeated acid exposure can weaken or roughen the surface.
A surface-by-surface decision
Porcelain tile usually tolerates diluted vinegar and properly diluted borax, but rinse both products so residue doesn't dull the finish. Glazed ceramic tile can also handle vinegar for mineral streaks when the glaze is intact.
Grout requires more judgment. Short vinegar contact may be acceptable on sealed grout, but use caution around unsealed grout and rinse promptly. Borax can be the more suitable choice for selected grime because its alkalinity doesn't etch stone, although it still needs dilution, spot-testing, and a complete rinse. Sunny Day Pro's tile and grout cleaning guidance can help when grout needs more than a surface wipe.
Natural stone requires a stone-safe, pH-neutral product unless the manufacturer specifically approves another cleaner. Borax may be preferable to vinegar for some stone-care situations, but “safer” doesn't mean automatically safe. Test first, use a diluted solution, and remove residue.
For sealed hardwood, laminate, and engineered wood, a carefully diluted borax mop may be preferable to repeated vinegar mopping, which can affect some wax or protective finishes. Keep liquid controlled and avoid leaving moisture on the floor.
Quick rule: Vinegar for mineral film on compatible hard surfaces. Borax for selected grime on compatible surfaces. Neutral cleaner for routine care when you're uncertain.
Safety, Ventilation, and Pet and Child Precautions
Use ventilation with both products, especially in a small bathroom or kitchen. Open windows or run the bathroom fan while working with borax solutions, and avoid creating airborne dust when measuring the powder. Gloves help prevent dryness and irritation, while safety glasses are sensible when mixing a borax paste.
Borax can be toxic if ingested. Store the original powder and every prepared solution in a sealed, clearly labeled container that children and pets can't reach. Rinse any surface that may contact food with clean water after cleaning.
Handling rules that matter
- Protect your skin: Wear nitrile or rubber gloves when handling vinegar or borax.
- Protect your eyes: Use safety glasses when making borax paste or working above shoulder height.
- Control borax concentration: Keep working mop solutions at or below 1/2 cup per gallon. This limit is also the stated floor-solution ratio in the recipe above.
- Limit vinegar fumes: In enclosed spaces, keep vinegar at or below a 1:1 water-to-vinegar mixture. Stronger odor doesn't mean stronger cleaning.
- Store responsibly: Label bottles with the ingredient and dilution, and never store a mixed vinegar-borax solution as though it were a finished cleaner.
- Avoid dangerous combinations: Never mix vinegar or borax with chlorine bleach, ammonia, or other household cleaners.
The California parks guidance highlights the overlooked side of DIY cleaning, surface damage, ventilation, dilution, and ingestion risk (surface and health precautions). “Natural” doesn't mean harmless in every concentration or setting.
For toilet work, don't improvise combinations inside the bowl. Use a compatible product according to its label, ventilate the room, and keep children and pets away until the area is rinsed and dry. Sunny Day Pro's guidance on an acid toilet bowl cleaner offers a useful reminder that acids require deliberate surface and safety decisions.
If a child or pet swallows borax, contact poison control or a veterinarian immediately. Don't wait for symptoms before seeking professional advice.
Eco-Friendly Alternatives Worth Reaching For
Sometimes the smartest green-cleaning choice is neither vinegar nor borax. A pantry-based kit works better when each product has a defined job instead of forcing one formula to handle every stain.
Citric acid is a low-odor acidic option for alkaline mineral deposits and some rust-related bathroom buildup. It can be useful in bathrooms and dishwashers where vinegar's smell is unpleasant, but it still requires care around acid-sensitive stone and finishes.
Washing soda, or sodium carbonate, is a stronger alkaline option for greasy laundry presoaks and oven grime. A common working ratio is 1 tablespoon per gallon of hot water, but the Utah State University cleaning-chemicals guidance is a better reference for understanding why alkaline cleaners suit oily soils and why separate use matters.
3% hydrogen peroxide can help with organic grout stains, mildew on caulk, and whitening tasks. It isn't chlorine bleach, and it should still be spot-tested because colorants, sealers, and fabrics can react differently.
Liquid castile soap is a gentle everyday option for floors and countertops when diluted to 1:100. Use only enough to clean without leaving a slippery soap film, and avoid combining it with acids or other concentrated cleaners.
| Alternative | Best Cleaning Jobs | Typical Dilution | Avoid On |
|---|---|---|---|
| Citric acid | Mineral deposits, rust-related bathroom buildup, dishwasher scale | Follow the product label | Marble, limestone, travertine, and other acid-sensitive surfaces |
| Washing soda | Greasy laundry presoaks, oven degreasing | 1 tablespoon per gallon hot water | Delicate fabrics and surfaces that require neutral cleaning |
| 3% hydrogen peroxide | Organic grout stains, mildew on caulk, whitening | Use the labeled concentration | Untested colored fabrics, finishes, and sealers |
| Liquid castile soap | Everyday floors and countertops | 1:100 in warm water | Surfaces where soap residue or excess moisture can cause problems |
A small starter kit of these four products gives you separate tools for mineral film, grease, organic staining, and routine soil. Keep the bottles labeled, and don't judge safety by the word “eco-friendly” alone.
When to Call a Professional Instead of DIYing
Pantry cleaners can remove surface soil, but they can't rebuild failing grout, reverse deep stone damage, or solve a moisture problem hidden behind a wall. Call a tile and grout restoration specialist when grout is crumbling, missing in patches, or permanently darkened by mold that returns soon after cleaning.
Natural stone also deserves professional attention when marble, travertine, or limestone shows etch marks or dull spots after exposure to an acidic DIY cleaner. Honing and polishing require specialized diamond abrasives, controlled technique, and an understanding of the stone's finish. More scrubbing usually makes the appearance worse.
Situations that need more than a household recipe
- Recurring mold: If mold returns shortly after cleaning, the source may involve moisture, ventilation, or damaged grout rather than dirty tile.
- Water emergencies: Sewer backups and flooding require more than deodorizing and wiping. Moisture mapping and appropriate antimicrobial treatment may be necessary.
- Large mold areas: Mold growth covering more than 10 square feet calls for professional assessment and remediation planning.
- Persistent odors or dust: If household dust and odors remain after thorough surface cleaning, a duct or HVAC specialist may need to inspect the system.
- Damaged flooring: Warped boards, loose tile, hollow-sounding tile, and failed transitions need repair, not stronger chemicals.
Ask any contractor for a written scope of work, photos of comparable stone or grout restoration, and proof of insurance. Those details help you compare a real repair plan with a promise that another stronger cleaner will solve everything.
For homeowners in the greater Boston and North Shore area, Sunny Day Pro Services handles recurring cleaning, deep cleaning, move-in and move-out service, post-construction cleanup, and tile and flooring installation. Their team can also discuss eco-friendly cleaning options when a pantry recipe isn't appropriate for the surface or the condition.
If vinegar and borax have left residue, damaged grout, or failed to solve a larger cleaning problem, Sunny Day Pro Services offers professional house cleaning, tile and grout care, and flooring services across nearby Massachusetts communities. Request a quote for a careful surface assessment and a cleaning plan that fits your home.

