
Bathroom Remodel Checklist: 10 Essential Phases
Follow this bathroom remodel checklist for budgeting, permits, tile, inspections, cleanup, and maintenance in Massachusetts.
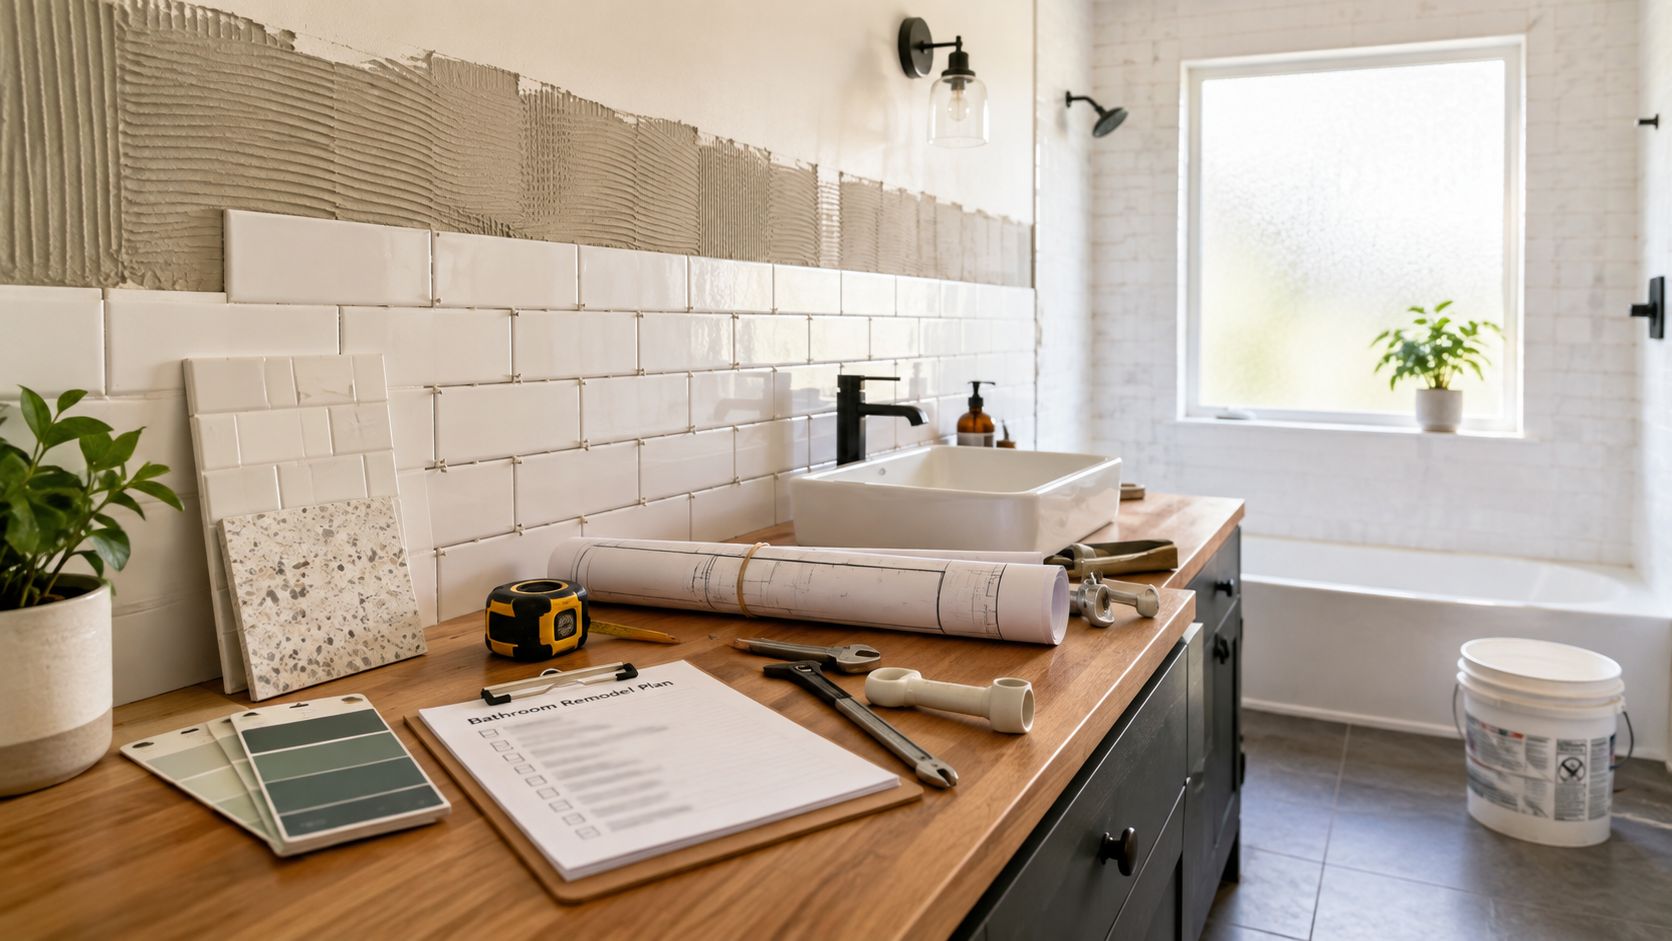
A Massachusetts bathroom remodel can look simple on the design board and still become stressful once the walls open. A hidden leak, a permit delay, a missing trim piece, or an electrician waiting on a plumbing decision can push the project off schedule and turn a controlled renovation into an expensive sequence of changes.
This bathroom remodel checklist follows the project phase by phase, from budget and inspection through waterproofing, tile installation, fixture connections, inspections, cleaning, and final handoff. Use it to organize contractor conversations, compare itemized estimates, schedule decisions before demolition, and keep evidence for inspections and warranties. Cost figures below are planning references rather than promises. Your town, home construction, scope, material selections, and concealed conditions will determine the actual estimate.
Requirements also vary between Massachusetts communities, including Wayland, Newton, Needham, Wellesley, Weston, and nearby towns. A licensed contractor, plumber, and electrician should confirm current plumbing, electrical, building, permit, ventilation, and hazardous-material requirements before work begins. The checklist supports estimates, inspections, and a cleaner closeout, but it doesn't replace local approvals or professional judgment.
Table of Contents
- Keep a printable closeout record
- Establish a tile and grout maintenance routine
- Frequently asked questions
- Recommended search and content markup
1. Plan Your Budget and Establish Financial Parameters
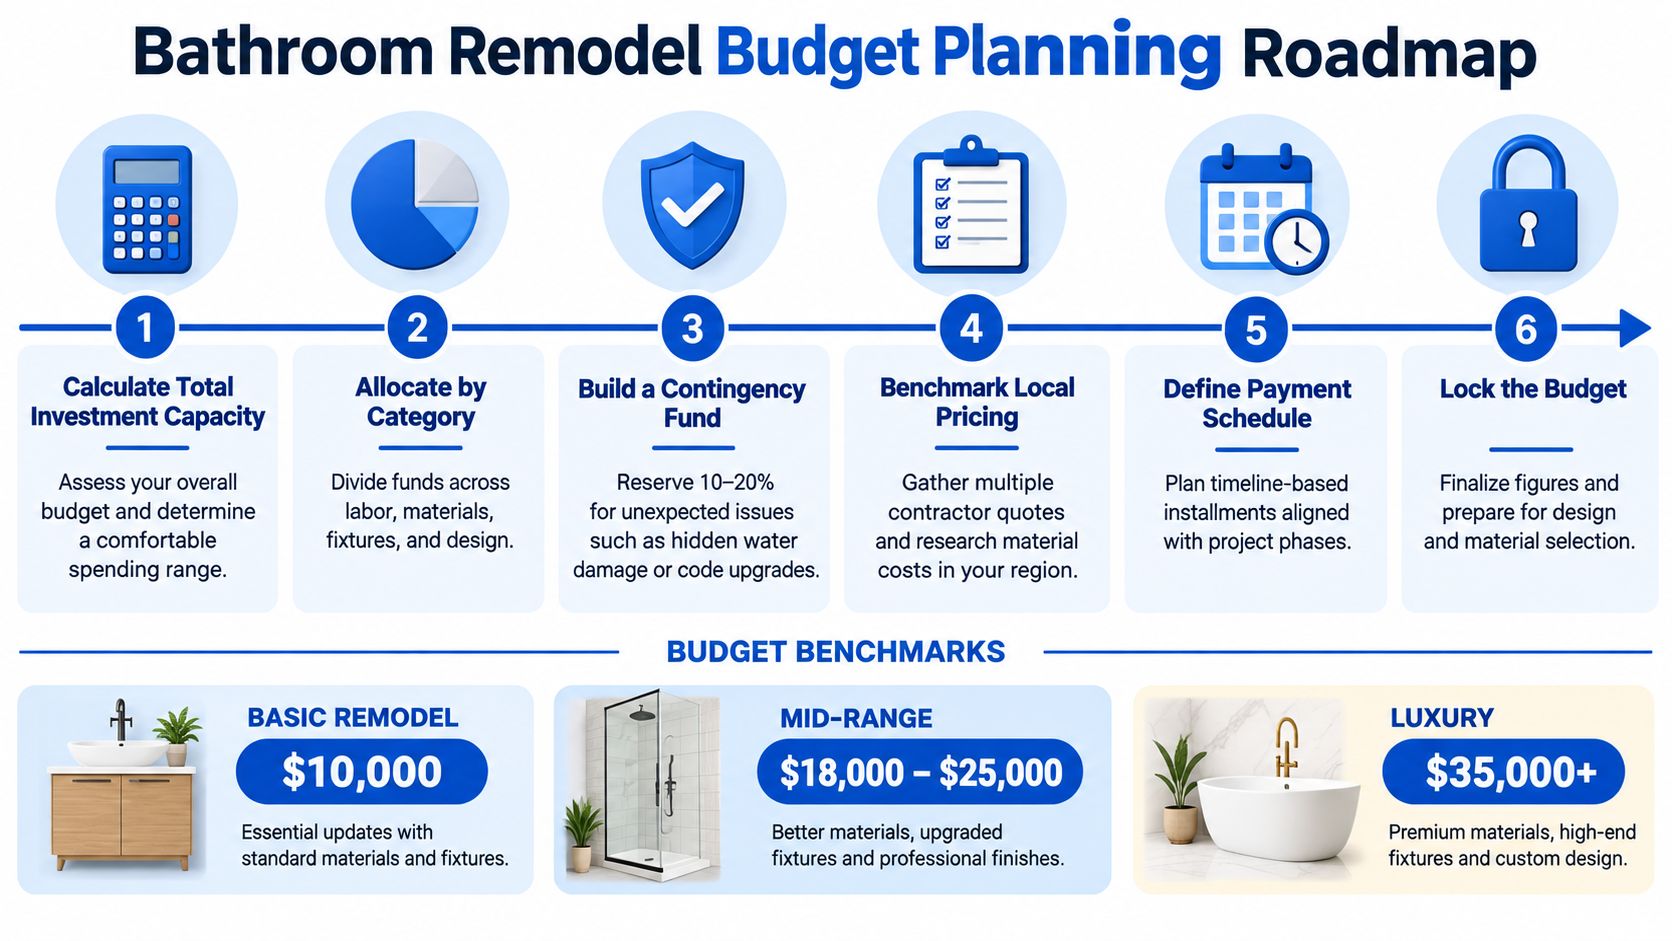
Start with the total project envelope, not with a faucet or a tile sample. Decide whether you're planning a cosmetic refresh, a replacement of major fixtures, or a full renovation involving layout changes, new plumbing, electrical work, waterproofing, and custom tile. Each choice affects labor, material lead times, inspection points, and the number of trades that must coordinate.
Recent U.S. consumer cost references place the typical bathroom remodel in a fairly narrow range. HomeAdvisor's 2025 bathroom remodel data reports about $12,151, with a common range of $6,651 to $17,657, while Angi reports an average of $12,118, with a range of $6,639 to $17,620. Houzz found a $13,000 national median spend in 2024, down from $15,000 in 2023. These are national reference points, not a Massachusetts quote.
Build the budget around decisions
Request an itemized estimate that separates labor, demolition, tile and flooring, fixtures, plumbing, electrical, permits, waterproofing, painting, cleanup, and allowances. A single total makes it difficult to understand whether a change affects materials, labor, or both.
Use these actions before signing:
- Compare local estimates: Ask qualified contractors to price the same written scope so you're comparing like with like.
- Research material pricing: Check local suppliers for tile, trim, grout, vanities, faucets, toilets, lighting, and shower components before approving allowances.
- Protect a reserve: Keep money available for concealed damage, substrate repairs, plumbing changes, or electrical corrections discovered after demolition.
- Review insurance: Ask your homeowner's insurance representative how renovation-related damage, temporary conditions, or contractor-caused losses are handled under your policy.
- Define exclusions: Confirm who pays for design revisions, disposal, delivery, storage, permit fees, inspection corrections, and extra preparation.
A good budget also separates wants from requirements. Heated floors, a rain shower, a larger vanity, premium stone, and decorative niches may be worthwhile, but they should not consume funds needed for sound framing, safe electrical work, plumbing, or waterproofing. For more local planning context, review this guide to bathroom remodeling near Massachusetts homeowners.
2. Assess Current Bathroom Condition and Identify Hidden Issues
A bathroom can look ready for finishes while the framing, subfloor, or plumbing behind it needs work. Before the design and permit scope are finalized, have the contractor inspect the structure, wall condition, supply and drain lines, electrical system, exhaust route, and signs of prolonged moisture.
Older Massachusetts homes need a closer review. Previous renovations may have added tile over tile, patched plumbing, weak ventilation, or outdated wiring. Water stains, soft flooring, musty odors, peeling paint, cracked grout, and loose tile warrant further investigation. A clean surface does not confirm that the assembly behind it is dry.
Ask the contractor to show you what the inspection found, preferably with photographs and locations marked on the plan. Separate observed damage from suspected conditions and confirmed repairs. If the room has a leak history, ask whether moisture testing is appropriate. If demolition may disturb old insulation, pipe wrap, flooring, or paint, confirm how hazardous materials will be evaluated before removal.
Before approving the final scope, get clear answers to these questions:
- What can remain: Which framing, subfloor, plumbing, wiring, and ventilation components are sound?
- What must open: Where is exploratory demolition needed before the estimate is reliable?
- What changes the price: How will concealed rot, mold, damaged subfloor, or settlement be documented, priced, and approved?
- What does the home's construction suggest: Could its age, foundation, or previous renovations affect the work?
- What will be recorded: Will the team photograph existing damage, shutoffs, pipe routes, and areas that could matter for insurance or future repairs?
Coordinate these findings with the plumber, electrician, waterproofing installer, and tile contractor before walls or floors close. Confirm that the substrate is firm and dry, and request waterproofing photographs before tile covers the work. Keep those records with the permit documents and final closeout checklist.
New tile over a weak or damp base only conceals the problem temporarily. The same applies to an exhaust fan. Verify that its duct vents outdoors rather than releasing moisture into an attic or wall cavity.
3. Design Your Layout and Select Fixtures That Match Your Lifestyle
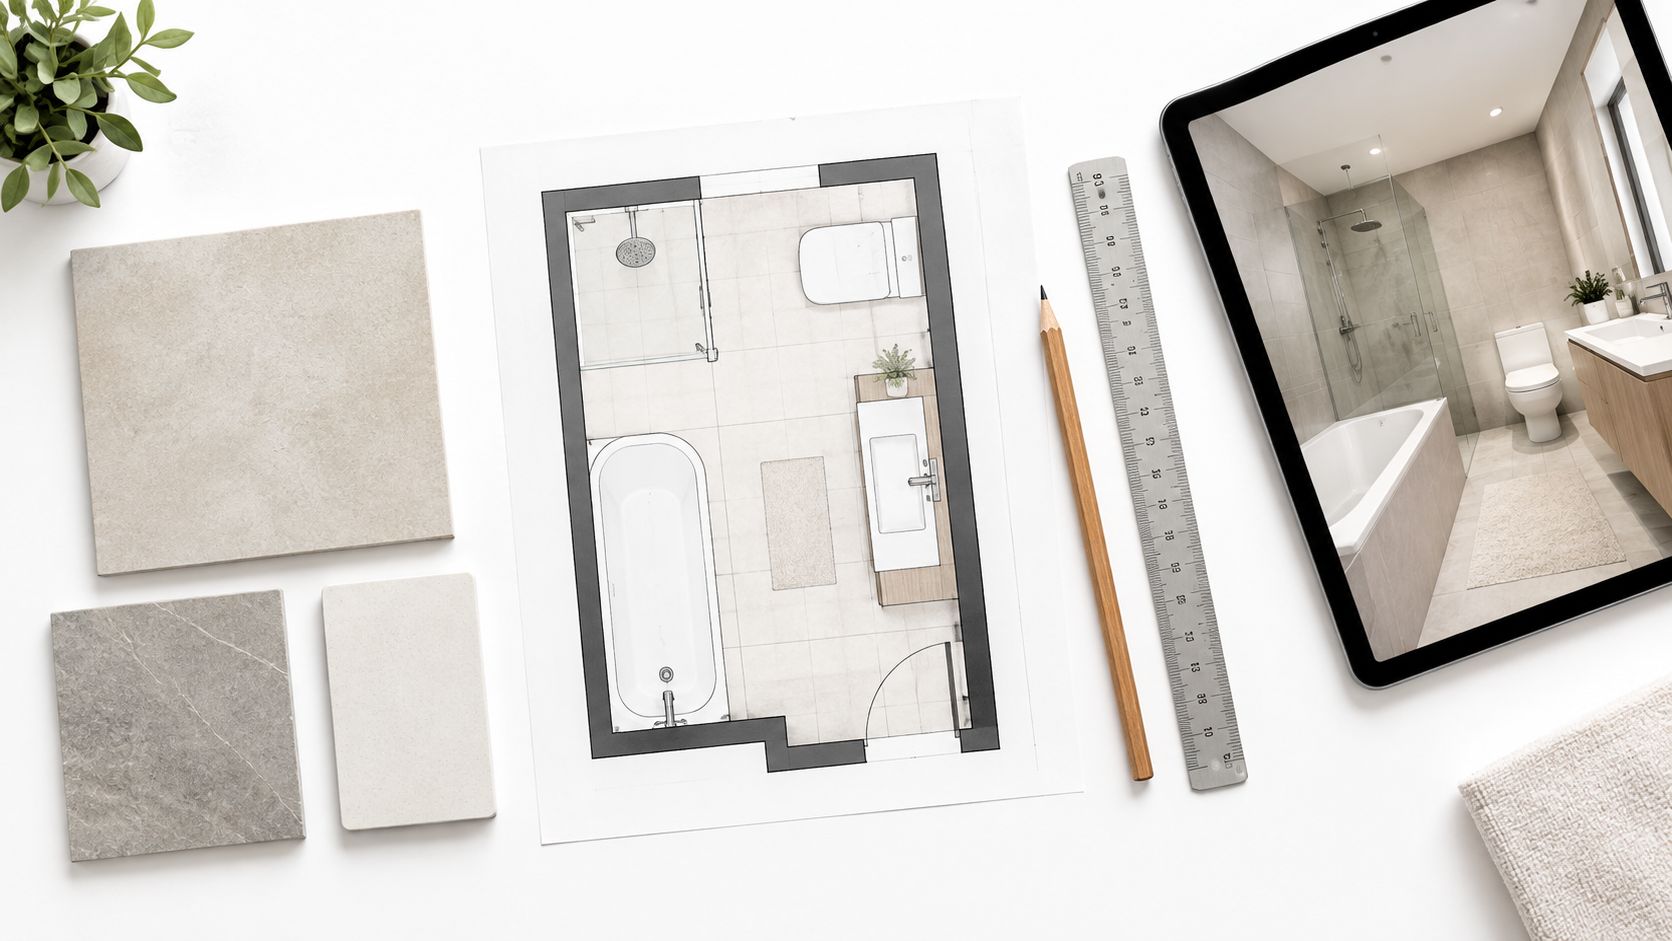
Start with a morning test. Mark the door swing, vanity, toilet, tub or shower, windows, radiators, storage, lighting, and towel accessories on the floor or a scaled plan. Walk through the room as someone washes, dresses, opens a cabinet, or assists a child or older family member. This exposes cramped clearances before a contractor orders materials.
Keeping the existing plumbing locations can control cost and simplify coordination when the arrangement already works. Moving a toilet, shower, or vanity may solve a daily problem, but it can require new rough plumbing, access through floors or walls, and revised work by the plumber, electrician, tile setter, and inspector. For a Massachusetts remodel, ask whether a layout change affects the permit drawings or inspection sequence before approving the revised plan. A larger redesign should earn its disruption by improving how the room functions.
Build the fixture package before demolition
Choose the vanity, sink, faucet, toilet, shower valve, showerhead, tub, mirror, lighting, and storage as one coordinated package. Confirm dimensions, connection locations, and installation requirements with the contractor. A wall-mounted faucet needs compatible rough-in planning. A concealed shower valve needs its finished-wall depth established before the wall closes. A lighted mirror needs an electrical box and cable access in the right location.
Use these checks:
- Household routines: Assign storage for cosmetics, towels, cleaning supplies, children's items, and mobility equipment.
- Accessibility: Ask for grab-bar blocking, curbless access, handheld controls, seating, and practical reach ranges before framing.
- Lighting: Plan general illumination, vanity task lighting, shower lighting where permitted, and softer accent light.
- Future changes: Keep shutoffs and serviceable components accessible instead of burying every connection.
- Maintenance: Select surfaces and hardware your household can clean without special treatment each week.
Review full-size samples or visit a showroom before final approval. Screens often hide texture, scale, color variation, and sheen. Verify that each product is available, compatible with the layout, and accepted by the installer. Record model numbers and substitutions in the scope so a replacement does not create a clearance or connection problem later.
4. Select Quality Tile, Flooring, and Finish Materials
For a Massachusetts bathroom remodel, choose tile by performance, installation requirements, and maintenance, then confirm the decision with the contractor before ordering. Porcelain, ceramic, natural stone, mosaics, large-format panels, and wood-look planks place different demands on the substrate, cutting, setting materials, grout, sealing, and layout. The right material fits the room, installation method, and cleaning routine your household can maintain.
Recent 2026 trend coverage reports that 89% of professionals expect demand for smaller or no grout lines, while 80% expect large-format flooring to lead over the next three years. The same bathroom design trend coverage reports a 39% increase in shower size and wet rooms reaching 16% of renovated bathrooms. These trends create practical trade-offs. Larger surfaces and fewer joints may simplify cleaning, but they demand a flat substrate, careful handling, accurate cuts, and documented waterproofing before tile covers the work.
Large-format porcelain can produce a calm, low-grout appearance, though it needs precise handling and a suitable base. Herringbone adds visual interest but increases cuts and layout sensitivity. Natural stone offers variation and depth, yet may need sealing and more deliberate cleaning.
Before approving the order, have the installer verify:
- Floor safety: Choose a finish suited to wet-foot traffic and discuss slip resistance.
- Grout type: Compare cement, epoxy, and urethane grout for appearance, stain resistance, repairability, and installer experience.
- Trim availability: Include edge profiles, bullnose pieces, niche trim, transitions, and replacement material.
- Quantity: Have the installer calculate material for cuts, pattern matching, breakage, and future attic stock. The allowance depends on the tile, room, and layout.
- Cleaning method: Confirm safe cleaners for tile, grout, stone, metal trim, and sealers.
Review full-size samples under the bathroom's lighting, beside the vanity and fixture finishes, and with the proposed grout. Record model numbers, approved substitutions, and care instructions in the scope. A material that looks excellent in a showroom can fail when installed with the wrong adhesive or over an uneven base. Keep those records for the printable closeout checklist and future repairs.
5. Plan Plumbing and Electrical Systems Upgrades
A bathroom can look fully designed while the rough-in remains unresolved. Before walls close, verify supply lines, drain locations, shutoffs, venting, shower valve depth, tub and vanity connections, lighting boxes, fan wiring, mirror power, and requirements for heated floors or towel racks. These decisions affect both the budget and the inspection schedule.
Separate plumbing and electrical allowances in the estimate. Have the licensed plumber identify changes required by the approved layout and note which existing components can remain. The licensed electrician should confirm circuit capacity, box locations, switches, lighting, fan controls, and protection requirements. Ask both trades to list any assumption that could require opening a finished wall later.
For a concrete example of outlet protection and placement, review the Salinas residential bathroom alteration guide. It is a California municipal reference, not Massachusetts code. On a Massachusetts project, your electrician and local inspector must confirm the requirements that apply. The current plan should account for GFCI protection for bathroom receptacles and a dedicated 20-amp GFCI-protected outlet within 36 inches of the outside edge of each bathroom sink basin only if those requirements are confirmed for the project.
Before rough work begins, have the trades verify these points:
- Ventilation routing: Confirm the fan exhausts outdoors through an approved route, rather than into an attic or concealed cavity.
- Service access: Keep valves, junctions, and equipment reachable for maintenance.
- Fixture compatibility: Match rough plumbing to the selected faucet, valve, toilet, tub, and drain components.
- Load requirements: Determine whether heated floors, towel warmers, lighting, or fans require dedicated circuits or other changes.
- Inspection readiness: Schedule rough inspections before insulation, backer board, or other coverings conceal the work.
Record circuit notes, valve locations, product models, and contractor responsibilities in the project file. Inspections provide checkpoints while the work remains visible, but they do not replace careful coordination between the plumber, electrician, contractor, and homeowner.
6. Obtain All Required Permits and Schedule Inspections
Start the permit conversation before demolition. Replacing a tub or shower enclosure, moving plumbing fixtures or cabinets, adding fixtures, or changing walls may require permits. Plans may also be required when walls are removed, added, altered, or fixtures are relocated. Salinas, California's residential bathroom alteration guide shows why a building department review can affect the work sequence, but Massachusetts towns set their own procedures and requirements.
Ask the contractor to list the permits that apply to your scope in writing. Confirm who submits the applications, pays fees, schedules inspections, and keeps the final approvals. Confirm whose license appears on each permit, too. With separate plumbing, electrical, and general contracting teams, assign each responsibility by name so no inspection or sign-off is missed.
Build inspections into the schedule
The town may review plans and require inspections at stages such as framing, rough plumbing, rough electrical, waterproofing where applicable, and final completion. The exact sequence depends on the project and municipality. Before work starts, ask which areas must remain exposed and which coverings are prohibited until approval. A contractor who cannot answer should contact the building department before setting dates.
Keep one project file for the homeowner, contractor, and trades:
- Approved plans: Save the approved drawings and written amendments.
- Permit records: Keep permit numbers, inspection notices, correction lists, and final approvals.
- Trade documentation: Store license and insurance details, invoices, product records, and warranties.
- Photographic evidence: Photograph framing, blocking, rough work, and waterproofing before they are concealed.
- Change approvals: Record scope changes and their cost impact before the crew proceeds.
A failed or postponed inspection can affect tile, drywall, fixture, or closeout timing, so leave schedule space for corrections. Do not allow pressure to cover work that has not been inspected. If the layout or scope changes, ask whether the town requires amended plans. A complete record supports future maintenance, insurance questions, and a later sale.
7. Prepare for Demolition and Contain Disruption Properly
At 7 a.m., the crew removes the first fixture, and the bathroom becomes a worksite. Before that happens, agree on how dust, debris, water, noise, foot traffic, and service interruptions will be handled. This matters even more when the bathroom sits beside a bedroom, nursery, finished hallway, or HVAC return.
Walk the route with the contractor. Confirm how adjacent floors and walls will be protected, where debris will go, how often it will leave the house, and what gets cleaned before the crew departs. Sealed doorways, plastic barriers, floor protection, HEPA filtration, and a defined exterior route help keep a Massachusetts home livable during the remodel. Busy homeowners in Sunny Day Pro Services communities should also identify who receives daily updates when they cannot be present.
Set the safety and access plan before demolition
Older homes may contain asbestos, lead, or mold. Ask the contractor whether testing or a licensed evaluation is needed, who will arrange it, and what happens if suspect material appears. Work should pause until the concern is assessed and the required response is clear.
Put these decisions in writing:
- Utility shutoffs: Identify water, electrical, and other services that must be isolated, and confirm who controls them.
- Bathroom access: Decide which bathroom the household will use and how long this one may be unavailable.
- Containment boundaries: Mark the work zone and protect the path from the bathroom to the exterior.
- Daily cleanup: Require loose debris removal plus reasonable sweeping or HEPA cleaning as part of the daily routine.
- Salvage decisions: Mark vintage fixtures, doors, hardware, or trim for preservation before removal begins.
- Discovery protocol: Agree on how concealed damage will be photographed, priced, and approved before additional work starts.
Do not open the walls until selected fixtures, tile, trim, valves, and other long-lead components are ordered when practical. A missing valve or delayed niche insert can leave the room open while the household waits for one part. Confirm the storage location for delivered materials, the expected demolition duration, and the contractor's contact for same-day problems.
8. Install Waterproofing and Moisture Barriers Before Finishing
Before tile arrives, treat waterproofing as a documented phase of the remodel. The assembly must direct water to the drain and limit infiltration into framing, the subfloor, and adjacent rooms. Ask the contractor to identify the substrate, membrane, shower pan, curb, drain, corners, penetrations, seams, and transitions, then explain how those components work together.
A bathroom remodeling planning guide recommends waterproof protection for shower walls, shower floors, tub surrounds, and the floor around the toilet. It also notes that shower pan waterproofing is commonly leak-tested by filling the pan to curb height and monitoring it for 24 hours before tile installation. Confirm the testing method with the installer and ask where the result will be recorded.
Make the hidden work verifiable
Request progress photos before the membrane disappears behind tile. The photo set should show corners, niches, benches, pipe penetrations, drain connections, seams, and the area around the toilet. Photos support the project record, but they do not replace the manufacturer's instructions, an inspection, or a required test.
Use the contractor's answers to confirm:
- Drainage: The shower pan and finished surfaces slope toward the drain without low spots.
- Membrane continuity: The waterproofing system matches the board, pan, drain, sealants, and setting materials.
- Penetrations: Valves, shower arms, niches, benches, and fasteners are sealed according to system requirements.
- Corners and movement joints: Flexible sealant is used where specified instead of treating every joint as grout.
- Flood testing: The contractor confirms whether the pan requires testing before tile and places the result in the project file.
- Ventilation: The moisture-control plan coordinates with the exhaust fan and duct route.
Keep this checkpoint in the printable closeout file, especially if you cannot visit the job daily. A low bid can become expensive when waterproofing receives little time or documentation. Tile can be removed, but moisture damage behind a finished shower is disruptive and harder to diagnose.
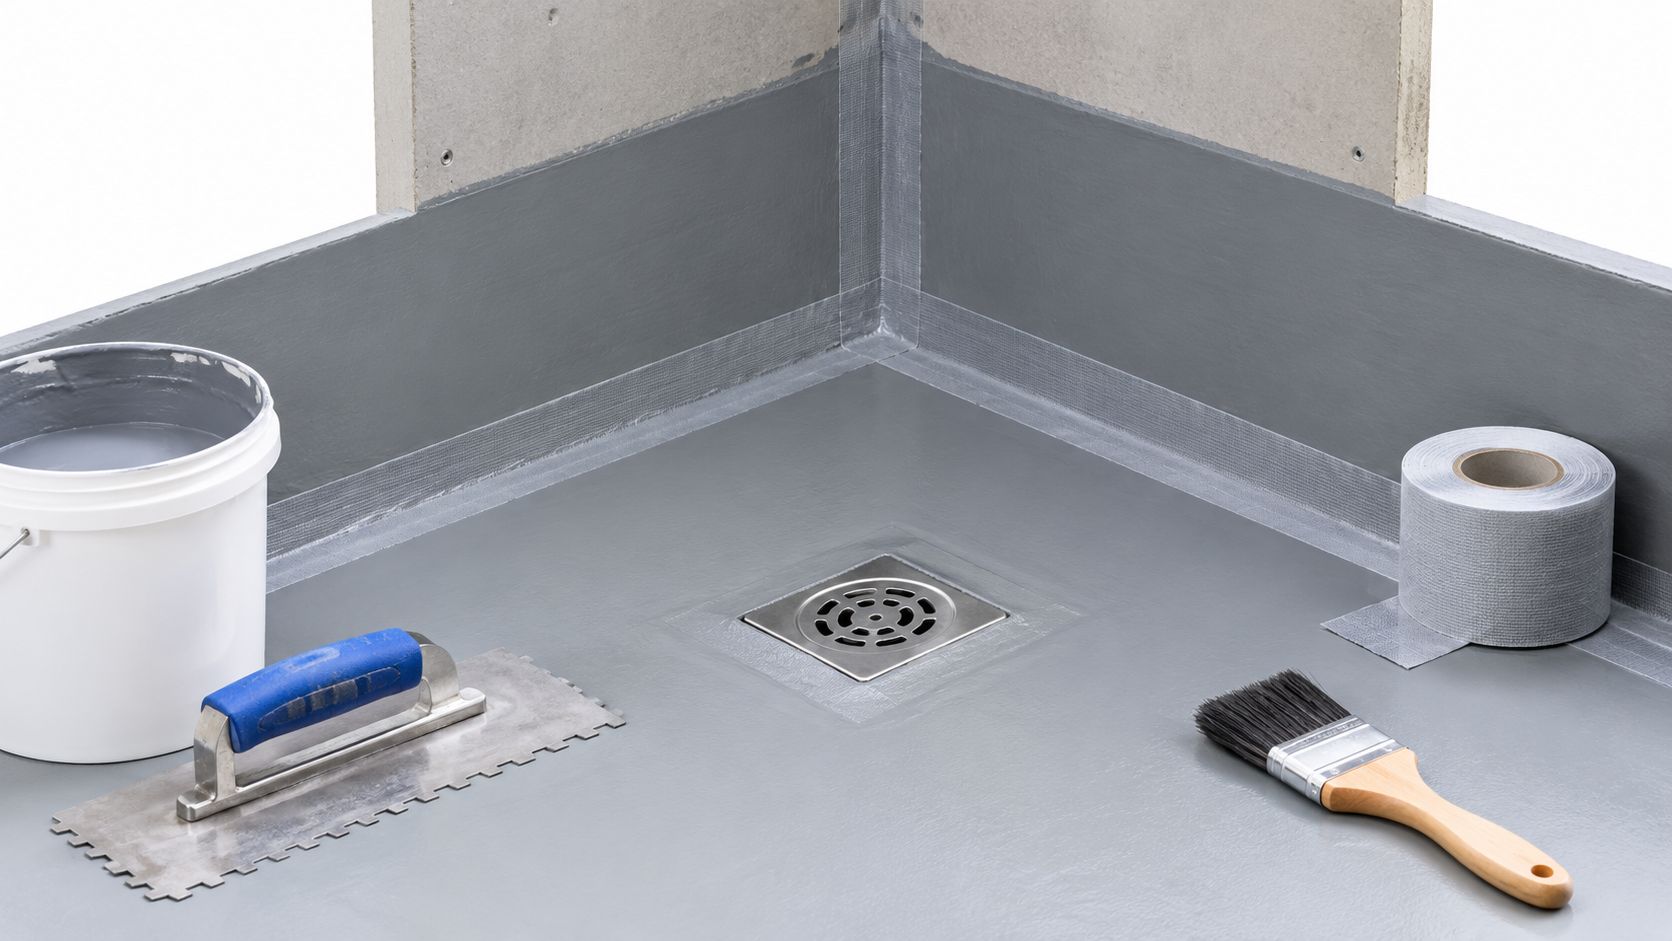
Review how to waterproof a shower before tiling with your licensed contractor before finishing begins.
9. Execute Professional Tile and Flooring Installation
Tile work reveals problems left by earlier phases, so pause before setting begins. Confirm that the substrate is sound, clean, and flat enough for the selected tile. The waterproofing should be complete, the layout approved, and the mortar compatible with the tile and wet-area application. Large-format tile, mosaics, natural stone, and intricate patterns each bring different handling and layout requirements.
Before adhesive is spread, review a dry layout with the installer. Check where cuts will fall beside the door, vanity, toilet, niche, drain, and corners. Ask how grout joints will align between walls and floor, where the pattern will center, how outside edges will finish, and how the bathroom will transition to adjacent flooring. Massachusetts homeowners should settle these decisions before the crew reaches the installation phase, not during a rushed site visit.
Approve the finish before the room closes up
Ask the installer to explain surface preparation, mortar coverage, spacers, movement joints, cure times, grout application, sealing where required, and protection during the remaining work. Review the full room rather than judging one attractive tile.
Use this quick field check:
- Base: Confirm the substrate is stable, properly prepared, and compatible with the setting system.
- Layout: Approve full tiles, cuts, pattern direction, niche placement, trim, and transitions before work advances.
- Materials: Verify that mortar and grout suit the tile, substrate, and wet-area use.
- Details: Inspect thresholds, plumbing penetrations, corners, changes between tile types, and movement joints.
- Protection: Keep other trades away from newly set or grouted surfaces until the installer releases them.
- Finish: Look for cracked or chipped tile, hollow-sounding areas, uneven joints, grout haze, and missing caulking.
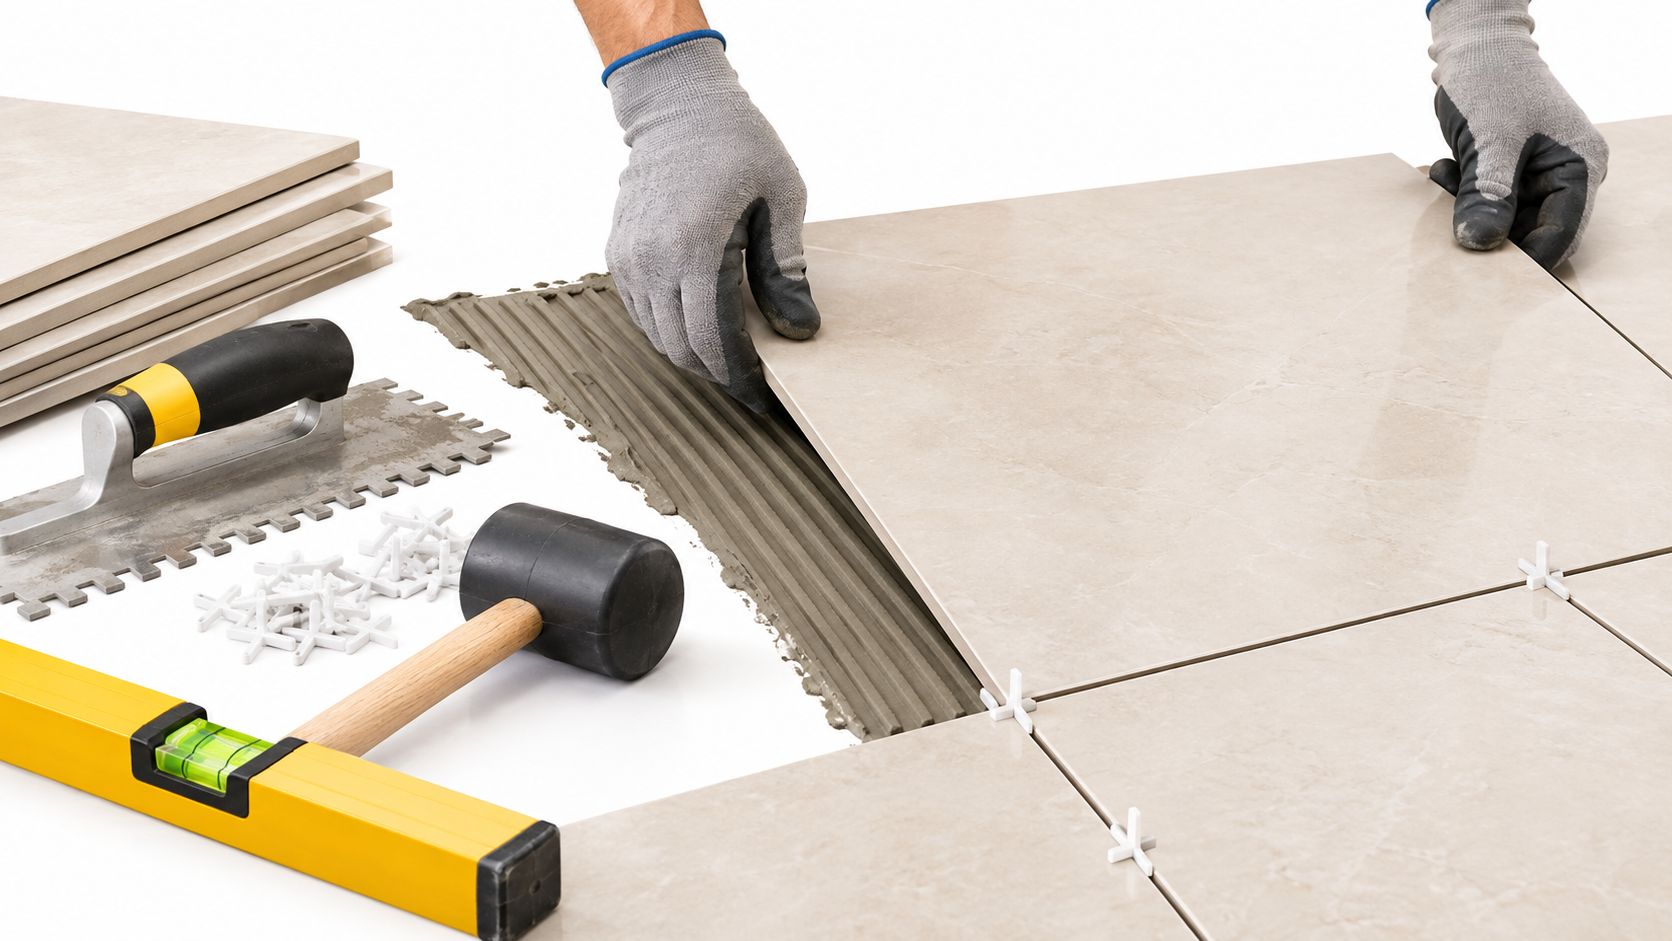
Coordinate tile timing with vanity delivery, toilet flange height, shower glass measurements, and accessory blocking. Professional bathroom tile installation can help homeowners and contractors coordinate those details. Keep the approved layout, product information, and care instructions in the project file for closeout and future maintenance.
10. Install Fixtures and Complete Plumbing Connections
A finished bathroom still needs a working handoff. Once tile has cured and surfaces are protected, place the vanity, countertop, sink, faucets, toilet, tub or shower fixtures, mirror, lighting, and accessories. Before opening packages, compare each product with the approved model, finish, dimensions, rough-in requirements, and warranty documents. Set aside anything that does not match.
Schedule the plumber and electrician before the final installation sequence is fixed. Shower glass needs accurate finished dimensions. Mirrors and lighted cabinets require ready electrical connections. Grab bars and towel hardware need blocking or an approved mounting method, rather than a screw placed wherever framing allows. Professional bathroom tile installation can help homeowners and contractors coordinate these details.
Test the room under ordinary use. Run each faucet, shower control, diverter, toilet, drain, fan, light, switch, heated floor, and towel warmer. Ask the plumber to check supply connections, shutoffs, traps, drains, toilet seals, shower valves, tub drains, balanced operation, flow, and drainage. Let water run long enough to inspect the cabinet, nearby flooring, and accessible connections for leaks. A slow leak beneath a vanity can damage finishes before it becomes visible.
Before releasing final payment, record the following with the contractor:
- Ventilation: Verify that the fan operates and its duct termination is complete.
- Seals: Inspect caulk at tubs, shower corners, counters, sinks, and plumbing penetrations.
- Product records: Collect model numbers, manuals, care instructions, spare parts, and warranty documents.
- Workmanship terms: Confirm how the written agreement handles punch-list corrections.
Keep the bathroom checklist, approved product information, and test results with the project records. Do not rush the handoff because the room looks complete. Resolve failed tests, missing documents, and unfinished corrections before the contractor closes out the work.
Bathroom Remodel Checklist, 10-Point Comparison
| Item | Implementation complexity | Resource requirements | Expected outcomes | Ideal use cases | Key advantages |
|---|---|---|---|---|---|
| Plan Your Budget and Establish Financial Parameters | Low–Medium, research and decisions | Time, multiple contractor quotes, financing, contingency (10–20%) | Clear cost framework; prioritized scope; fewer mid-project changes | All projects; first planning step; limited budgets | Prevents overspending; guides contractor/material choices |
| Assess Current Bathroom Condition and Identify Hidden Issues | Medium, specialist inspections needed | Home inspector/plumber/electrician, mold/asbestos testing, extra time | Identifies structural/plumbing/electrical problems; accurate scope | Older homes (pre-1980s); projects with demo | Avoids costly surprises; ensures safety and code compliance |
| Design Your Layout and Select Fixtures That Match Your Lifestyle | Medium–High, design decisions and planning | Designer or consultant, showroom visits, layout software | Functional, cohesive layout and style; optimized flow | Layout changes; family or accessibility needs; value-driven remodels | Improved usability; cohesive aesthetic; prevents rework |
| Select Quality Tile, Flooring, and Finish Materials | Medium, technical choices affect outcome | Material budget, tile samples, slip-rated options, skilled installer | Durable, water-resistant surfaces; aesthetic transformation | High-moisture areas; long-term durability priorities | Longevity; improved safety; lower long-term maintenance |
| Plan Plumbing and Electrical Systems Upgrades | High, licensed trades and code work | Licensed plumber/electrician, permits, materials, potential panel/pipe upgrades | Code-compliant systems; supports modern fixtures; future-proofing | Older homes; adding heated floors, new appliances, layout relocations | Safety; prevents failures; enables advanced features |
| Obtain All Required Permits and Schedule Inspections | Medium, administrative coordination | Permit fees, plan drawings, contractor coordination, inspection scheduling | Legal compliance, inspection sign-offs, documented work | Any remodel affecting structure, plumbing, or electrical | Protects insurance/resale; enforces workmanship standards |
| Prepare for Demolition and Contain Disruption Properly | Medium, safety and containment protocols | Asbestos/mold testing, containment barriers, HEPA filtration, debris disposal | Safe, contained demolition; reduced contamination; reveals hidden issues | Occupied homes; suspected hazardous materials; major demo | Protects occupants/home; minimizes contamination and damage |
| Install Waterproofing and Moisture Barriers Before Finishing | Medium, technical installation required | Waterproof membranes, sealants, waterproofing board, skilled installers | Long-term moisture protection; prevents rot and mold | Showers, tub surrounds, humid climates (e.g., Massachusetts) | Prevents costly water damage; extends tile/fixture lifespan |
| Execute Professional Tile and Flooring Installation | High, skilled craftsmanship essential | Experienced tile installers, proper substrate prep, appropriate thin-set/grout | Even, durable finish; correct drainage and grout performance | Complex patterns, large-format tiles, high-use bathrooms | Reduces failures; higher-quality finish; workmanship warranty |
| Install Fixtures and Complete Plumbing Connections | Medium, coordination and testing | Plumber/installer, quality fixtures (Kohler/Moen/Toto), sealants, testing | Functional, sealed fixtures; correct pressure and venting | Final installation phase; premium fixture upgrades | Ensures reliable operation; prevents leaks; completes project |
Close the Project With a Cleaner, Safer Bathroom
The room isn't complete when the last fixture is installed. Final finishes may include paint touch-ups, trim adjustments, mirror installation, shower doors, hardware, shelving, grab bars, caulking, grout cleanup, and programming for heated floors or ventilation controls. These details should be completed only after the trades have finished the work that could create dust, vibration, or moisture.
Schedule the final inspection when the project is ready for review, not when the contractor wants to clear the calendar. Walk through the bathroom with the contractor and compare the result against the approved scope. Open every drawer, operate every valve, test every switch, run water at each fixture, inspect the floor around the toilet, and look closely at grout joints, flexible sealant, trim, transitions, and painted surfaces.
Keep a printable closeout record
Copy this list into your project notes and check each item before releasing final payment:
- Permit records: Save permit numbers, approved plans, inspection reports, correction notices, and final sign-offs.
- Leak testing: Run each fixture and inspect supply lines, traps, drains, toilet connections, shower controls, and the floor around the toilet.
- GFCI testing: Test each bathroom GFCI device using its test and reset controls, and ask the electrician to correct any failure.
- Ventilation: Confirm the exhaust fan operates, vents outdoors, and is controlled as agreed.
- Caulk and grout: Inspect corners, changes of plane, tub edges, shower joints, penetrations, and areas with missing or cracked material.
- Tile condition: Check for loose, chipped, cracked, uneven, or visibly misaligned tile and record punch-list items with photographs.
- Doors and drawers: Verify that vanity doors, drawers, shower doors, and bathroom doors open, close, and latch without interference.
- Debris removal: Confirm construction waste, protective coverings, packaging, dust, grout haze, and adhesive residue have been removed.
- Warranty documents: Collect contractor workmanship terms and manufacturer warranties for fixtures, waterproofing products, tile, grout, glass, fans, and electrical equipment.
- Care instructions: Record approved cleaners, sealing requirements, grout-care instructions, replacement tile locations, and shutoff information.
Waterproofing photographs are especially valuable because the finished shower hides the membrane, seams, drain connection, and penetrations. Keep them with the permit file, product manuals, and final invoice. If a future repair requires opening the wall or floor, that record can help the next professional understand what was installed.
Establish a tile and grout maintenance routine
Tile care starts with using the right cleaner for the material. Porcelain and ceramic generally need routine dust and soil removal with a manufacturer-approved cleaner. Natural stone may require different products and periodic sealing. Avoid assuming that a stronger chemical produces a cleaner result. Harsh or acidic products can damage stone, grout, metal finishes, or sealers.
After showers, use ventilation and allow surfaces to dry. Address failed caulk, cracked grout, loose tile, persistent staining, or musty odors early. Grout is not a substitute for waterproofing, and caulk at movement joints shouldn't be treated as a permanent structural seal. Ask the installer when the grout or stone sealer should be reviewed and what signs indicate that maintenance is due.
Sunny Day Pro Services can support professional tile and flooring installation and post-construction cleaning for homeowners in Wayland, Newton, Needham, Wellesley, Weston, and surrounding communities. A detailed post-construction cleaning should remove fine dust from surfaces, cabinets, floors, trim, and accessible fixtures after the construction crew has completed its work. That service is separate from correcting defective installation, so keep the punch list active until the contractor has resolved construction issues.
Frequently asked questions
Do Massachusetts bathroom remodels require permits?
Many projects do, particularly when they replace a tub or shower enclosure, relocate plumbing fixtures or cabinets, add plumbing fixtures, or alter walls. The exact requirements depend on the town and scope. Ask the contractor to confirm the applicable building, plumbing, electrical, and other permits before demolition, and keep the final inspection records.
How long does a bathroom remodel take?
The schedule depends on the layout, material availability, concealed conditions, permit timing, inspections, waterproofing, tile complexity, fixture coordination, and the number of trades involved. A small refresh can move differently from a full renovation with plumbing relocation and custom tile. Ask for a phase-by-phase schedule that identifies homeowner decisions, deliveries, inspection holds, and the handoff date.
How should I plan for unexpected conditions?
Keep a defined reserve and establish a written change-order process before work begins. When a problem appears, require photographs, an explanation of the proposed repair, the cost impact, and the schedule impact. Don't approve a broad verbal allowance for unknown work without understanding what it includes and what it excludes.
How can I verify shower waterproofing?
Ask which waterproofing system is being used, how the substrate and corners will be prepared, how penetrations and drains will be sealed, and whether the shower pan requires a flood test. Request photographs before tile covers the work, and keep any inspection or test documentation with your project records. A licensed contractor should follow the product manufacturer's installation requirements and local inspection rules.
How do I maintain bathroom tile and grout?
Use cleaners approved for the specific tile, grout, stone, and sealer. Keep the room ventilated, dry shower surfaces when practical, inspect caulk and grout regularly, and repair failed joints before water reaches the substrate. Ask the installer whether natural stone or grout requires sealing and which products won't damage the finish.
How do I coordinate several bathroom remodeling contractors?
Assign one person to own the schedule and written scope. Confirm when the plumber, electrician, waterproofing installer, tile setter, glass installer, painter, and cleaner can start, what each trade needs from the previous trade, and which inspections must occur before the next phase. Hold milestone checks before closing walls, starting tile, installing fixtures, and declaring the project complete.
Recommended search and content markup
For the finished page, an SEO team can consider Article schema for the main post and FAQ schema for the visible questions and answers, provided the structured data accurately reflects the content shown to users. Add clear local service-area language for Massachusetts communities without implying that every town has identical permit rules. Relevant service pages can also be linked naturally from sections about tile installation, post-construction cleaning, and estimate requests.
A bathroom renovation goes more smoothly when decisions, evidence, and responsibilities are documented before the room is opened. Use this checklist during the estimate, bring it to the contractor walkthrough, photograph concealed work, and don't close a phase until the previous phase has passed its inspection or quality check.
Sunny Day Pro Services provides bathroom tile and flooring installation, post-construction cleaning, and related home services for busy homeowners in Wayland, Newton, Needham, Wellesley, Weston, and nearby Massachusetts communities. Use this bathroom remodel checklist to prepare your scope, then visit Sunny Day Pro Services to request a quote and discuss the installation or cleanup support your project needs.

