
Bathroom Remodel Flooring: Choosing Materials That Last
Choose bathroom remodel flooring that resists water. Compare porcelain, ceramic and LVP, plus subfloor prep, slip ratings, costs and Massachusetts tips.
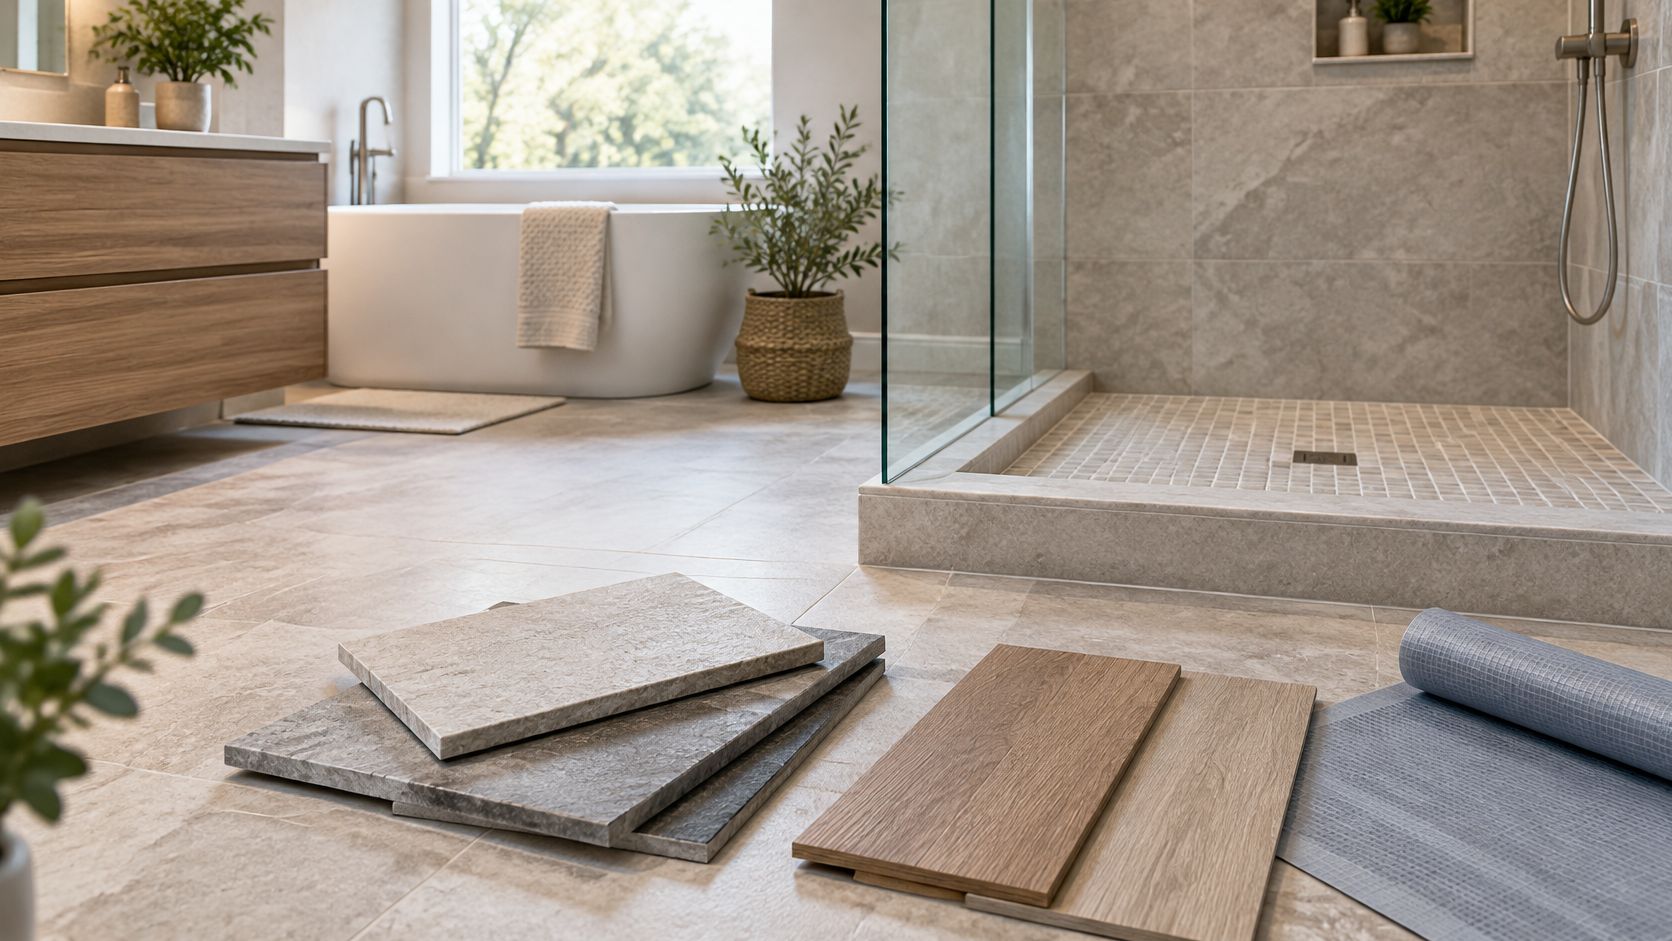
The most popular advice on bathroom remodel flooring is simple, and it is wrong: pick a waterproof material and move on. A bathroom floor is an assembly. The tile or plank is only the top layer; under it sit grout joints, seams, a perimeter gap, underlayment, a membrane, and a subfloor, and water enters through whichever one was ignored.
Premium porcelain often cracks over a springy subfloor, and budget plank can trap water at its edges until the plywood softens. In both cases the material performs as labeled, and the installation is what fails. Rank prep, waterproofing, and detailing above brand and color, and the floor has a chance to last.
Table of Contents
- Heat Under the Tile
- Ventilation Protects the Assembly
- Accessible Entries Without the Institutional Look
Bathroom Flooring Materials Compared at a Glance
Start with the scan, then read the notes underneath. Match the material to the wettest thing that happens in that zone, not to the room's name.
| Material | Water Performance | Typical Lifespan | Slip Behavior | Best Fit |
|---|---|---|---|---|
| Porcelain tile | Absorption 0.5% or less; dense body resists moisture | Decades with sound installation | Polished finishes slippery when wet; textured finishes safer | Shower floors and main bath floors |
| Ceramic tile | More absorbent than porcelain; glazed surface sheds water | Decades with sound installation | Wide range by glaze and texture; matte beats glossy when wet | Dry-zone floors and wall tile |
| Luxury vinyl plank (LVP) | Waterproof core; seams and perimeter must be sealed | 10 to 20 years in typical residential ratings | Moderate; depends on surface texture | Powder rooms and sealed dry-zone floors |
| Natural marble | Porous; requires regular sealing | Decades with sealing and care | Honed or textured finishes safer than polished | Low-traffic, high-end baths |
| Granite tile | Low porosity when sealed; durable under heavy use | Decades with sound installation | Textured finishes safer than polished | High-use baths and remodels |
Porcelain and Ceramic Are Not Interchangeable
Porcelain is defined by ANSI A137.1 as ceramic tile with water absorption of 0.5% or less when tested under ASTM C373. That dense, highly fired body takes up less moisture and resists staining better than more absorbent tile. It doesn't waterproof the assembly. Grout joints, perimeter gaps, penetrations, and the substrate still pass water, so you still need a membrane where water exposure is routine.
Ceramic costs less and cuts more easily, which makes it a sensible pick for dry-zone floors and walls. Its body absorbs more water than porcelain, so the glaze and grout carry more of the moisture load. Once that glaze chips or grout cracks, the margin for error narrows. I wouldn't put a soft glazed ceramic on a shower floor that gets daily soaking.
LVP and Natural Stone Trade Comfort for Upkeep
LVP feels warmer and softer underfoot than tile, and a waterproof core is a real advantage. Its weak points aren't in the middle of a plank. They're at the click seams, the room perimeter, and the toilet flange, where a slow leak can sit against the subfloor unseen.
Marble looks like nothing else, and it's porous. It needs sealing on a schedule and it etches from acidic cleaners, including many common bathroom sprays. Granite is denser and holds up better under heavy use once sealed, but it's still stone, not a maintenance-free surface.
Decision rule: Choose porcelain for shower floors and high-moisture zones, LVP for a powder room or dry-zone floor with a sealed perimeter, and stone only when your budget and maintenance plan can support it.
Subfloor and Waterproofing Work Before Any Tile Goes Down
Waterproof flooring doesn't automatically mean a waterproof bathroom. Boise Bath's guide to bathroom flooring notes that LVP itself may be waterproof while water can still pass through seams and remain trapped against the subfloor, creating mold risk, and it recommends sealing bathroom perimeters and fixtures with 100% silicone. The same logic applies to tile. Water enters at plank seams, room perimeters, toilet bases, tub edges, and transitions, then works into the substrate beneath the finish floor.
That distinction drives the whole job. A water-resistant material sheds surface water. A waterproofed installation also blocks the paths underneath it. If your installer talks only about the product, ask three questions before anything else. What protects the subfloor? Is the toilet flange height correct after the new floor goes in? How are the transitions sealed?
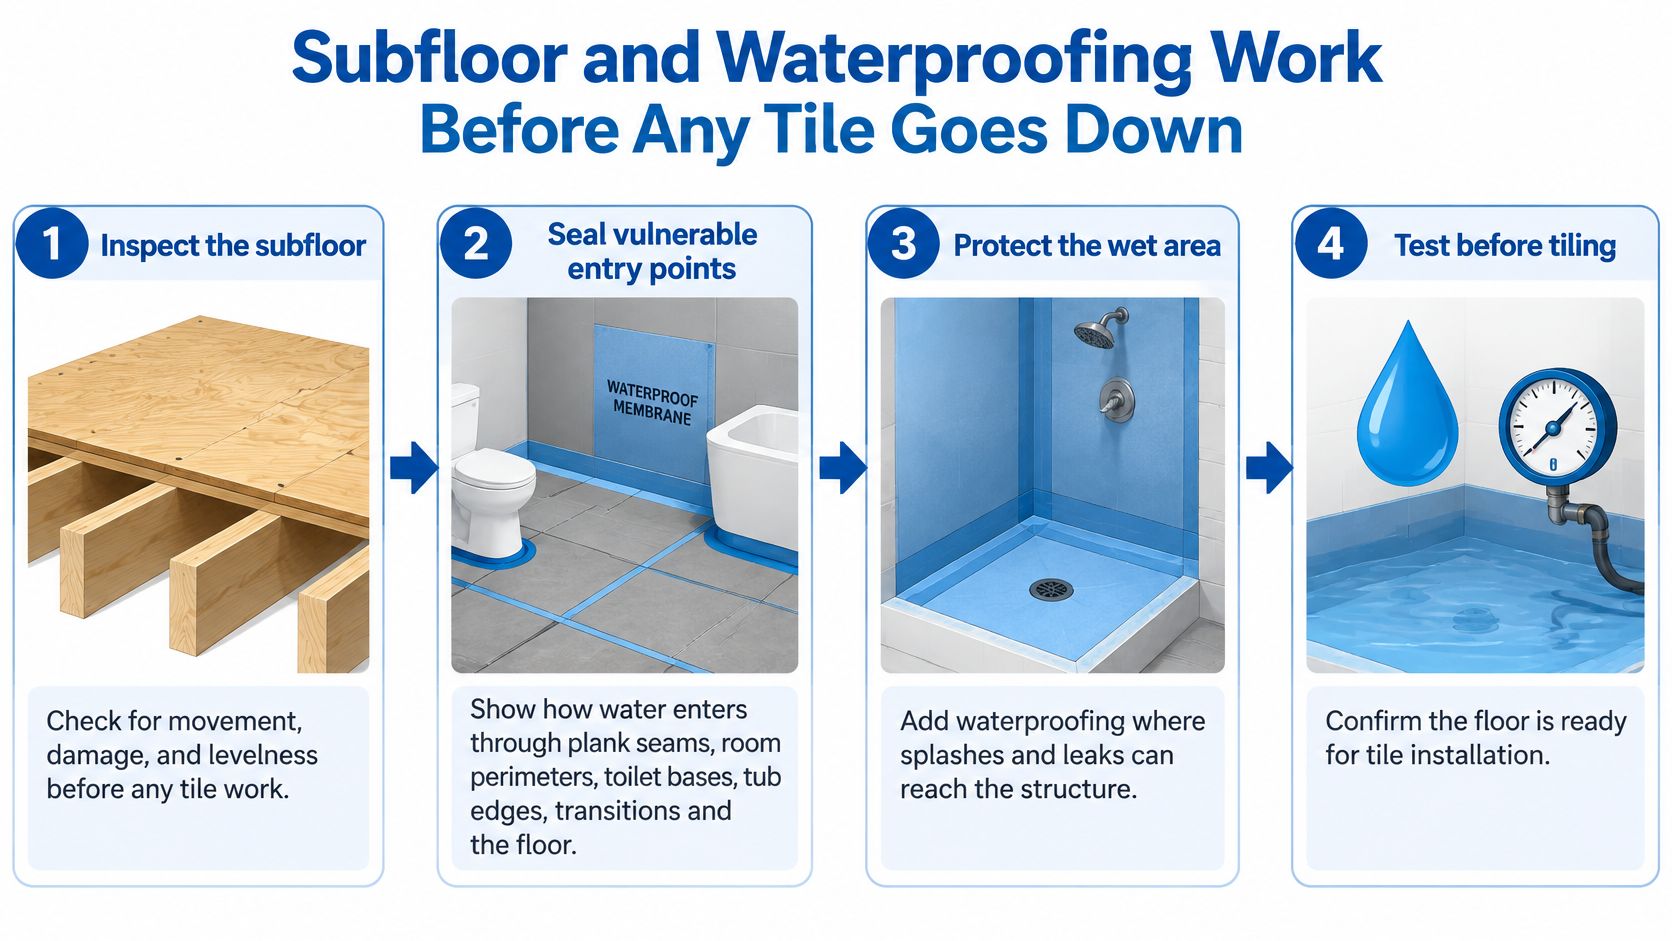
The Prep Sequence in Order
- Remove and inspect: Pull the old floor and check for rot, soft spots, and loose boards. Tile can't correct structural movement, and setting it over a spongy patch guarantees cracked grout.
- Check flatness: Run a long straightedge across the floor. Tile manufacturers typically call for about 1/8 inch of variation over 10 feet, and large-format tile punishes anything worse with lippage.
- Confirm flange height: The finished floor should sit flush with or slightly above the toilet flange, not below it. A flange left too low leaks at the wax ring, which is a slow, hidden failure.
- Install the underlayment: Screw down cement backer board or an approved uncoupling underlayment and tape the seams. This is the layer that gives mortar a stable bond, and our guide to tile backer board installation covers fastener patterns and seam treatment in detail.
- Waterproof and slope the shower: Run a membrane up the shower walls past the showerhead height zone per the manufacturer's instructions, and slope the shower floor about 1/4 inch per foot toward the drain so water doesn't pond.
- Seal and leave movement joints: Finish the perimeter, tub edges, and fixtures with 100% silicone, and keep soft movement joints where the manufacturer specifies instead of hard-grouting every corner.
A cheaper waterproof plank beats premium tile when its perimeter detailing and substrate prep are right, and premium tile loses to both when they're wrong.
That's not a sales point, it's the pattern behind most callbacks. Low-absorption porcelain doesn't replace a correct underlayment, membrane, slope, or movement joint. Neither does a waterproof core. Spend your scrutiny on the layers you won't see after grout day, because those are the ones you'll pay to redo.
Slip Resistance, Tile Size and Finish Choices
A showroom floor tells you almost nothing about a wet bathroom floor. Two porcelain tiles can look identical under retail lighting and behave very differently under soapy feet.
Say you're choosing between a polished porcelain and a matte textured porcelain in the same color. Dry, both feel fine. Six months in, the polished one carries a film of soap and body oils that turns it slick at the shower entry. The textured one keeps its bite because the surface breaks up that film. Same material, same water exposure. The finish is the variable, and it shows up in a test number you can ask for.
The Number to Ask For
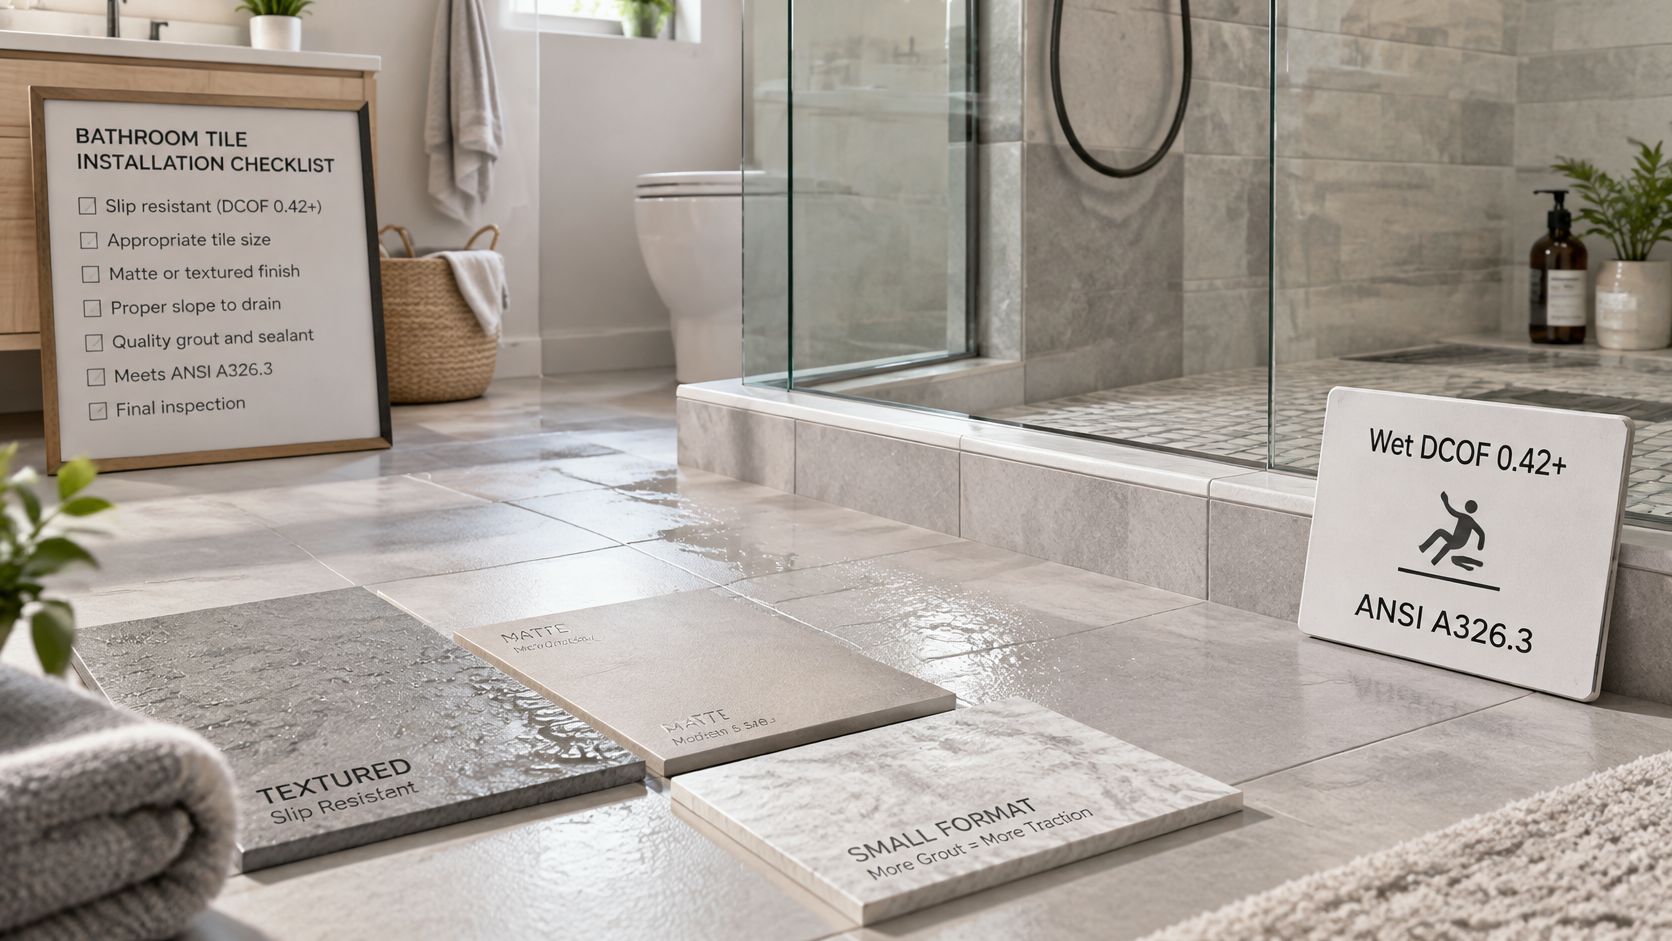
The TCNA slip and fall report sets the benchmark for floors walked on while wet at a wet dynamic coefficient of friction (DCOF) of at least 0.42 under ANSI A326.3 testing. That figure is a benchmark, not a guarantee that a floor can't be slippery. Polished porcelain and smooth glazes can fall short in real use, while textured or matte surfaces generally improve traction.
Don't accept a generic slip-resistant label. Ask the supplier for the published wet DCOF for the exact finish and format you're ordering, because the same tile line often tests differently in polished and matte versions.
A certified slip rating still does its job inside an assembly. A high-DCOF tile set over a poorly bonded underlayment, or grouted with a joint pattern that leaves the surface uneven, underperforms a modest tile installed correctly. Treat the number as one spec among several, not as permission to skip the rest.
Why Small Tile Dominates Shower Floors
Small mosaics, typically 1 to 4 inches, are the common choice for shower floors, and the reason is mechanical rather than aesthetic. More tile edges mean more grout joints, and grout joints add grip underfoot. Just as important, small formats bend over a sloped shower pan without tenting at the drain. A 24 inch plank can't do that without envelope cuts.
The trade-off is upkeep. More grout means more surface for mildew and more lines to scrub. If you want larger tile on a shower floor, you need a linear drain with a single-plane slope, which has to be decided before the pan is built. Our overview of slip-resistant bathroom tile finishes walks through surfaces that work for each format.
Before you order, check three things. Confirm the wet DCOF for your exact finish, confirm the absorption rating suits a wet zone, and weigh both against who's using the room. Households with children, older adults, or mobility limitations shouldn't compromise on the first one.
Bathroom Flooring Costs and Lifespan by Project Scope
Flooring rarely gets its own headline number, because it's priced inside a larger renovation. Read the benchmarks below as whole-project context, then use them to sanity-check your own quote.
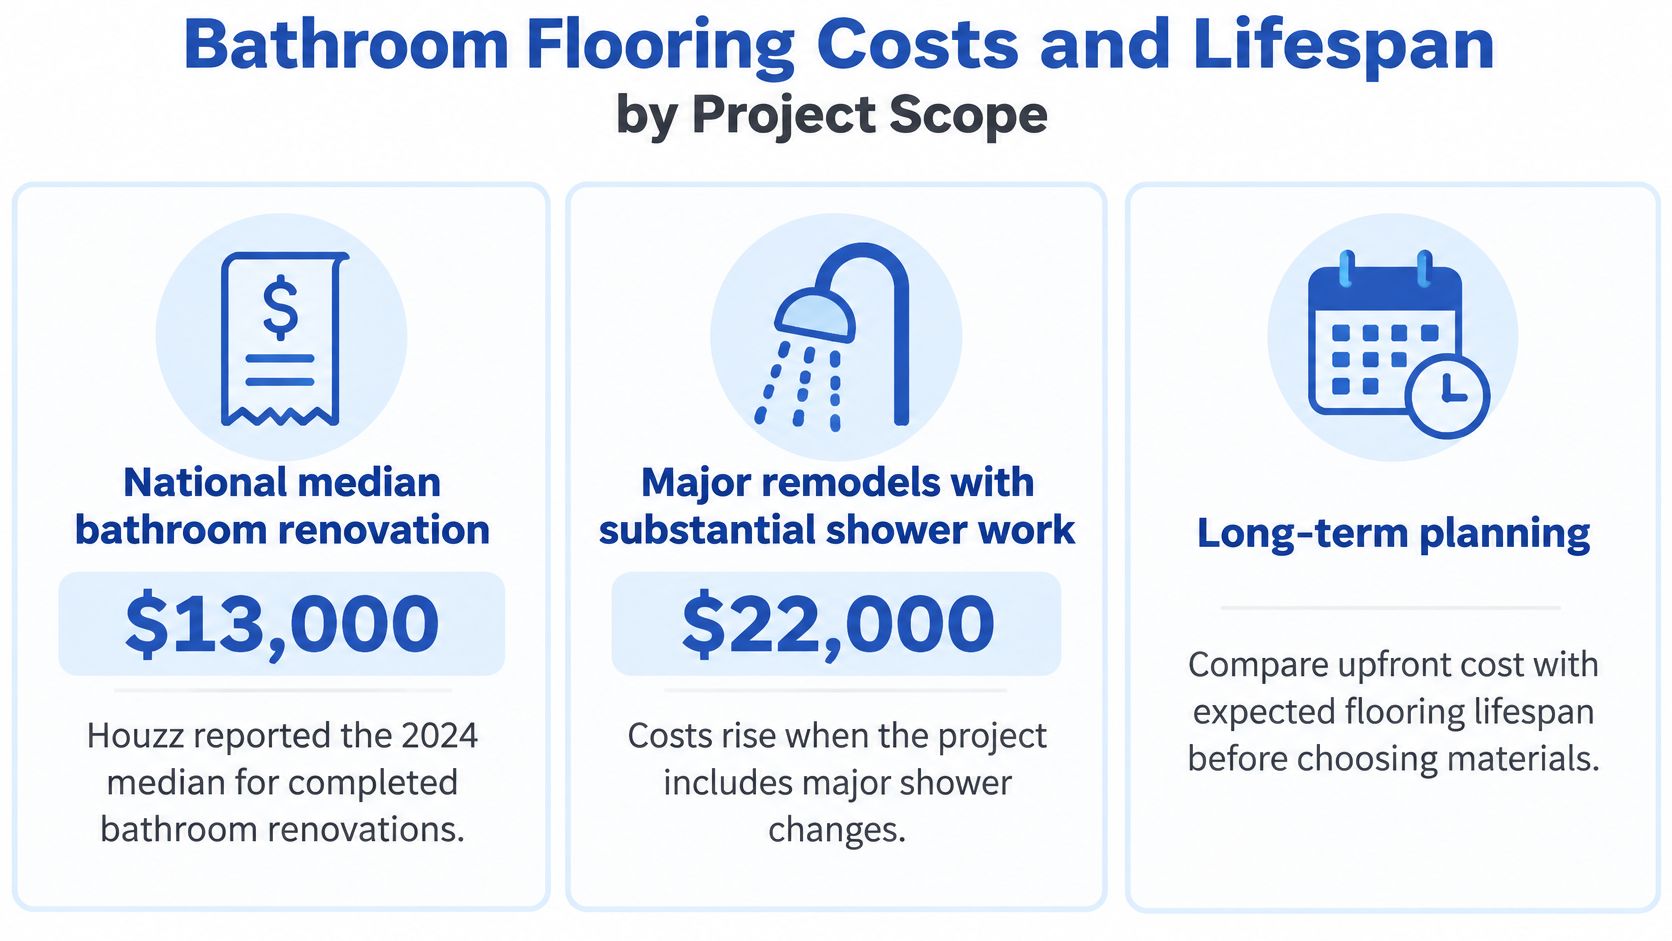
The 2025 U.S. Houzz Bathroom Trends Study reported a $13,000 national median spend for bathroom renovations completed in 2024, and $22,000 for major remodels that include substantial shower work. Size moved the numbers too. Bathrooms measuring at least 100 square feet had a $25,000 median, while smaller bathrooms had a $17,000 median. Houzz also reported that in 2024, 82% of U.S. homeowners renovating primary bathrooms included flooring among the features they modified, according to Houzz's summary of bathroom features homeowners want.
| Project Scope | Median Spend | What Changes the Flooring Budget |
|---|---|---|
| All U.S. bathroom renovations | $13,000 | Flooring is one line item among many |
| Major remodel with shower work | $22,000 | Shower floor tile, membrane and drainage drive the cost |
| Bathroom under 100 sq ft | $17,000 | Less floor area, but fixed labor costs stay similar |
| Bathroom 100 sq ft or larger | $25,000 | More floor area, more transitions and more tile to set |
What Actually Moves Your Flooring Line Item
Room size is obvious, but format matters more than most homeowners expect. Small mosaics take more labor per square foot than large-format tile, and a herringbone or offset pattern adds cutting time on top of that. Subfloor repair is the other swing factor. A few sheets of replacement plywood and leveling compound cost real money, and you can't know you need them until demo.
Ask for a quote broken into materials, underlayment or membrane, labor, demolition, and disposal. If those are bundled into one number, you can't compare bids or find the padding. Our breakdown of tile flooring cost shows how those line items usually stack up.
Hold a 10 to 15% contingency for hidden subfloor damage. In older homes, that's the most common budget surprise and the worst place to cut corners. On lifespan, porcelain and ceramic run for decades with sound installation, while LVP is often rated at 10 to 20 years.
One caution on the figures above. The Houzz medians cover whole renovations, not flooring alone, so there's no honest flooring-only per-square-foot number to pull from them. Compare line-item quotes instead, and remember that a cheaper floor that fails at the seams costs more than it saved.
Heated Floors, Ventilation and Accessible Design
These three upgrades get decided at different moments in a remodel, and that's where people get hurt. Heat and blocking have to happen before tile. Ventilation has to be sized before drywall. Add any of them late and you're paying to reopen finished work.
Heat Under the Tile
Electric floor-heating mats sit in the mortar bed under tile or under approved LVP. They need a dedicated circuit, GFCI protection, and a thermostat with a floor sensor, and the sensor wire placement determines whether your floor reads its own temperature accurately. The Center for Tile and Advanced Surfaces summary of Houzz research found that in 2024, 25% of U.S. homeowners installing new bathroom flooring outside the shower selected heated flooring, while 31% prioritized a nonslip surface. Comfort is popular, but traction still wins.
The common mistake is heating the whole room. You only stand in front of the vanity and the shower entry. Mat those zones, skip under the vanity and toilet, and you'll cut material cost without losing the benefit.
Ventilation Protects the Assembly
Heat doesn't dry out a floor assembly. Airflow does. Moisture trapped in grout and under flooring encourages mold and softens adhesive bonds over time. Specify an exhaust fan sized for the room's volume, vent it outdoors rather than into the attic, and run it for about 20 minutes after each shower. A humidity-sensing switch handles that automatically, which matters because nobody remembers to flip a fan off later.
Accessible Entries Without the Institutional Look
A curbless or low-threshold shower needs the floor structure lowered or the drain placed so the slope fits inside the room's existing height. Keep any threshold at or below 1/2 inch, consistent with ADA guidance, and hold the bathroom floor height even with the hallway to avoid a trip lip. Add blocking inside the walls for grab bars before tile goes up, even if you don't install bars now. Photograph the blocking locations so a future installer can find solid wood.
Decide these items at the design stage and write them down:
- Heat zones: Which areas get mats, and where the thermostat and sensor sit
- Fan rating: CFM sized to the room, with an exterior vent path confirmed
- Threshold height: Curbless, beveled, or a low curb, measured before framing
- Blocking locations: Grab bar and accessory positions photographed pre-tile
Maintenance, Sealing and Cleaning by Material
The goal isn't a spotless floor. It's a floor that keeps its traction and finish for years. Most damage comes from the wrong cleaner, not from use.
Start with a pH-neutral cleaner and rinse away soap residue, because leftover film is what makes a safe floor slippery. Skip waxes, coatings, and topical sealers on glazed tile. They sit on the surface, change the friction you tested for, and wear off in traffic lanes so the floor ends up blotchy.
A Schedule That Catches Problems Early
- Weekly: Wipe down the shower floor and the grout lines at the walls, then run the exhaust fan after showers. Standing moisture is what feeds mildew, so drying beats scrubbing.
- Monthly: Inspect grout lines and perimeter silicone for dark staining, cracking, or gaps. Catch mildew while it's a spot and it's a five minute job. Leave it and you're cutting out caulk.
- Yearly: Test sealer on natural stone by placing a few drops of water on the surface. If the water soaks in instead of beading, reseal on the interval the product maker specifies.
Marble needs that sealing discipline plus stone-safe cleaners only, since acidic products etch the surface permanently. Sealed granite tolerates daily use better, but it's not exempt from the water drop test. Porcelain and ceramic ask for the least. Keep the grout clean, replace failed silicone, and they mostly take care of themselves.
For LVP, mop lightly and never leave water pooled at seams or room edges. A floor that shrugs off a splash can still let standing water work through a joint and sit against the subfloor. That's how concealed damage starts, out of sight.
Notice the pattern. The materials that demand the most care are usually the ones you chose for the wettest zone. If you don't want a sealing calendar, don't put marble on a shower floor.
How to Choose a Flooring Installer in Massachusetts
You can separate a careful installer from a fast one in a single phone call. The questions below take ten minutes, and the quality of the answers tells you more than any portfolio photo.

Questions That Get Real Answers
- Ask for the written scope: It should name the tile, the underlayment or membrane, the perimeter sealant, and how the subfloor will be checked. A scope that says only "install tile floor" leaves every important decision unstated.
- Ask who handles waterproofing: Confirm the installer owns the membrane, slope, and sealing details, not just the visible surface. If waterproofing is "someone else's job," nobody owns the failure.
- Ask about the flange and transitions: How was the toilet flange height checked? How are transitions sealed, and what protects the subfloor at the tub edge? Specific answers mean they've thought about your bathroom, not bathrooms in general.
- Ask about credentials and warranty: Request references from recent bathroom jobs, confirm current Massachusetts Home Improvement Contractor (HIC) registration, and ask who's responsible if a seam or transition fails and what the warranty covers.
If you're planning natural stone, say so early. We ask customers with sensitive surfaces, such as natural stone or hardwood, to mention them in the quote form, because stone changes the mortar color, the sealing plan, and the cleaning products used after install.
Why the Local Context Matters
Massachusetts has 3,072,289 housing units as of July 1, 2025, and 62.5% of housing units were owner-occupied during 2020 to 2024, with a median owner-occupied home value of $562,100, according to U.S. Census Bureau QuickFacts for Massachusetts. At those values, a botched floor isn't a small loss, and buyers notice sloppy transitions and cracked grout. Older Massachusetts homes also hide plank subfloors and uneven framing under previous remodels, so an installer who quotes without a subfloor check is guessing with your money.
Bring a short checklist to every estimate. Written scope, named membrane, flange check, transition plan, HIC registration, references, and warranty terms. If an installer can't fill in those blanks, keep calling.
Confirm Your Bathroom Flooring Plan Before You Order
Turn your research into a firm plan in this order, and don't reorder product until the steps before it are done.
First, pull the spec sheet for every product on your list and confirm the wet DCOF and absorption rating for the exact finish you're buying. Second, schedule the subfloor and flange-height check before tile is ordered, so repair costs are known and your contingency is sized against real findings instead of a guess. Third, request line-item quotes from Massachusetts installers, and note any natural stone or hardwood on the request so the sealing plan is set from the start.
Sunny Day Pro Services installs porcelain, ceramic, marble, and granite tile, along with full-room bathroom and kitchen remodels, and tile installation comes with a guaranteed high-end finish. We also use eco-friendly products that are safe for new finishes, floors, and appliances, so post-install cleaning won't damage fresh grout or stone sealer.
If you're in Wayland, Newton, Needham, Wellesley, Weston, or a nearby town, request an estimate and talk through your shower-floor and dry-zone choices before you commit to materials. A twenty minute conversation at this stage costs nothing. Reordering tile or reopening a floor costs plenty.
Ready to plan bathroom remodel flooring that holds up at the seams, the perimeter, and the subfloor, not just on the surface? Sunny Day Pro Services installs porcelain, ceramic, marble, and granite tile for bathrooms, kitchens, and floors across Wayland, Newton, Needham, Wellesley, and Weston, with a guaranteed high-end finish. Visit Sunny Day Pro Services to request an estimate and get your subfloor, waterproofing, and tile choices sorted before you order.

