
Bathroom Remodel Tub to Shower Guide
Plan your bathroom remodel tub to shower conversion with expert advice on design, waterproofing, hidden costs, and hiring top Massachusetts tile professionals.
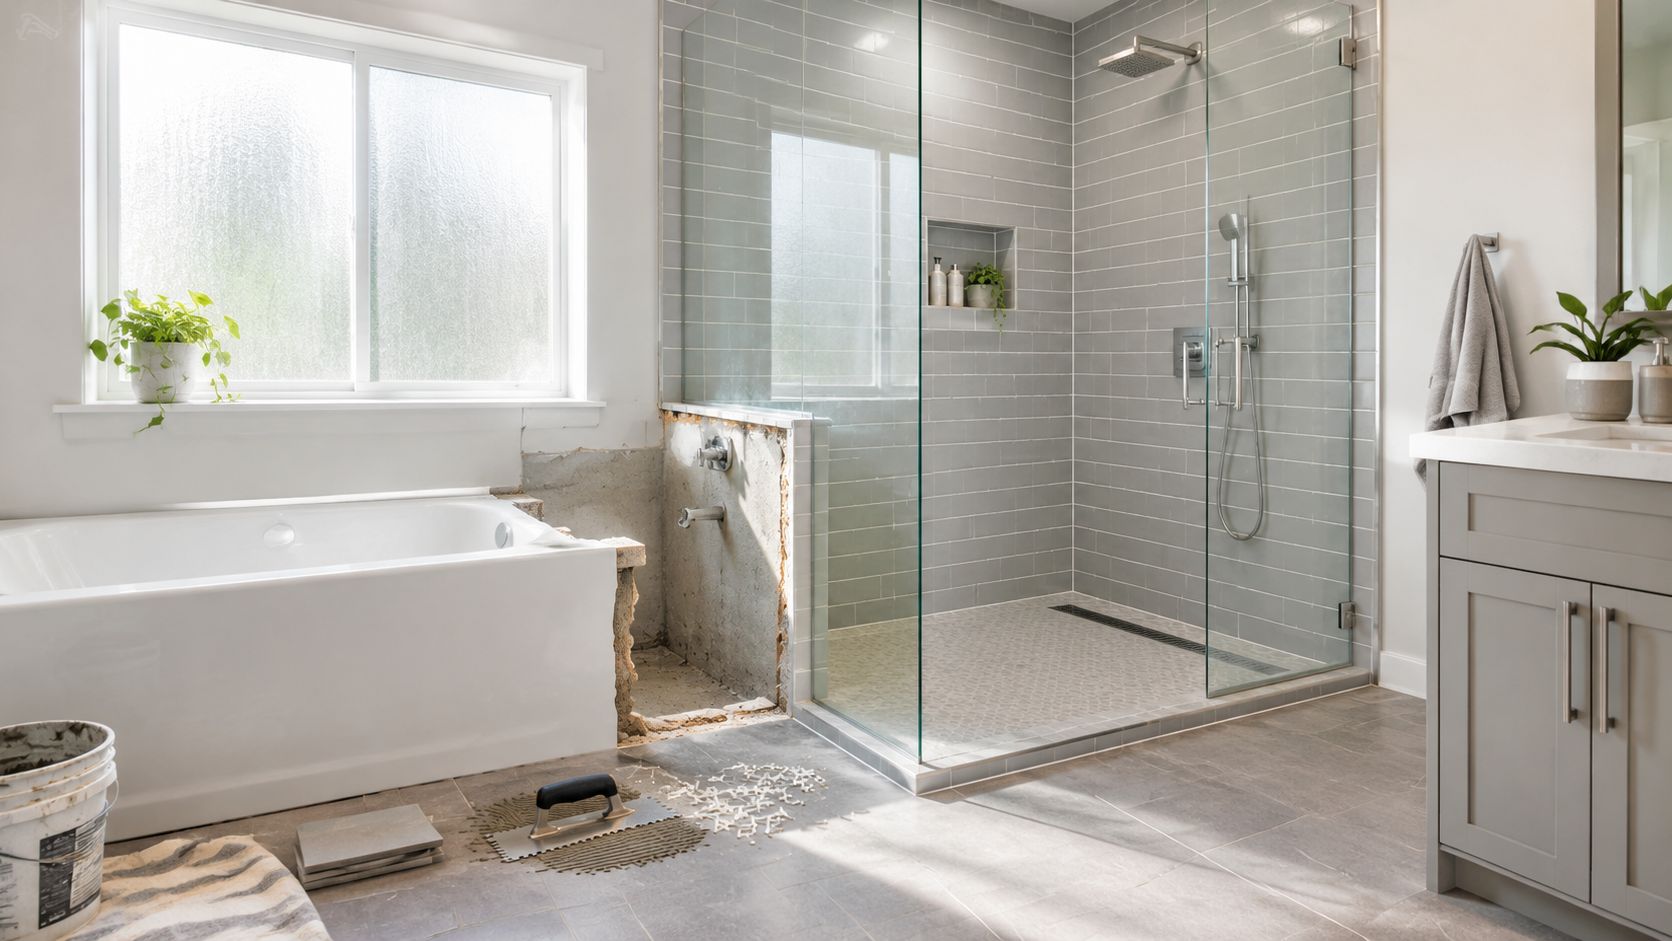
You're standing in the bathroom looking at a tub you rarely use, wondering whether removing it will make the room more useful or uncover a much larger renovation than expected. A bathroom remodel tub to shower project can improve access, storage, and everyday comfort, but the visible fixture is only one part of the job. Behind it may be aging plumbing, damaged framing, an inconvenient drain, uneven flooring, and waterproofing that was never designed to support the new shower.
The strongest conversions begin with investigation, not demolition. A shower that looks excellent on installation day still depends on the structure beneath it, the drainage path, the valve, and a continuous waterproofing system. Here's how to evaluate those decisions before choosing tile, glass, or hardware.
Table of Contents
Evaluating Your Bathroom for a Tub to Shower Conversion
Removing a tub can look simple until the surround is open. The old fixture may conceal water-stained studs, softened subfloor, patched plumbing, or framing that limits the new footprint. A contractor should inspect the area before finalizing the design, because the cost and feasibility of a conversion depend more on these hidden conditions than on the shower trim you see in a showroom.
The floor also deserves careful attention. A new shower may include a receptor, mortar bed, porcelain tile, stone, glass, and built-in features. The existing floor joists and subfloor need to remain sound and sufficiently stable for the proposed assembly. The inspection should look for deflection, rot, uneven areas, and previous repairs. Large-format tile is especially unforgiving when the substrate moves or contains high spots.
The drain rarely lands where you want it
A bathtub drain typically serves a narrow fixture footprint. A shower drain must work with the slope of the receptor or mortar bed and the selected layout. The existing connection may be usable, but it often doesn't align with the preferred shower center, linear drain, or new plumbing arrangement.
Before approving the layout, have the installer determine:
- Drain alignment: Confirm whether the existing waste line can serve the new receptor without awkward offsets or insufficient slope.
- Access below: Identify whether the plumbing is reachable from the floor below, a basement, a crawlspace, or an adjacent wall.
- Vent and trap conditions: Check that the trap and vent arrangement suit the revised fixture.
- Valve location: Establish whether the new control can be placed at a comfortable entry position without opening unnecessary walls.
The John Burns Research and Consulting bathrooms report found that, for the first time, half of renovated primary bathrooms didn't have a tub. The report identified 23% of homeowners who removed a bathtub and 27% who never had one before renovation. Among projects that removed the tub, almost 4 in 5 homeowners enlarged the shower, indicating that tub removal commonly accompanies a broader effort to create more usable bathing space.
Framing and water damage change the scope
A wall that looks nonstructural may still contain plumbing, electrical wiring, or framing that restricts expansion. If you want to widen the shower, the contractor must verify what can be altered and what must remain. In older Massachusetts homes, inconsistent framing and previous remodeling layers can make exploratory demolition particularly valuable.
Water damage is another early warning. Darkened wood, swollen subfloor edges, rusty fasteners, and musty insulation indicate that the old enclosure may have leaked. Replacing tile without removing compromised material only hides the problem.
Practical rule: Don't price the finish package until someone has inspected the framing, substrate, drain route, and valve location.
Designing Your New Shower Space and Layout
Once the structure and plumbing support the conversion, design becomes a balance between available room and daily use. A standard alcove shower generally preserves the existing bathroom arrangement and controls spray well. A larger walk-in layout can feel more open and accommodate a bench, handheld spray, or wider entry, but it may require more glass, more tile, and more careful splash management.
A curbed shower is usually the more forgiving option in an older bathroom. The curb helps contain water, simplifies the transition between the bathroom floor and shower floor, and can reduce the amount of subfloor modification required. It still needs accurate slope, properly detailed corners, and a well-sealed enclosure.
A curbless shower creates a clean transition and removes the step-over at the entry. It's attractive, but it isn't a matter of leaving out the curb. A true barrier-free installation usually requires recessing the subfloor or building up the surrounding floor so the shower floor sits flush with the bathroom floor, often with a linear drain and no entry curb, as explained in this curbless shower accessibility guide.
| Feature | Traditional Curbed Shower | Curbless / Barrier-Free Shower |
|---|---|---|
| Entry | Requires stepping over a low curb | Flush entry with no curb |
| Floor construction | Usually simpler to form within the existing floor area | May require subfloor recessing or surrounding floor buildup |
| Drain options | Point drain or other receptor-compatible arrangement | Often paired with a linear drain |
| Splash control | Curb provides an additional water boundary | Depends more heavily on slope, glass, drain placement, and waterproofing |
| Best fit | Many conventional renovations and older floor systems | Accessibility-focused designs where the structure can support the detail |
Choose surfaces for wet conditions
The shower floor must provide traction when wet. ASTM F462 is the consumer safety specification for bathing facilities, and its accompanying testing literature states a minimum static coefficient of friction of 0.04. If the average of any two measurements in the nine test areas falls below 0.04, the surface is rejected as hazardous, according to the ASTM F462 testing information.
That requirement affects more than the tile's appearance. The installer must consider the tile finish, grout joint layout, receptor slope, and wet-rated surface performance together. Small-format mosaics can provide more grout joints and help conform to a sloped floor, while large-format tile creates a quieter visual field but demands precise substrate preparation and layout.
Niches should sit where users can reach them without stretching, and a bench should be framed and waterproofed as part of the shower system rather than attached as an afterthought. For additional inspiration around materials and configurations, review these shower tile remodel ideas, then test samples under the lighting and proportions of your own bathroom.
Waterproofing and Drainage Best Practices
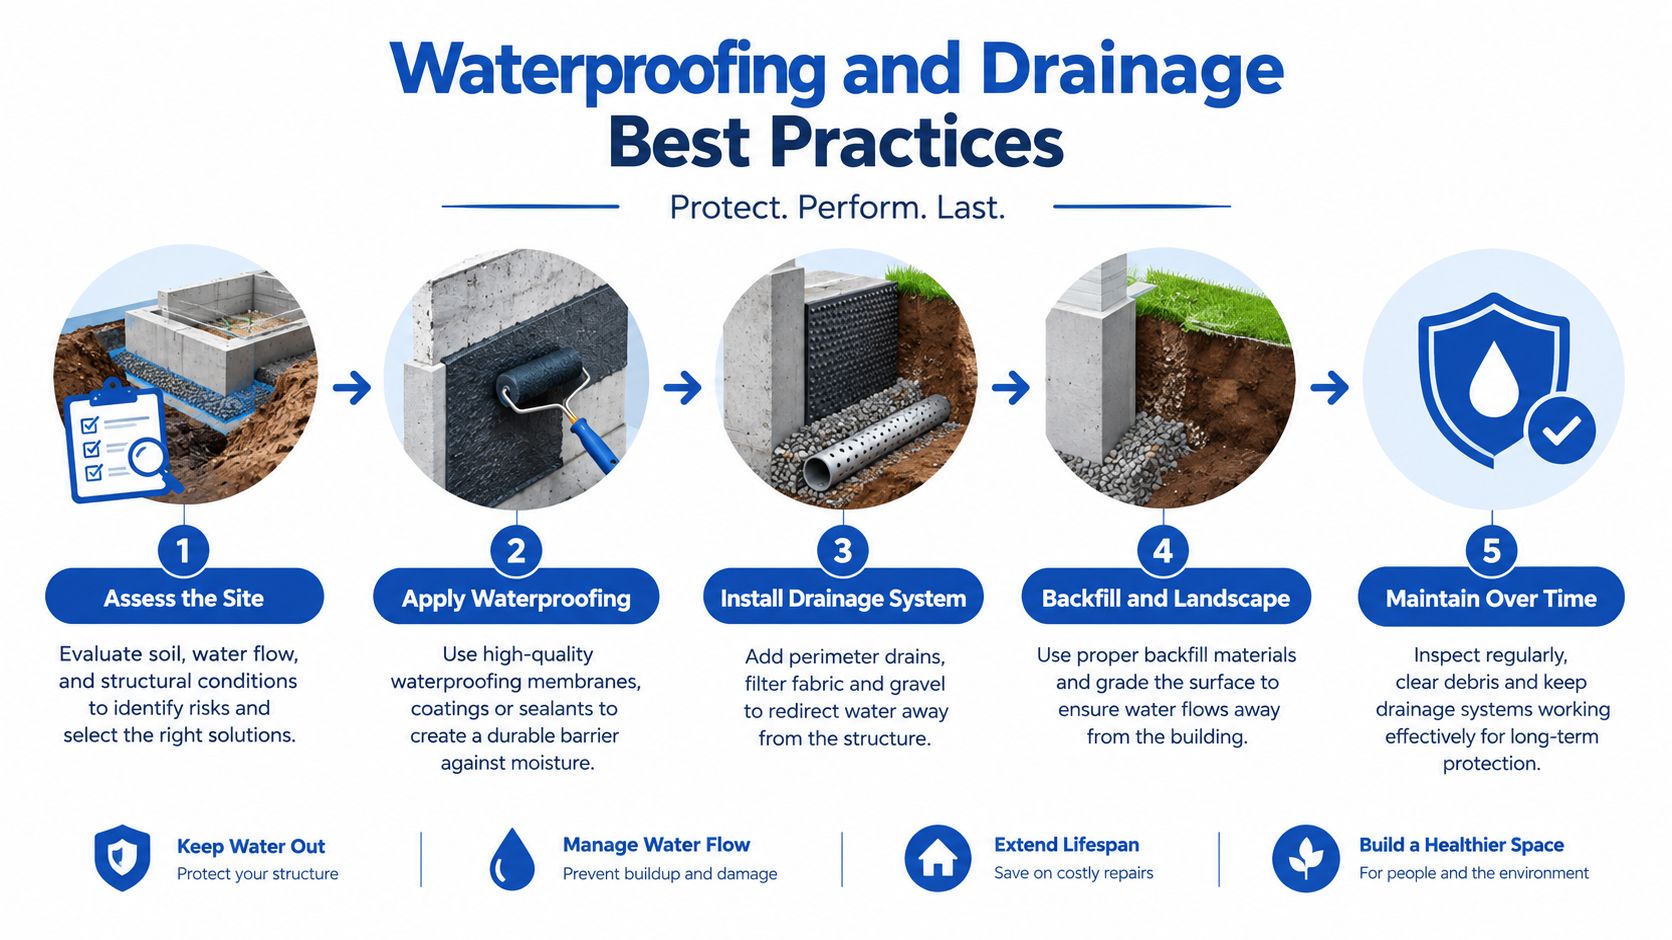
A shower can look finished while water is already reaching the framing. Grout and tile are exposed finishes, not the primary waterproofing layer. Moisture can pass through grout joints, changes of plane, fastener penetrations, and failed caulk. A durable tub-to-shower conversion needs a continuous system that manages water from the wall surface to the drain and keeps it out of the subfloor.
Use this sequence:
Inspect and prepare the substrate. Check framing and sheathing for rot, movement, and flatness before installing the receptor or membrane. Correct damaged material first. In older Massachusetts homes, hidden floor and wall repairs can become the larger plumbing and structural cost, especially when the existing drain does not align with the new shower.
Form the drainage plane. Install a compatible receptor or build a sloped mortar bed. The finished floor must fall consistently toward the drain, without flat areas that hold water. A curbless layout may require more floor preparation and tighter coordination with the existing waste line.
Install continuous waterproofing. The bonded membrane should cover the walls and floor, with sealed seams, corners, transitions, plumbing penetrations, niches, benches, and curb tops. Massachusetts code requirements still apply to the underlying framing, ventilation, and plumbing work, so waterproofing cannot compensate for an improperly supported or poorly connected assembly.
Seal every penetration. Use the membrane manufacturer's approved seals and accessories around valves, shower arms, drain connections, and fasteners. A single unsealed opening can interrupt the water-management system.
Test before finishing. Complete a practical 24 to 48-hour flood test and confirm that the receptor holds water without measurable loss before installing tile or panels, as outlined in this professional tub-to-shower waterproofing guidance.
Why backer board isn't enough
Cement backer board provides a stable surface for tile, but it does not automatically waterproof the shower. Seams, fasteners, corners, and penetrations need treatment that belongs to the selected membrane system. This tile backer board installation guide explains how board placement fits with wet-area protection.
After tile, glass, trim, and flooring are installed, a failed shower pan is disruptive to repair. Water-damaged framing or subfloor may require demolition beyond the shower floor. Skipping the flood test saves little compared with opening a finished bathroom to find a concealed leak.
Understanding the True Costs and Timeline
A tub-to-shower conversion typically costs about $1,200 to $12,000, with one 2026 guide placing the average near $4,000 and noting that custom tiled walk-in showers approach the high end of the range, according to this tub-to-shower conversion cost guide. Another 2026 guide gives a broader range of about $1,200 to $15,000, depending on scope, as described in this cost analysis of tub-to-shower conversions.
Those ranges are useful only when you understand what changes the scope. A basic prefabricated shower may preserve much of the existing plumbing and use a limited finish package. A custom tiled shower can involve demolition, substrate repair, drain relocation, waterproofing, niche framing, bench construction, specialty glass, and detailed trim work.
Hidden cost drivers deserve line-item pricing
Ask the estimate to separate visible selections from concealed work. The major variables often include:
- Drain relocation: Moving the drain can require access below the bathroom, cutting the subfloor, modifying waste piping, and repairing the finished floor.
- Water damage repair: Rotten framing or subfloor must be removed and replaced before the new enclosure can be trusted.
- Curbless construction: A flush entry may require floor recessing, floor buildup, a linear drain, and more exact waterproofing transitions.
- Custom tile: Patterns, niches, miters, mosaics, natural stone, and large-format pieces increase layout and installation labor.
- Glass enclosure: Frameless panels require accurate finished dimensions. Ordering glass before tile work is complete creates avoidable risk.
- Valve replacement: A new shower should use a compliant pressure-balancing, thermostatic, or combination valve.
IRC 2018 Section P2708.3 requires individual shower and tub-shower combination valves to be pressure-balancing, thermostatic, or combination valves. This protects users from sudden pressure changes that can create scalding conditions, as detailed in this IRC anti-scald valve reference. Massachusetts projects also need local permitting and inspection requirements reviewed before work begins, because town procedures can affect sequencing.
Schedule around curing and inspection
The work sequence generally includes demolition, framing and substrate repairs, plumbing rough-in, inspection where required, receptor or mortar-bed installation, waterproofing, flood testing, tile setting, grout and sealant work, glass measurement, and final cleanup. Tile, mortar, grout, and sealants need appropriate curing time. A company promising a one-day wet-area replacement may not be describing a complete custom renovation.
Use a written proposal that identifies allowances, exclusions, change-order rates, fixture responsibilities, cleanup, and the conditions that trigger additional work. That document is more useful than a single headline price.
For local planning, compare the scope with a bathroom remodel near me search, but verify that each contractor can explain the concealed work rather than only the decorative package.
Hiring Local Massachusetts Tile and Remodeling Experts
A tub-to-shower conversion can expose structural and plumbing problems long before the new tile is installed. The contractor must coordinate demolition, framing, drain work, waterproofing, tile movement, grout, glass, and cleanup. Skill in one task does not guarantee that the finished shower will perform as a connected system.
Massachusetts homes often have older framing, uneven floors, tight plumbing chases, and repairs built from incompatible materials. Local experience in Newton, Wellesley, Wayland, Needham, and Weston helps a contractor anticipate those conditions and coordinate with the applicable building and plumbing authorities. Seasonal humidity and temperature changes also make durable wet-area transitions important, even in a bathroom with effective ventilation.

Questions to ask before signing
A reliable estimate identifies the concealed work, not only the fixtures. Ask who is responsible for each stage and how the following details will be handled:
- Waterproofing method: Which membrane or receptor system will be used, and how will seams, corners, niches, benches, and penetrations be sealed?
- Flood testing: Will the shower pan be tested before tile installation, and will the result be documented?
- Drain access: Where will the installer reach the existing drain, and what happens if the pipe or subfloor is damaged?
- Tile preparation: How will the team correct flatness, control movement, handle transitions, and limit lippage with large-format tile?
- Code coordination: Who handles permits, inspections, and required plumbing upgrades?
- Glass timing: When will the enclosure be measured, and how will the finished tile support and protect the glass installation?
- Cleanup: Does the proposal include dust control, debris removal, grout haze removal, and post-construction cleaning?
A curbless shower requires added scrutiny. The proposal should show the floor slope, drain position, waterproofing transition, and any subfloor modification needed to align the shower with the bathroom floor. If those details remain unclear before demolition, the design is not ready.
Specialized tile teams also bring consistency to surface preparation and finish work, which is why these questions matter more than the showroom pitch. Review the answers, allowances, exclusions, and change-order terms before signing, especially where concealed framing or plumbing may increase the scope.
Maintaining Your New Shower and Grout
Maintenance starts with controlling what remains on the surface after each shower. Use a squeegee on glass and broad tile areas, keep bottles off the floor when possible, and run the exhaust fan during bathing and afterward. Good ventilation reduces lingering moisture, but it can't correct a drainage or waterproofing defect.
Use a pH-neutral cleaner suited to the tile, grout, and sealant specified for the installation. Harsh acids can dull some stone, weaken cement-based grout over time, or damage nearby metal finishes. Avoid abrasive pads that can scratch polished porcelain, glazed ceramic, glass tile, or fixtures. Always follow the tile and grout manufacturer's care instructions, especially when the shower includes marble or granite.
Watch the joints, not just the tile
The most important maintenance inspection is visual. Look closely at inside corners, the floor-to-wall transition, the curb, the drain perimeter, niche corners, and penetrations around the valve and shower arm. Flexible sealant belongs at many changes of plane, while grout belongs where the approved system specifies it. Separation, cracking, discoloration, or a persistently damp area deserves prompt attention.
A simple routine works well:
- After use, remove standing water. Pay attention to corners and the area around the drain.
- Clean regularly with the approved product. Don't wait until mineral deposits become difficult to remove.
- Inspect monthly. Look for open joints, loose tile, damaged grout, and failing caulk.
- Repair early. Remove failed sealant cleanly, allow the area to dry, and use a compatible replacement rather than smearing new caulk over old material.
- Keep the drain clear. Hair and soap buildup can slow drainage and leave the receptor wet longer than intended.
The scale of shower upgrades reflects how central this fixture has become in major remodels. In the 2019 U.S. Houzz Bathroom Trends Study, 83% of homeowners upgraded the shower and 54% increased its size during a master bathroom renovation, according to the Houzz bathroom trends study.
A well-built shower doesn't need complicated care. It needs consistent drying, suitable cleaners, adequate ventilation, and early attention to small joint failures before moisture can reach the assembly behind the tile.
Sunny Day Pro Services provides bathroom tile and flooring installation for tub-to-shower conversions, along with post-construction cleanup that leaves the space ready to use. Visit Sunny Day Pro Services to request a quote for your Massachusetts bathroom project and discuss the tile, waterproofing coordination, and finish work your conversion requires.

