
Deep Cleaning Kitchen Checklist: A 2026 Room-by-Room Guide
Use this deep cleaning kitchen checklist to scrub, sanitize, and organize every corner. Your complete 2026 guide for a spotless kitchen.
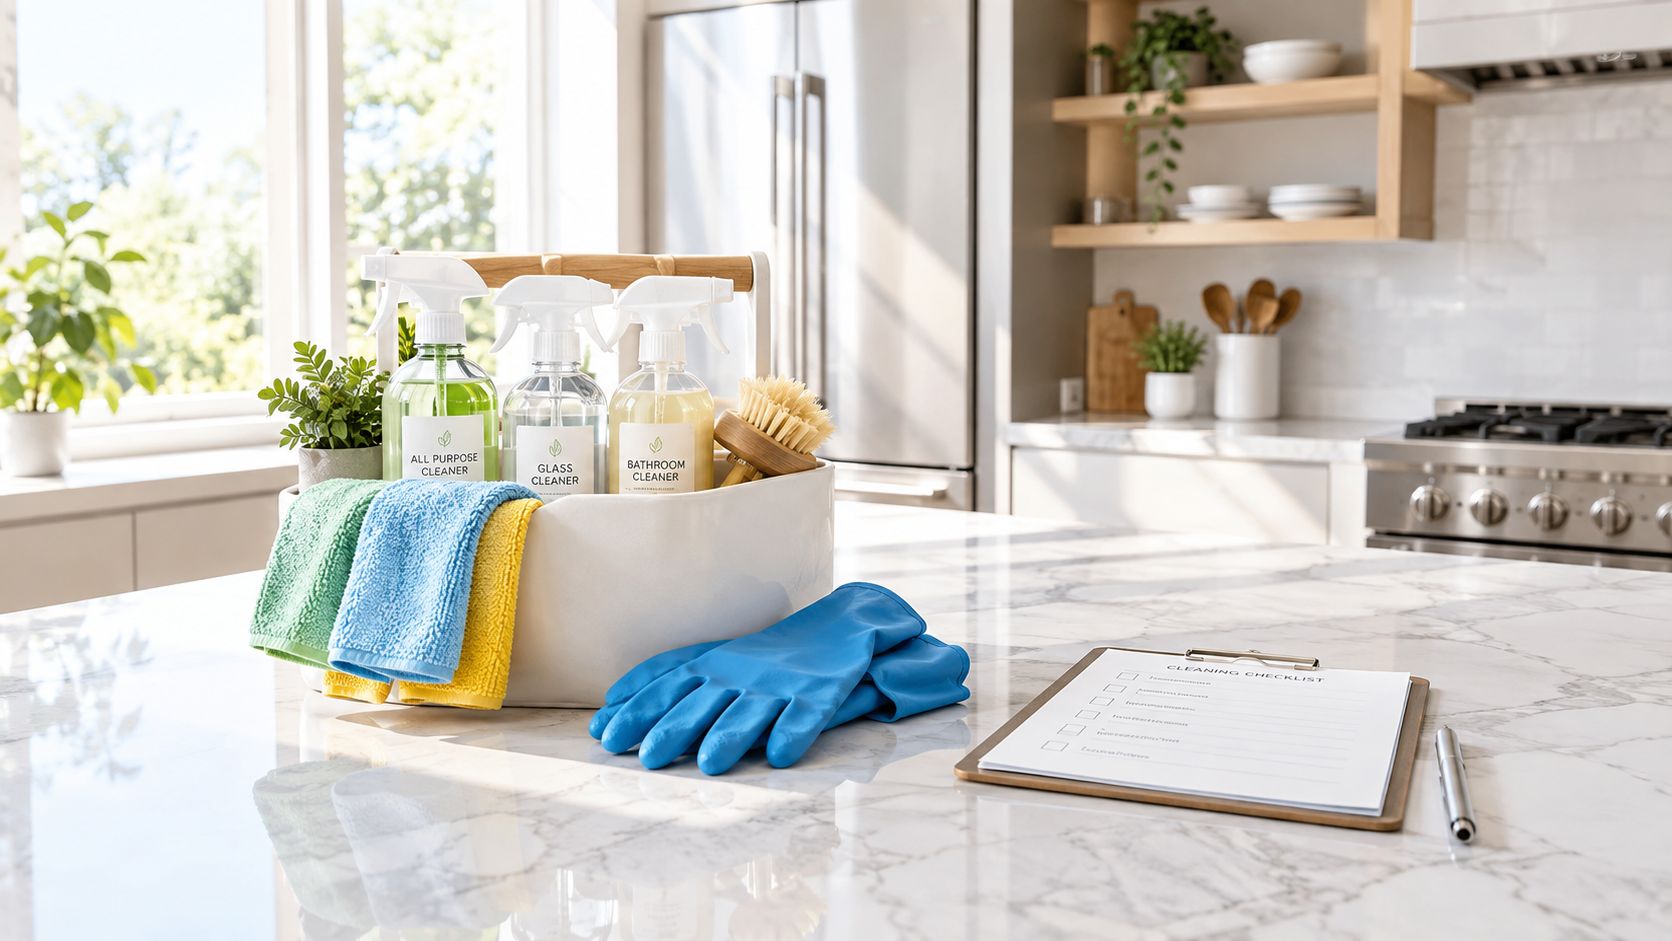
Saturday at 7:40 a.m. is when most kitchens tell the truth. The coffee is brewing, the counters look mostly fine, and then you catch the cabinet fronts above the range in side light. There's a tacky film on the finish, a haze on the hood, and a sour smell near the sink that didn't come from last night's dishes alone.
That's the point where a regular wipe-down stops being enough. A proper deep cleaning kitchen checklist isn't about making the room look good for the next meal. It's about resetting the kitchen in the right order so grease, residue, and contamination-prone surfaces don't keep feeding the next round of mess.
Table of Contents
- Commercial vs. Eco-Friendly Cleaner Comparison
- Where DIY Works and Where It Doesn't
- How I'd Split the Work
Why a Deep Clean Is Different From Your Nightly Wipe-Down
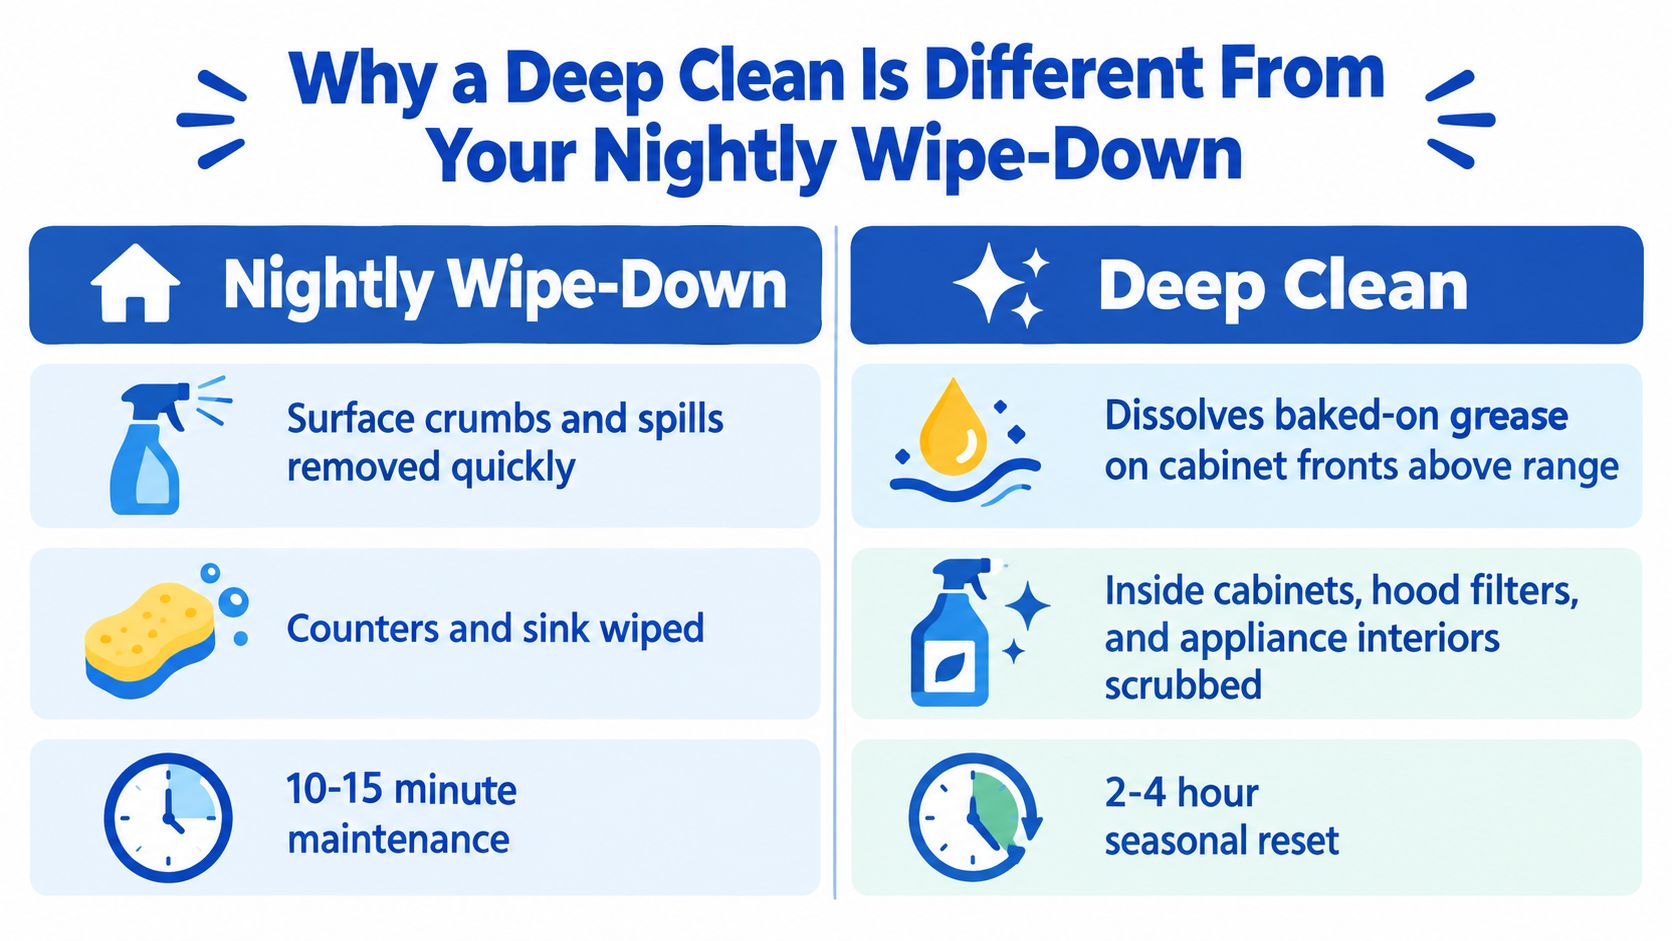
A nightly wipe-down handles the obvious. You clear crumbs, wipe a ring off the counter, maybe hit the sink with a sponge, and move on. That keeps a kitchen presentable.
A deep clean does different work. It deals with what daily cleaning misses: grease bonded to cabinet faces, buildup inside hood filters, residue in refrigerator seals, and the contamination chain that starts at the sink and spreads across handles, boards, and counters.
What the Daily Wipe Misses
The biggest mistake I see in Massachusetts kitchens between tenants and after renovations is treating visible dirt as the whole job. It isn't. A clean-looking counter can still be a badly cleaned food-contact surface if grease, detergent residue, or sink splash is still in play.
A 2023 USDA kitchen behavior study showed how wide that gap can be. Eighty-seven percent of participants said they washed hands before cooking, but only 44% were observed doing so, and handwashing wasn't even attempted 83% of the times it should have happened. The same study found 96% of handwashing attempts missed at least one required step, and the kitchen sink was the most frequently contaminated surface, with 34% of participants contaminating it during meal prep, according to the USDA consumer kitchen behavior study.
That's why good deep cleaning focuses on sequence and high-risk zones, not just appearance.
The Real Difference Is Sequence
Food-contact cleaning works best in a set order. Wash off debris and grease first. Rinse if needed. Then sanitize the surface. If you stop at spraying and wiping, you often smear soil around and leave the surface looking better than it actually is.
Practical rule: If a surface touches food, the goal isn't “looks clean.” The goal is “clean first, then sanitized if appropriate.”
If you want a fuller breakdown of what separates routine cleaning from a reset-level service, Sunny Day Pro's guide on what deep cleaning means in a real home is a useful companion.
Gather the Right Supplies Before You Start
Before you spray anything, do one lap around the kitchen and stage your tools. Most deep-clean jobs go sideways for one reason. People start cleaning with one bottle and one rag, then cross over from grease to food-contact surfaces without changing tools or chemistry.
Set up separate supplies for degreasing, sanitizing, and finishing surfaces like glass or stainless. That simple split keeps the work cleaner and faster.
The Supply Kit That Actually Covers a Kitchen
Use this as a copy-and-go setup:
- For grease and cooked-on soil: pH-neutral all-purpose cleaner, stronger degreaser for hood and range area, non-scratch scrub pad, microfiber cloths in one color dedicated to grease.
- For food-contact cleaning: dish detergent or surface-safe cleaner, clean rinse cloths, sanitizer approved for food-contact surfaces or a bleach solution mixed and used according to label-safe guidance.
- For detail work: small brush set, old toothbrush for seams, putty knife wrapped in cloth for crevices, nitrile gloves, and a mask if you're tackling dust or renovation residue.
- For finish work: glass cleaner, stainless cleaner, dedicated polishing microfiber, baking soda for odor control, white vinegar for hard-water spotting on appropriate surfaces, and isopropyl alcohol for sticky residue.
Independent food-safety guidance is clear on one point that many household checklists blur: wash first with hot, soapy water, then sanitize. It also notes that not every surface needs the same treatment, which is why a one-bottle approach usually fails, as explained in the Illinois Extension cleaning and sanitizing guidance.
Deep Cleaning Supply Kit by Surface
| Surface / Job | Cleaner | Tool | Sanitizer Step |
|---|---|---|---|
| Cabinet fronts near range | Degreaser or pH-neutral all-purpose cleaner | Non-scratch pad and grease-only microfiber | Usually not needed unless food-contact area |
| Prep counters | Hot water and detergent | Microfiber cloth | Sanitize after cleaning and rinsing |
| Sink basin and faucet | Detergent or sink-safe cleaner | Brush for seams and sponge | Sanitize after visible soil is removed |
| Range hood filter | Degreaser | Brush and soak container | Not typically a food-contact step |
| Glass and stainless fronts | Glass or stainless cleaner | Dedicated lint-free microfiber | Not usually needed |
For a broader setup beyond the kitchen, this professional house cleaning supplies list is a practical reference.
The Room-by-Room Deep Cleaning Sequence
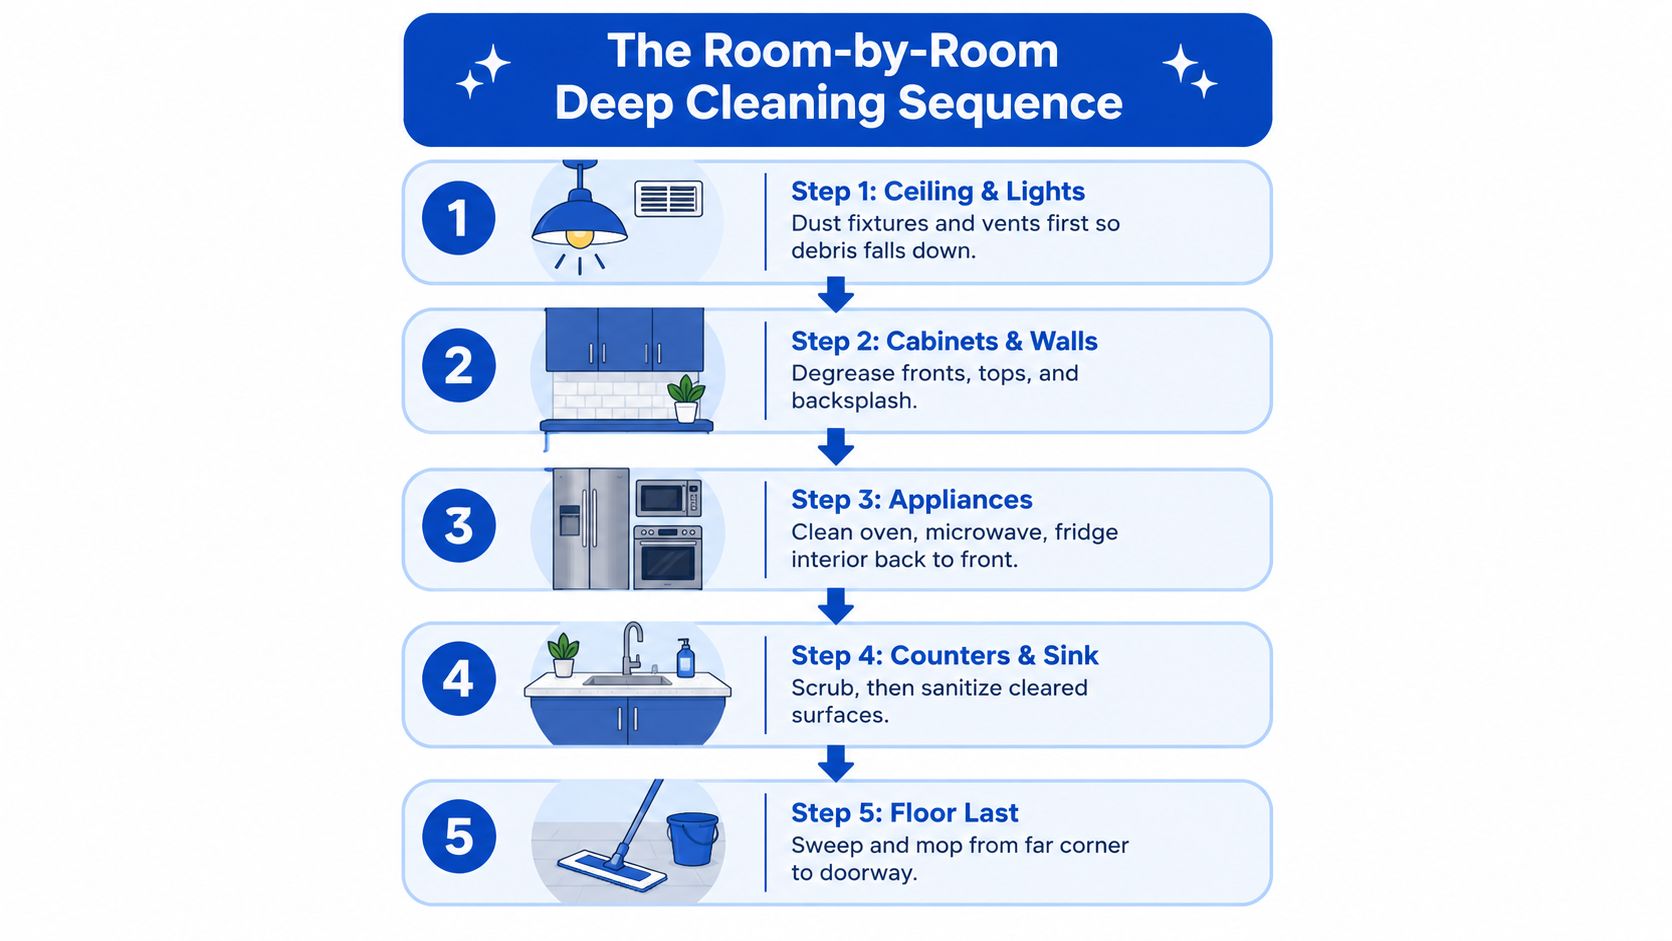
Scrubbing harder isn't what gets a kitchen clean. Order does. In food-service guidance, the standard approach is to clean from ceiling to floor and back to front so you don't knock dust, grease, or dirty rinse water onto areas you already finished, according to this commercial kitchen sequencing guide.
Start High and Away From the Exit
Begin with the farthest point in the room and work toward the doorway. That usually means the ceiling corners, vents, light fixtures, and hood exterior first. Dust and dry debris always fall. If you clean counters first, you'll clean them twice.
Then move to upper cabinets, cabinet tops, and the wall area around the range. In older New England homes especially, those painted and wood surfaces collect a fine cooking film that grabs dust and turns gummy.
Clean in a direction that protects finished work. Top down. Back to front. Dirty to clean. Dry debris before wet work.
The Clean Then Sanitize Workflow
For food-contact surfaces, the practical sequence is scrape or pre-wipe debris, wash with hot water and detergent, rinse, sanitize, then air-dry. Australian food-safety guidance adds that you do a final rinse only if the sanitizer label requires it, and drying should be drip-dry or with a single-use towel. It also notes that the wash, rinse, then sanitize sequence is the most effective way to prevent cross-contamination on countertops in restaurant settings, as described in the Food Standards Australia surface sanitizing guidance.
The main failure points are simple and common:
- Skipping the rinse: leftover detergent can weaken sanitizer performance.
- Using a dish towel after sanitizing: that can put microbes right back on the surface.
- Sanitizing visible grease: sanitizer works poorly on dirty surfaces.
The Working Order That Saves Time
A usable kitchen deep clean sequence looks like this:
- Ceiling area and fixtures. Dust vents, lights, hood exterior, and the underside of the microwave.
- Cabinets and walls. Upper sections first, then lower cabinet fronts, pulls, and toe-kicks.
- Cooking zone. Stovetop, range, knobs, drip pans, oven door, and oven cavity.
- Counters and movable items. Clear appliances, clean exposed counter, then clean behind and under each item.
- Sink and faucet. Basin, handles, seams, and drain area after counters are finished.
- Cold storage and small appliances. Refrigerator interior, door seals, toaster crumb tray, coffee maker reservoir, kettle.
- Floors last. Vacuum dry debris, then mop toward the exit.
That order is what makes a deep cleaning kitchen checklist work in a real home instead of just looking organized on paper.
Hidden Hot Spots Most Checklists Skip
Most homeowners clean what they can see from standing height. That leaves out the exact areas that make a kitchen feel dirty again a week later.
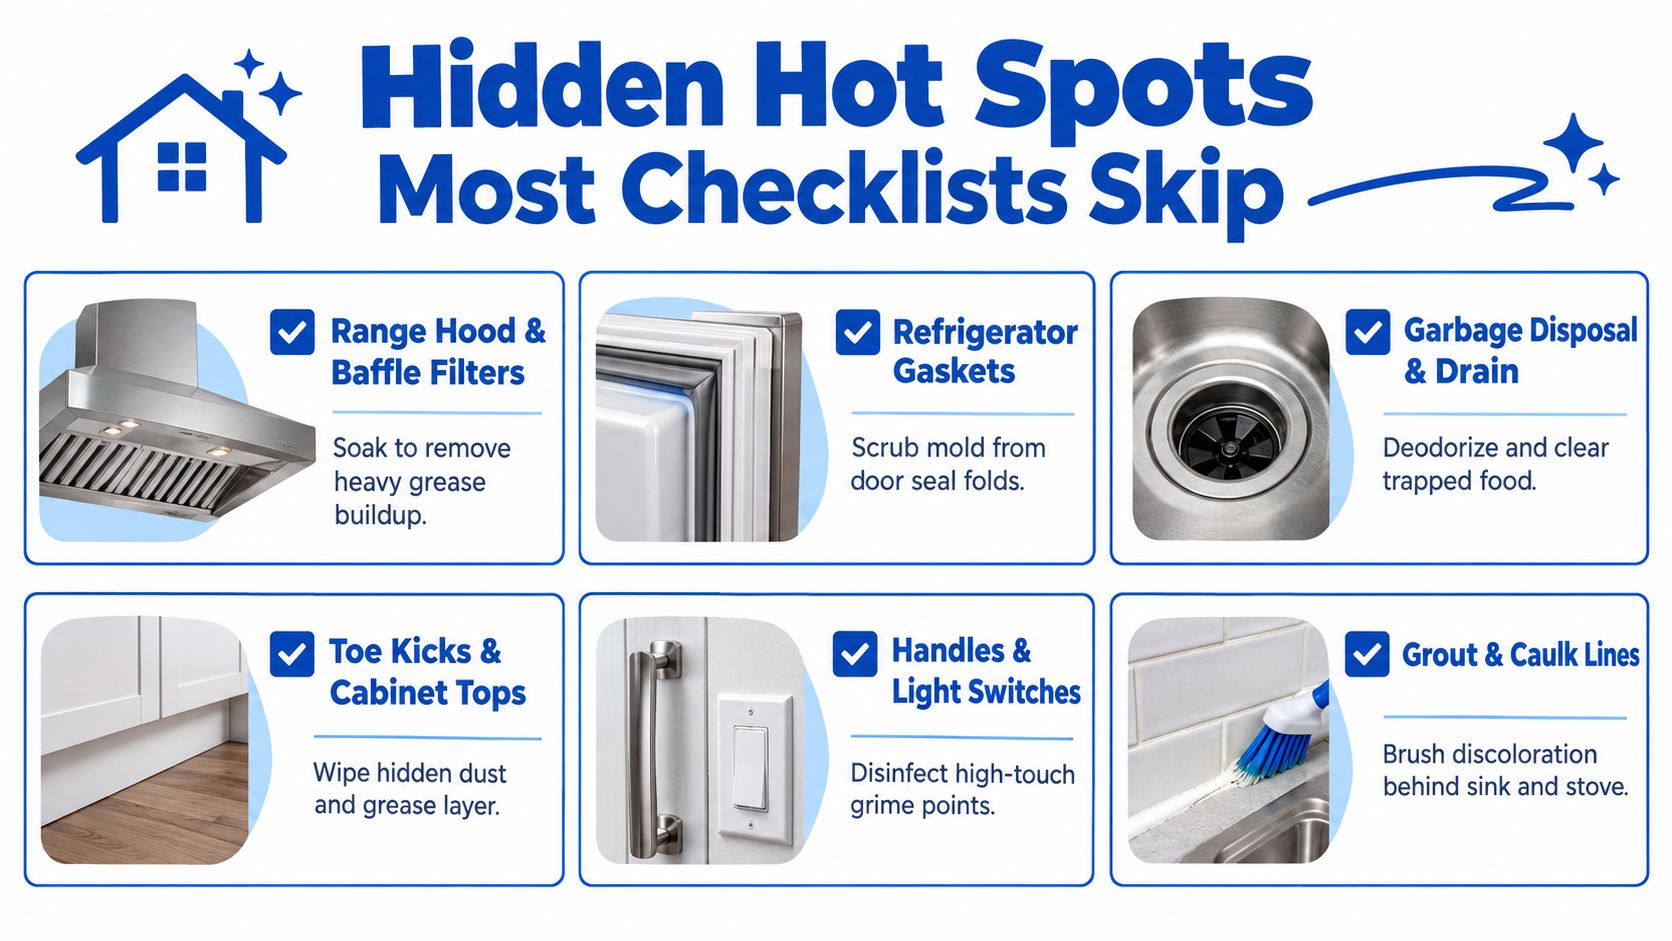
The missed zones aren't cosmetic extras. They're the places where grease, residue, moisture, and touch traffic keep reseeding the room.
The Spots That Cause Repeat Problems
High-risk kitchen guidance treats every food-contact surface as a post-use sanitization problem, not just a visible-dirt problem. Industry guidance built on food code standards requires sanitized food-contact surfaces after cleaning, with chemical sanitizers at confirmed concentrations or hot-water immersion at 171°F minimum, and it specifically points toward contamination-prone locations like cutting boards, prep counters, sink basins, faucet handles, refrigerator seals, and dishwasher filters in the food code cleaning overview.
In homes, the hidden trouble spots usually include:
- Range hood filters and hood seams where grease settles and thickens.
- Refrigerator gaskets that trap moisture and residue in folds.
- Dishwasher filter and door gasket where food soil lingers.
- Trash can rim and under-lid lip that keep odors hanging around.
- Toaster crumb tray that collects burnt debris and attracts pests.
- Sink overflow, drain edge, and faucet base where splash and residue meet.
- Cabinet pulls, light switches, and appliance handles that pick up constant hand contact.
- Under-appliance spaces where dust and food bits build unnoticed.
How to Check Before You Scrub
You don't need lab testing to spot hidden buildup. Use simple checks:
- Flashlight test: hold a light across cabinet faces, hood edges, and backsplash tile. Grease shows up faster in side light than in overhead light.
- Sniff test: open the fridge, dishwasher, and trash can lid after the room has been closed up for a bit. Odor usually points to a filter, gasket, or drain issue.
- Glove swipe: run a gloved finger along the top of cabinets, hood trim, or fridge seal folds. Tacky residue means the area needs degreasing, not a quick wipe.
- Paper towel press: press a white towel into seams and hardware edges. Yellow or gray transfer tells you what's sitting there.
The kitchen that “looks clean” but smells off almost always has a filter, seal, drain edge, or under-appliance problem.
One thing newer deep-clean guidance gets right is treating ventilation, filters, grout, and under-appliance spaces as core tasks, not optional extras. That shift shows up clearly in this 2026-style deep cleaning checklist focused on hidden buildup.
Eco-Friendly Product Alternatives That Actually Work
Eco-friendly cleaning can work well in kitchens. It just doesn't work equally well for every problem. The mistake is assuming “natural” means effective on grease, safe for every surface, and suitable for food-contact use without rinsing. Those are three different questions.
A smart setup uses milder products where they perform well, then brings in stronger chemistry only where DIY options waste time.
Commercial vs. Eco-Friendly Cleaner Comparison
| Cleaner | Best For | Dwell Time | Food-Safe Rinse | Notes |
|---|---|---|---|---|
| Petroleum-based degreaser | Polymerized grease on hoods, oven exteriors, greasy cabinet bands | Short to moderate, follow label | Usually yes on food-adjacent surfaces | Fast on stubborn grease, stronger fumes, not my first choice for routine wipe-downs |
| Plant-based surfactant cleaner | General cabinet fronts, counters, sealed stone-safe routine soil | Moderate, let it sit before wiping | Depends on label and use area | Good middle ground for regular deep-clean maintenance |
| White vinegar | Mineral spotting and hard-water film | Short | Rinse on food surfaces | Poor on grease and not suitable for natural stone |
| Baking soda paste | Gentle abrasion on stainless and enamel | Short | Rinse well | Helpful for deodorizing and light scrubbing |
| Diluted castile soap | Daily or light-duty cleaning | Short | Rinse on food-contact areas | Versatile, but not enough for baked grease or post-construction residue |
Where DIY Works and Where It Doesn't
DIY wins on lighter jobs. Vinegar is fine for hard-water spotting on the right surfaces. Baking soda paste helps on sink haze and inside some enamel appliances. Castile soap is decent for maintenance cleaning.
DIY usually loses in four situations:
- Carbonized oven spills
- Heavy hood-filter degreasing
- Mold or dark residue on silicone-style seals
- Post-construction dust and fine debris
That last one matters after remodels. Fine dust settles into joints, vents, and textured surfaces, and it needs careful removal, not casual wiping.
How I'd Split the Work
Between tenants or before listing photos, I'd typically use a stronger degreaser on the hood and oven zone, then shift to a milder plant-based product on the rest of the kitchen. That keeps the chemistry matched to the soil.
If you're trying to reduce harsher products without sacrificing performance, this guide to eco-friendly cleaning products is a sensible starting point.
Timing, Printable Checklist, and When to Call a Pro
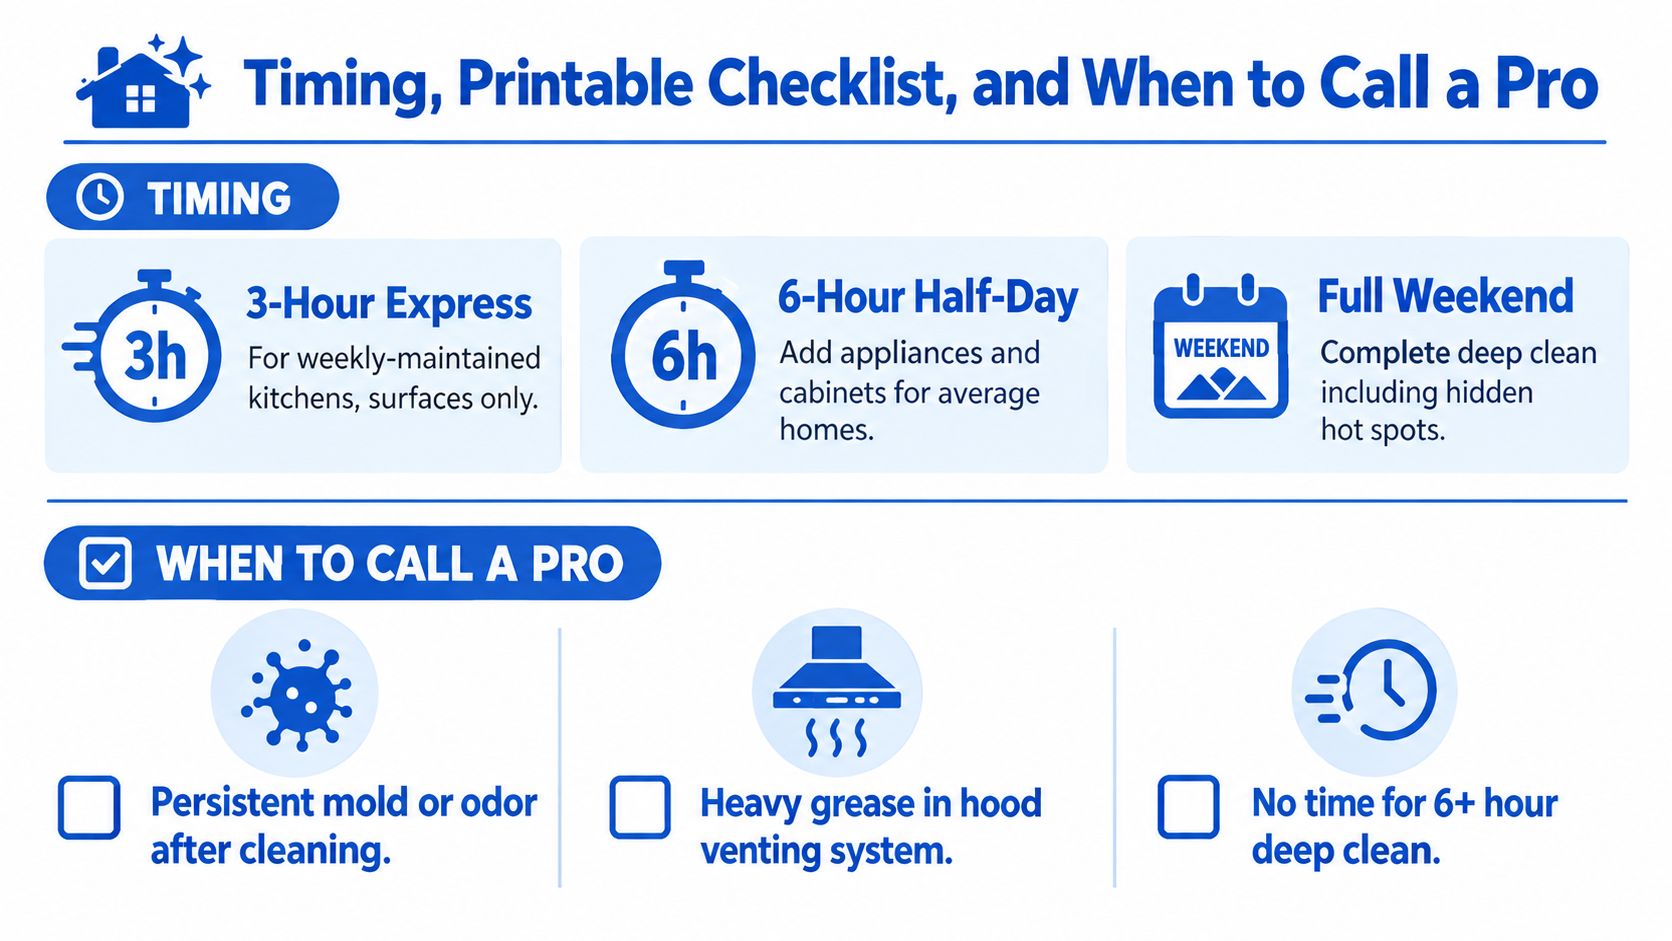
The biggest planning mistake is underestimating how long a true kitchen reset takes. If the kitchen gets weekly maintenance, you can move quickly. If it's a move-out, post-renovation, or “we haven't pulled the fridge out in ages” situation, the timeline changes fast.
I'd think of the job in three tiers rather than one generic Saturday task.
A Realistic Time Budget
- Express reset for a regularly maintained kitchen. This covers visible surfaces, sink, fronts, and the main cooking zone.
- Standard deep clean for the average lived-in kitchen. Add appliance interiors, cabinet fronts, seals, filter cleaning, and floor edges.
- Full reset for move-out, post-construction, or pre-listing work. Include inside cabinets, behind movable appliances, heavier degreasing, and detail cleaning of neglected zones.
If you want one outside benchmark for ventilation-related cleaning schedules, commercial fire guidance often sets grease-extraction cleaning intervals by use level at every 3 months for heavy use, every 6 months for moderate use, and every 12 months for light use, according to the NFU Mutual commercial kitchen fire safety guide. A home kitchen doesn't follow the same rulebook, but the principle holds. Heavy cooking means hood and filter cleaning can't stay on a vague “once in a while” schedule.
Printable Deep Cleaning Kitchen Checklist
Save this, print it, or screenshot it:
Highest priority first
- Clear and stage counters, tools, and trash.
- Dust high areas including lights, vents, and hood exterior.
- Degrease cabinet bands near the range and backsplash area.
- Clean the stove and oven including knobs, grates, drip pans, and door edges.
- Wash and rinse counters after moving small appliances.
- Sanitize food-contact surfaces only after they're visibly clean.
- Scrub the sink and faucet base and clean the drain edge.
Second pass tasks
- Clean refrigerator interior and wipe door seals.
- Empty and clean toaster crumb tray.
- Clean dishwasher filter and gasket.
- Wipe handles and switches.
- Scrub trash can rim and lid underside.
Finish work
- Vacuum under reachable appliances.
- Mop floors last from far corner to doorway.
- Air-dry sanitized surfaces where appropriate.
When It's Time to Call a Pro
Some jobs are better handed off:
- Visible mold in venting or inaccessible duct areas
- Heavy grease in hood systems or signs of a past flare-up
- Stone surfaces showing etching or finish damage
- Post-construction dust after kitchen work
- Any task that needs ladder work above the refrigerator or cabinets
Academic medical center fire guidance also calls for hoods, fans, ducts, and other kitchen appurtenances to be inspected and cleaned of grease at least every 6 months, with 3-month intervals for high-volume operations, and it specifically flags grease on walls, ranges, fryers, broilers, grills, ovens, and grease traps in the UCSF kitchen fire safety guidance.
Never mix bleach and ammonia. Ventilate the room well, follow product labels, and don't assume stronger chemistry means better results.
One practical option for homeowners who want the hidden-zone work handled is a kitchen deep clean service that includes inside the fridge, oven, microwave, cabinets, and under or behind appliances. Sunny Day Pro Services offers that type of scope in its Massachusetts cleaning lineup.
Keep It Deep-Cleaned Longer With These Habits
A deep clean lasts longer when you stop treating the kitchen as one big zone. Keep it on a rhythm instead. Short resets beat heroic catch-up sessions every time.
Three Habits That Stretch the Reset
First, do a nightly 10-minute reset. Clear counters, wipe the cooktop after it cools, and dry the sink. That slows grease bonding and cuts down on water spotting around the faucet and basin.
Second, rotate one small forgotten zone each week. Handles, switches, trash can exteriors, refrigerator seals, and cabinet pulls don't take long. They just get skipped when there isn't a plan.
Third, hit the heavy-soil points on a repeating cycle. Hood filter, gasket wipe, trash can scrub, dishwasher filter, and the floor edges under movable pieces are what push a kitchen back toward deep-clean territory.
Why the Habit Layer Matters
A 2026 Safefood survey found 90% of home cooks felt confident in their kitchen cleaning, but only 25% consistently followed key cleaning practices. The same survey reported 64% of adults didn't replace dishcloths and sponges at least every two days, 74% failed to wash hands both before and after touching a phone while cooking, 73% risked spreading food-poisoning bacteria by skipping essential practices, and only 28% realized food-poisoning bacteria can survive on surfaces like phones and worktops for more than 24 hours, according to the Safefood home-cook hygiene survey.
That gap is why a kitchen stays cleaner when habits are scheduled, surface-specific, and repetitive. Not because the kitchen is dirtier than you think, but because the details people trust themselves to remember are the first ones they miss.
If your kitchen needs more than a wipe-down, Sunny Day Pro Services handles deep cleaning for busy homeowners across Wayland, Newton, Needham, Wellesley, Weston, and nearby Massachusetts communities, including appliance interiors, cabinet wipe-downs, under-appliance cleanup, and post-renovation resets. If you'd rather hand off the greasy, time-heavy work and get the kitchen back to a clean baseline, visit Sunny Day Pro Services to request an estimate.

