
Flooring Installation Services Guide for Homeowners
Learn what flooring installation services include, costs, timelines, and how to choose the right installer. Get expert tips for a flawless result.
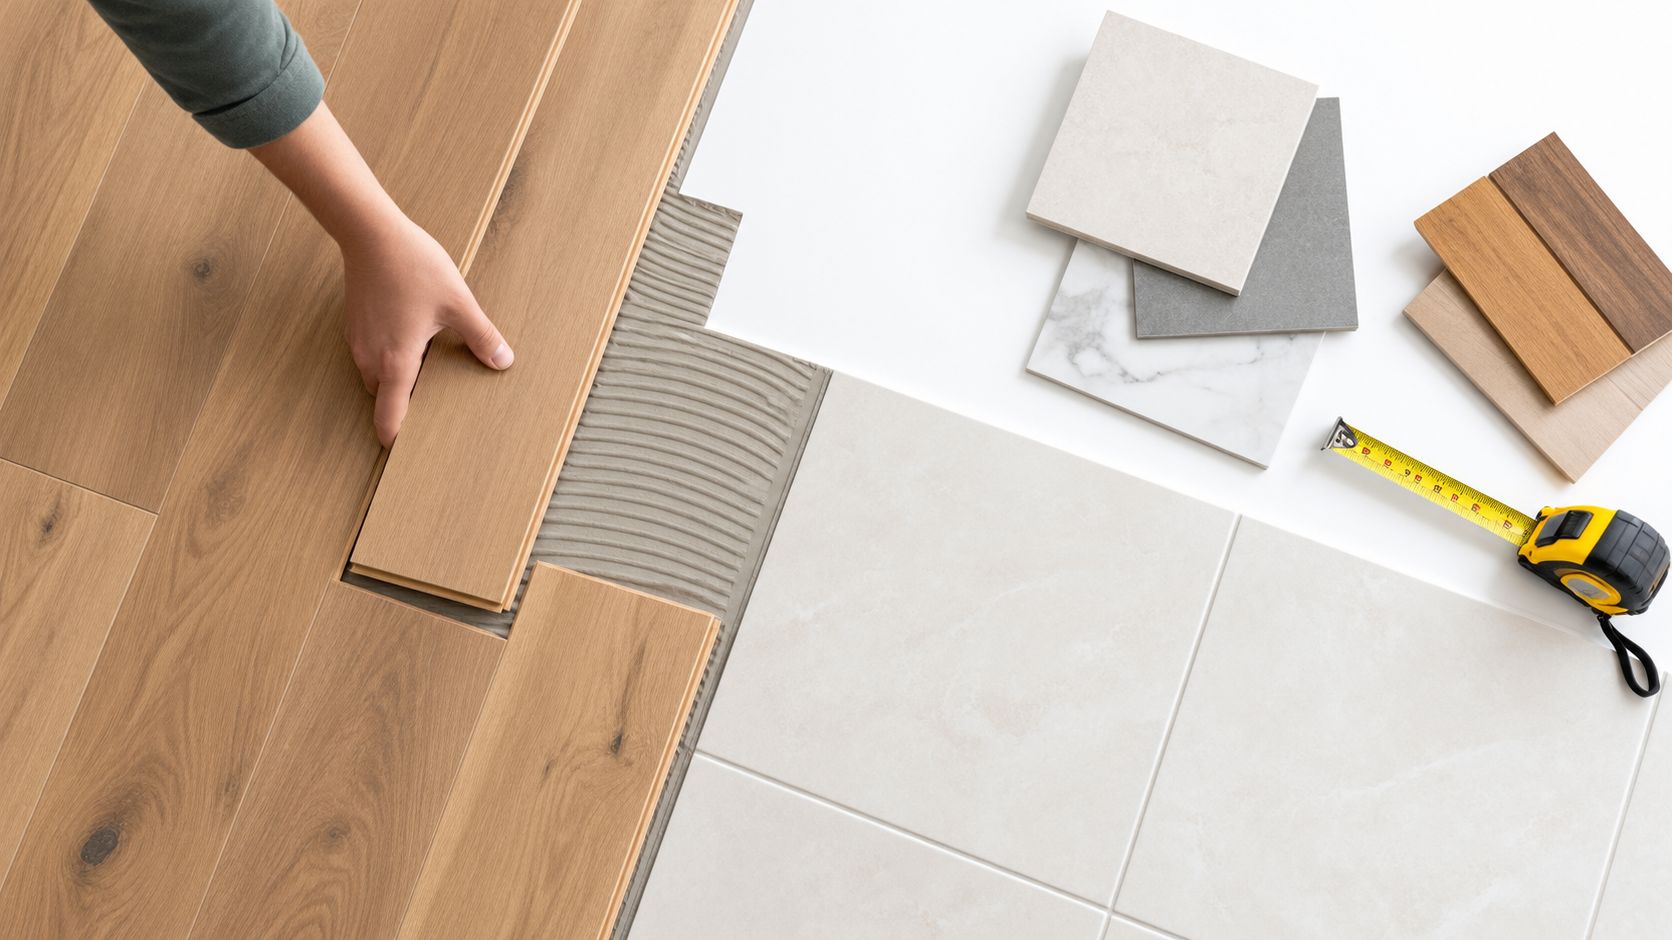
You're probably in one of two spots right now. Either you've picked a floor and assumed the hard part is over, or you're staring at samples wondering why one installer's quote sounds simple and another starts talking about moisture, leveling, grout width, and acclimation.
That gap is where most flooring problems begin.
A floor isn't just a finish. It's a system. The visible material matters, but the subfloor underneath it, the room conditions around it, and the skill of the crew installing it usually matter more. That's especially true in a large, competitive trade. The U.S. flooring installation services industry is projected to reach $34.0 billion in 2026, with about 103,896 businesses operating in the market, according to IBISWorld's flooring installation services industry report. Big market. Lots of options. Very uneven workmanship.
If you're a busy homeowner in Wayland, Newton, Needham, Wellesley, Weston, or nearby Massachusetts communities, the goal isn't to become a flooring expert overnight. It's to know enough to choose the right material, ask the right prep questions, and hire the right installer.
Table of Contents
- How these materials differ in real life
- Trends can raise the installation difficulty
- Flooring Material Comparison for Homeowners
- Step one through step three
- What happens before the first piece goes down
- Installation, finish work, and the last review
- Questions that reveal real skill
- Red flags worth taking seriously
- Why labor availability matters during hiring
- Simple habits that protect your new floor
- When to call a pro again
- What to include when requesting a quote
What Flooring Installation Services Actually Include
A lot of homeowners think flooring installation services start when the first tile or plank hits the floor. In real life, the job starts much earlier.
Say you're redoing a kitchen and mudroom. You pick a porcelain tile because it looks durable and easy to clean. Then the installer checks the existing floor and finds old adhesive, a small dip near the doorway, and moisture concerns near the exterior wall. None of that shows up on the tile sample, but all of it affects whether the new floor lasts.
That's what you're paying for. Not just placement, but judgment.
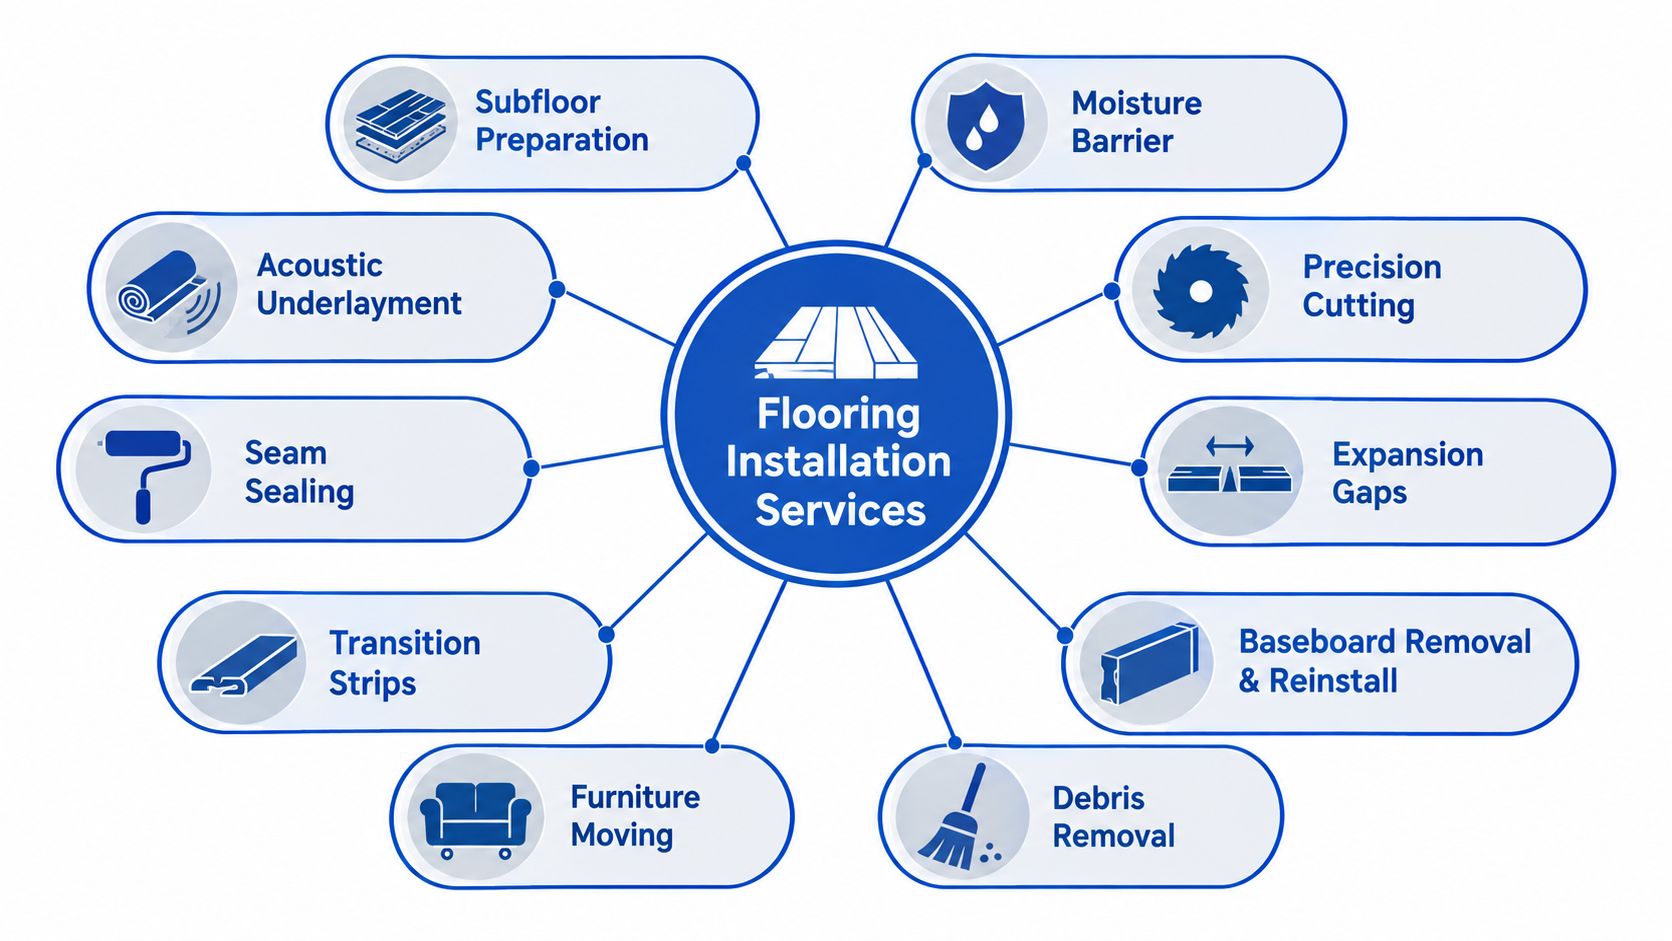
What a professional scope usually covers
Most professional flooring installation services include several parts of the job:
- Measurement and planning so the crew orders the right amount of material, plans layout lines, and identifies transitions at doorways, stairs, or adjoining rooms.
- Material handling including delivery coordination, inspection for damaged pieces, and staging materials so they acclimate if the product requires it.
- Subfloor preparation such as cleaning, patching low areas, removing old flooring, checking for movement, and verifying the surface is ready for adhesive, mortar, or underlayment.
- Installation work including dry layout, cutting, setting tile or planks, managing spacing, and keeping lines square.
- Finish work like grout, sealant where needed, trim details, transition strips, and baseboard reinstall.
- Cleanup and walkthrough so you know what was done, what needs curing time, and how to care for the floor right away.
Why workmanship changes the result
The labor side of this trade is bigger than many people realize. The Bureau of Labor Statistics reported 25,150 employed floor layers in May 2023, with a mean annual wage of $56,680 and a median annual wage of $48,840, based on BLS occupational employment and wage data for floor layers. Skilled installation isn't cheap because skilled installation isn't simple.
Practical rule: If a quote skips prep details, that's not efficiency. It usually means the risk has been pushed onto your floor.
A DIY install can work in a very forgiving space with a very forgiving material. But bathrooms, kitchens, entryways, and uneven older homes usually aren't forgiving.
In local remodeling work, companies such as Sunny Day Pro Services may handle this broader scope for tile and flooring projects, including prep, installation, and finish details, rather than treating the job like material-only labor.
Comparing Porcelain Ceramic Marble Granite and Backsplash Options
Homeowners usually ask, “What's the best flooring?” The better question is, “What's the best fit for this room, this household, and this level of maintenance?”
Porcelain, ceramic, marble, granite, and backsplash tile all solve different problems. Some are practical workhorses. Some deliver a high-end look but ask more from the installer and the homeowner.
How these materials differ in real life
Porcelain is often the safest choice for busy households. It handles moisture well, stands up to traffic, and works in kitchens, bathrooms, mudrooms, and many finished basements when the substrate is right.
Ceramic can be a strong option when you want style flexibility and a lower-stakes room surface. It's common in bathrooms and lighter-use spaces, though exact performance depends on the specific product and where it's installed. If you're deciding between these two, this guide on porcelain vs ceramic tile gives a helpful side-by-side breakdown.
Marble is about character. It brings movement, veining, and a softer natural look that many homeowners love in bathrooms and statement spaces. But marble can show wear and often needs more careful maintenance than porcelain or ceramic.
Granite is dense, durable, and visually bold. It's a fit for homeowners who want natural stone performance with a more substantial feel, especially in upscale rooms or coordinated stone-heavy remodels.
Backsplash tile plays a different role. It's not floor material, but it often gets chosen during the same remodel. A backsplash can be simple subway tile, patterned ceramic, marble mosaic, or stone. Because it sits at eye level, layout accuracy and cut quality become more noticeable than many homeowners expect.
Trends can raise the installation difficulty
Design trends matter, but they can also make the install harder. Coverage of 2026 flooring trends points to wide planks, matte or satin finishes, herringbone or checkerboard layouts, and warmer tones gaining attention, according to The Designery's flooring trend overview. Those choices can increase seam visibility, layout waste, and subfloor prep demands.
That doesn't mean you should avoid trend-forward choices. It means you should ask whether your installer has done that exact layout before.
A simple tile installed cleanly usually looks better in five years than a complicated pattern installed poorly.
Flooring Material Comparison for Homeowners
| Material | Durability and Maintenance | Best For |
|---|---|---|
| Porcelain | Strong moisture resistance, durable surface, generally low maintenance | Kitchens, bathrooms, mudrooms, high-traffic spaces |
| Ceramic | Easy to style, practical for many interior spaces, maintenance depends on product and use | Bathrooms, laundry rooms, lighter-use floors, wall tile applications |
| Marble | Elegant natural stone look, can require more careful cleaning and sealing | Spa-style bathrooms, feature areas, upscale remodels |
| Granite | Dense and durable natural stone, often chosen for long-term wear and visual impact | Luxury spaces, stone-focused remodels, select high-use areas |
| Backsplash Tile | Less wear than flooring, but layout precision and finish quality are highly visible | Kitchens, wet bars, bathrooms, accent walls |
How the Flooring Installation Process Works From Quote to Final Walkthrough
The smoothest flooring jobs follow a predictable sequence. The stressful ones skip steps, rush decisions, or leave too much unsaid before work starts.
A professional process should feel clear from day one.
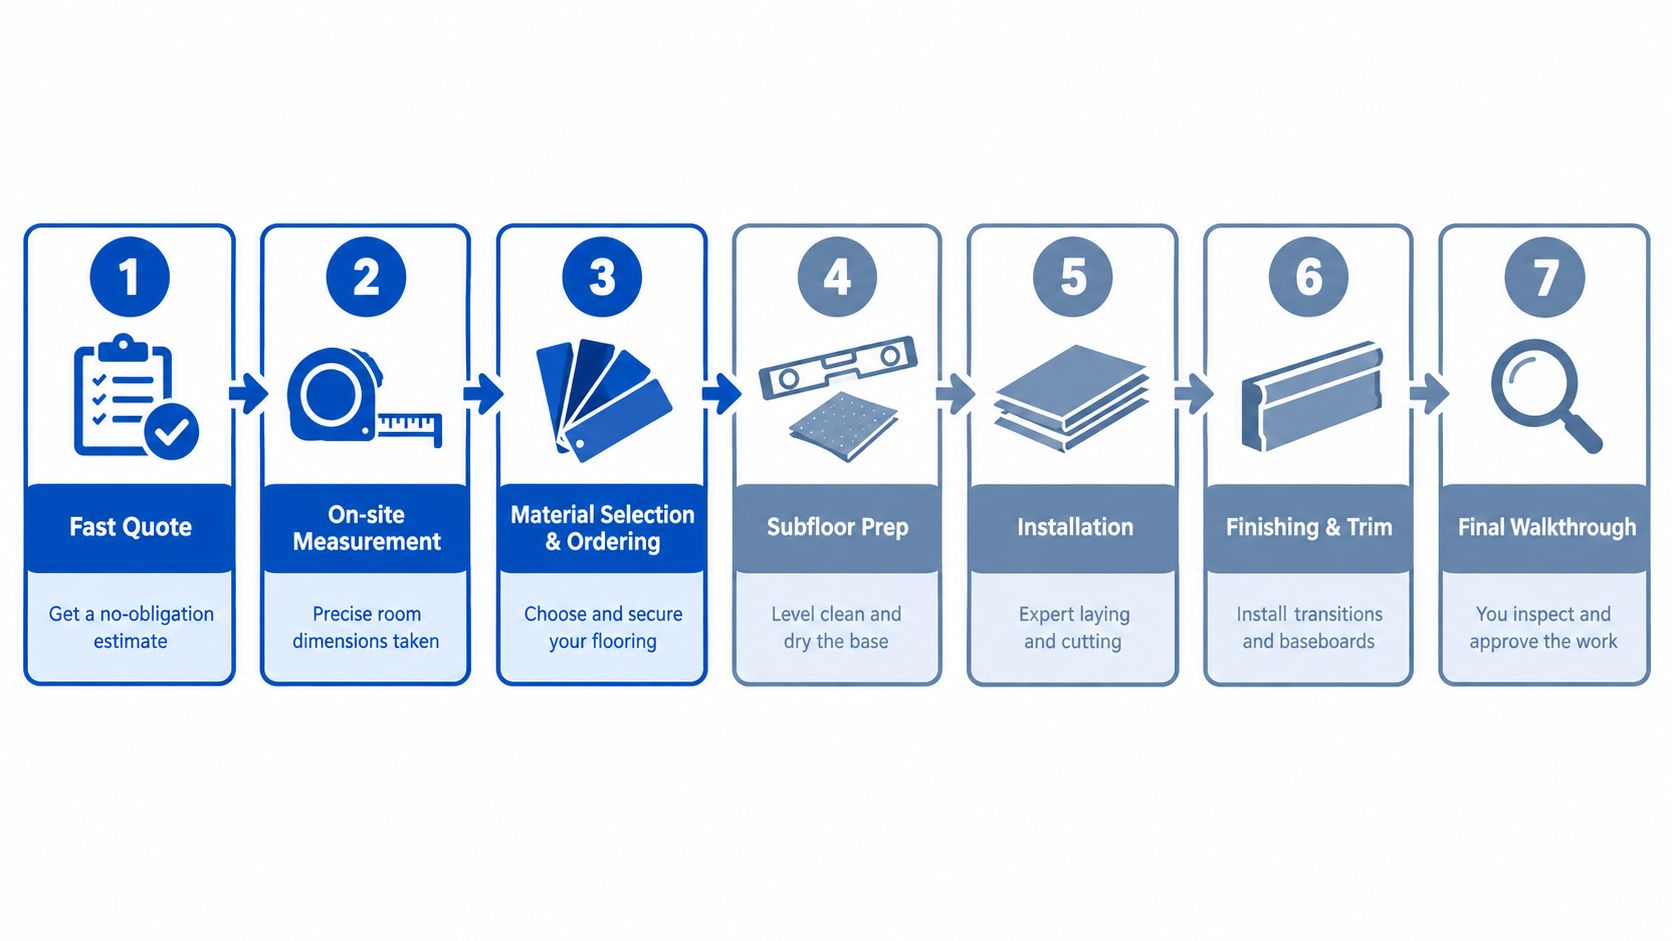
Step one through step three
Quote and initial conversation
You describe the room, the material, and any known issues. A useful early quote is a starting point, not a final promise.On-site measurement
Real planning begins here. The installer checks dimensions, transitions, existing floor height, appliance clearances, and obvious substrate concerns.Material selection and scheduling
Once the product is confirmed, the schedule gets more realistic. Specialty tile, natural stone, and custom patterns usually need more planning than straightforward field tile.
What happens before the first piece goes down
Prep is the part homeowners don't see once the room is finished, but it's often the part that determines whether the floor stays flat, bonded, and quiet.
That prep may include:
- Room clearing with furniture moved out and nearby areas protected from dust and debris.
- Demolition or removal of old flooring, trim, adhesive residue, or damaged underlayment.
- Subfloor correction to address dips, movement, cracks, or surface contamination.
- Dry layout so cuts land in sensible places and patterns look intentional rather than improvised.
The final layout should look inevitable, not accidental.
Installation, finish work, and the last review
After prep, the crew installs the material using the product-specific method. Tile work may involve mortar application, spacing control, cut sequencing, grouting, and cure time. Other flooring types may involve underlayment, locking systems, adhesive set, or perimeter expansion details.
Finish work matters more than people think. Transition strips at doorways, clean baseboard reinstall, caulked edges where appropriate, and even cut quality around vents or cabinets all affect how “finished” the room feels.
At the final walkthrough, a good installer should help you check:
- Surface consistency across the room
- Clean grout and joint lines where applicable
- Trim and transition details
- Immediate care instructions including cure time and when to move furniture back
If anything looks rushed at the edges, it usually was.
How Much Flooring Installation Costs and How Long It Takes
Flooring quotes vary because the visible material is only one piece of the job. The labor, prep, room layout, and scheduling pressure can change the price just as much.
That's why two bathrooms with the same tile can produce very different quotes.
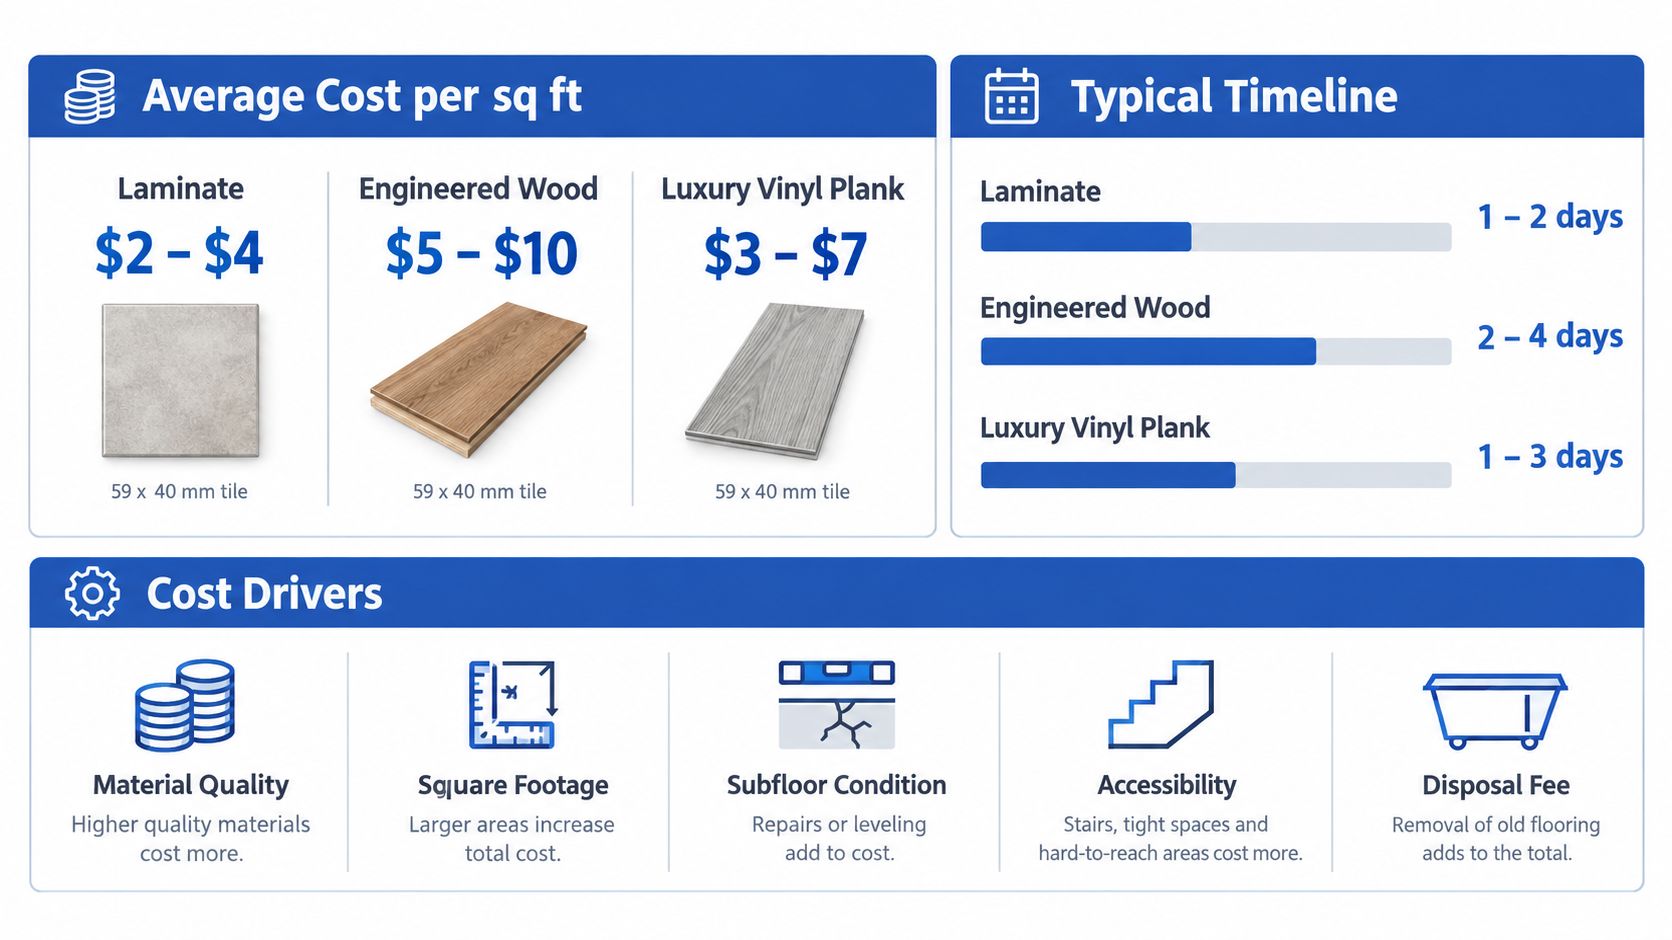
What drives the cost
The biggest cost factors usually include the material itself, the size of the space, how much cutting is required, and the condition of the existing subfloor. Patterned layouts, uneven older homes, floor-height transitions, and demolition all add labor.
Labor pressure is real in this trade. Industry reporting in 2026 described a persistent installer shortage, rising wages, and turnover, with one source noting that staffing accounts for 30-50% of operating costs in flooring, especially where precision-heavy hardwood and LVT work are involved, based on this flooring staffing costs report. That helps explain why prep-focused crews often price differently than install-only crews.
If you're trying to make sense of bids, this local guide on flooring installation cost per square foot can help you compare estimate structures and scope.
Why quotes for the same room don't match
A low quote might mean a simpler business model. It can also mean the installer excluded parts of the project that someone else included, such as:
- Subfloor patching that may be needed after demolition
- Moisture testing before installation
- Trim removal and reinstall
- Debris hauling and cleanup
- Detailed pattern layout rather than basic field placement
Ask what's included before you compare totals.
Budget check: A precise quote should tell you what happens if the crew uncovers subfloor damage or moisture issues after the old floor comes out.
How long the job takes
Timeline depends less on the sample board and more on logistics. A small straightforward room can move quickly. A larger job with demolition, drying time, or custom layout can stretch out.
Busy seasons also affect scheduling. Homeowners often assume the material is the bottleneck. In practice, installer availability is often what slows things down, especially when you need a crew experienced with detailed tile work or exacting plank layouts. If you're renovating before a move, holiday hosting, or a home sale, build in schedule cushion.
How to Vet and Choose the Right Flooring Installer Near You
The right installer will welcome detailed questions. The wrong one will try to move past them.
That matters in towns like Wayland, Newton, Needham, Wellesley, and Weston, where homeowners often expect clean finish work, older-home problem solving, and dependable scheduling. A pretty portfolio helps, but it doesn't tell you how a company handles a damp slab, a wavy subfloor, or a difficult doorway transition.

Questions that reveal real skill
Use these during calls or site visits:
- Ask about crew specialization. Some installers are strong at straightforward tile but less experienced with marble, large-format work, hardwood details, or luxury vinyl layouts.
- Ask how they inspect the substrate. You want to hear specifics about flatness, movement, moisture, and prep. Vague answers usually mean vague prep.
- Ask what standards they follow. Tile spacing, grout joint decisions, and moisture thresholds shouldn't be guesswork.
- Ask for recent similar work. A backsplash portfolio doesn't prove someone can handle a full bathroom floor or natural stone install.
- Ask about insurance and jobsite protection. Floors touch other finishes. You want to know how they protect walls, trim, adjacent rooms, and traffic paths.
Red flags worth taking seriously
Some warning signs are easy to miss because they sound confident at first.
- No in-person measuring. Remote pricing can be useful at the start, but final scope needs eyes on the room.
- No written prep plan. If subfloor work is “we'll see when we get there,” expect change-order stress.
- No clear workmanship warranty language. You should know what's covered by installer labor versus product manufacturer terms.
- No discussion of moisture testing. In tile, wood, and many resilient flooring situations, this is too important to skip.
Why labor availability matters during hiring
The labor side also affects vetting. Skilled installer shortages have been reported as especially acute in precision-heavy hardwood and LVT work, according to the staffing report cited earlier. That means asking who will be on site matters. Not just the company owner. The crew.
A good local installer should be able to explain who handles layout, who handles cuts, and who makes the final prep decisions before installation starts.
Preparing Your Home and Understanding Moisture and Subfloor Requirements
If you remember one thing from this guide, remember this. Most flooring failures start below the surface.
A floor can look perfect on day one and still fail if the slab, subfloor, or room conditions weren't ready. That's why experienced installers spend so much time talking about moisture, acclimation, and substrate condition.
What readiness looks like before installation
For concrete, two common tests come up a lot. ASTM F1869 measures moisture vapor emission over 60 to 72 hours, while ASTM F2170 measures in-situ relative humidity by drilling probes to 40% of slab depth and allowing at least 24 hours for equilibration, as explained in this flooring moisture management guide. Skipping the right test can lead to adhesive failure, cupping, bubbling, or premature debonding.
Industry guidance commonly treats ASTM F2170 as the preferred modern method for concrete moisture verification, with three tests for the first 1,000 square feet and one additional test per 1,000 square feet after that, and many manufacturer systems require installation only when RH is within product-specific limits, often around 75% to 85% RH, according to IFTI's practical guide to concrete moisture testing.
What wood and tile installers should also verify
Wood flooring has its own moisture rules. One installer-training source says the subfloor should never be more than 4% higher or lower than new strip flooring, wood subfloors should not exceed 13% moisture content, concrete RH should not exceed 75%, and a calcium chloride target of 3 lbs is recommended, based on the CFI installer training material.
Another hardwood reference recommends taking at least 30 moisture readings, treating 12% or less as a good dry reading for subfloor moisture, and acclimating flooring to within 2% to 3% of environmental readings before installation, as described in this record-keeping and moisture guidance for wood flooring.
Tile has spacing rules too. ANSI A108.02 Section 4.3.8 requires grout joints to be at least three times the tile's actual facial-size variation, and never less than 1/16 inch (1.6 mm), according to Custom Building Products' grout joint width technical bulletin. For running bond layouts with rectangular tiles longer than 15 inches, guidance says average grout joints should be at least 1/8 inch for rectified tile and 3/16 inch for calibrated tile, with wider joints needed if edge warpage is greater, based on Ceramic Tile Foundation guidance on offsets and grout joints.
If your installer talks through prep in this level of detail, that's a good sign. If you want a related primer on substrate support behind tiled areas, this overview of tile backer board installation is useful context.
Aftercare Maintenance and When to Request Your Quote
A well-installed floor still needs the right aftercare. The good news is that maintenance usually isn't complicated. It just needs to match the material.
Simple habits that protect your new floor
- Keep grit off the surface. Dirt acts like sandpaper, especially near entries and kitchen work zones.
- Use the right cleaner. Harsh or mismatched products can dull finishes, haze tile, or cause unnecessary residue.
- Wipe standing water promptly. Even moisture-tolerant materials benefit from fast cleanup, especially at seams, edges, and transitions.
- Protect heavy-contact points. Chair legs, appliance feet, and entry traffic all concentrate wear in small areas.
For natural stone such as marble or granite, ask your installer whether sealing is needed and how to tell when it's time again. For tile floors, keep an eye on grout condition. Small cracks, loose tiles, or darkening at isolated areas can signal movement or moisture issues underneath.
When to call a pro again
Don't wait for a small problem to turn into a replacement project. Reach out if you notice:
- Hollow-sounding tile
- Loose transitions
- Persistent grout cracking
- Edges lifting on plank flooring
- Doors suddenly rubbing after a floor install
- A musty smell or recurring damp spot
Those don't always mean major failure. But they do mean the floor deserves a closer look.
What to include when requesting a quote
A faster, clearer estimate usually starts with better information from you. Include:
- The room type such as bathroom, kitchen, mudroom, or basement
- Your preferred material if you've chosen one
- Approximate timing for the project
- Photos of the current floor
- Any known concerns like uneven areas, prior water exposure, or existing cracked tile
That helps the installer flag likely prep needs before the visit and keeps the conversation focused.
If you're also updating nearby tiled walls or planning a coordinated kitchen or bath refresh, it's worth using the company blog as a planning tool for care advice and design ideas, including newer looks such as tile drenching.
If you're planning new floors, tile work, or a kitchen or bathroom refresh in Wayland, Newton, Needham, Wellesley, Weston, or nearby communities, Sunny Day Pro Services offers professional tile and flooring installation with a trained, background-checked team and clear project communication. You can explore services, request a fast quote, and see whether the fit is right for your home at Sunny Day Pro Services.

