
10 House Cleaning Tips and Tricks for Busy Homes
Use these house cleaning tips and tricks to clean by room, save time, protect tile, and choose eco-friendly methods for a fresher home.
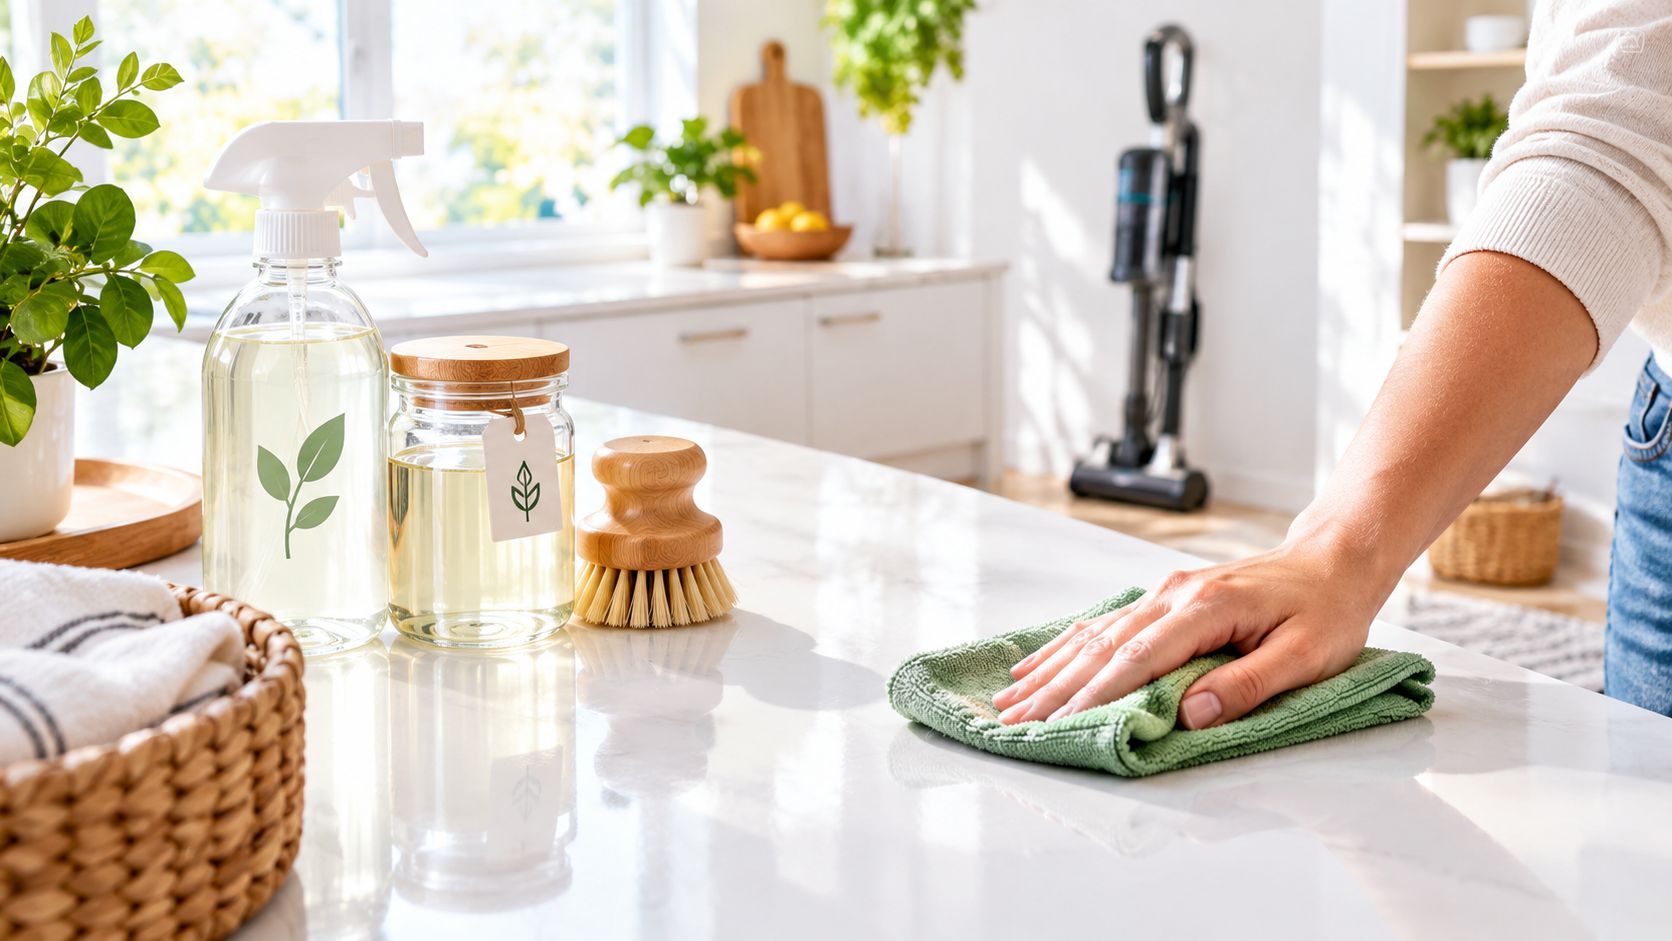
A busy home can go from reasonably tidy to overwhelming in a single day. Breakfast dishes collect beside the sink, shoes spread across the entryway, bathroom moisture settles into grout, and dust lands on surfaces you just wiped. By the time the weekend arrives, cleaning feels less like maintenance and more like recovery.
The fastest path to better results usually isn't harsher products. It's a repeatable system: clear obstacles before wiping, work from top to bottom, use clean tools, and match each method to the surface. That approach helps you clean more thoroughly without repeatedly doing the same job.
These house cleaning tips and tricks follow a professional workflow. You'll start with decluttering and cleaning sequence, then move through daily maintenance, microfiber tools, eco-friendly options, grout and tile care, bathroom moisture control, and renovation cleanup. You'll also find material-safety cautions, a concise comparison table inserted for later use, answers to common cleaning questions, and practical links to Sunny Day Pro Services cleaning and tile resources.
For homeowners in Wayland, Newton, Needham, Wellesley, Weston, and nearby Massachusetts communities, the same system works whether you're maintaining a family home, preparing for a showing, moving between properties, or finishing a renovation.
Table of Contents
1. The Two-Bucket Cleaning Method for Streak-Free Floors and Surfaces
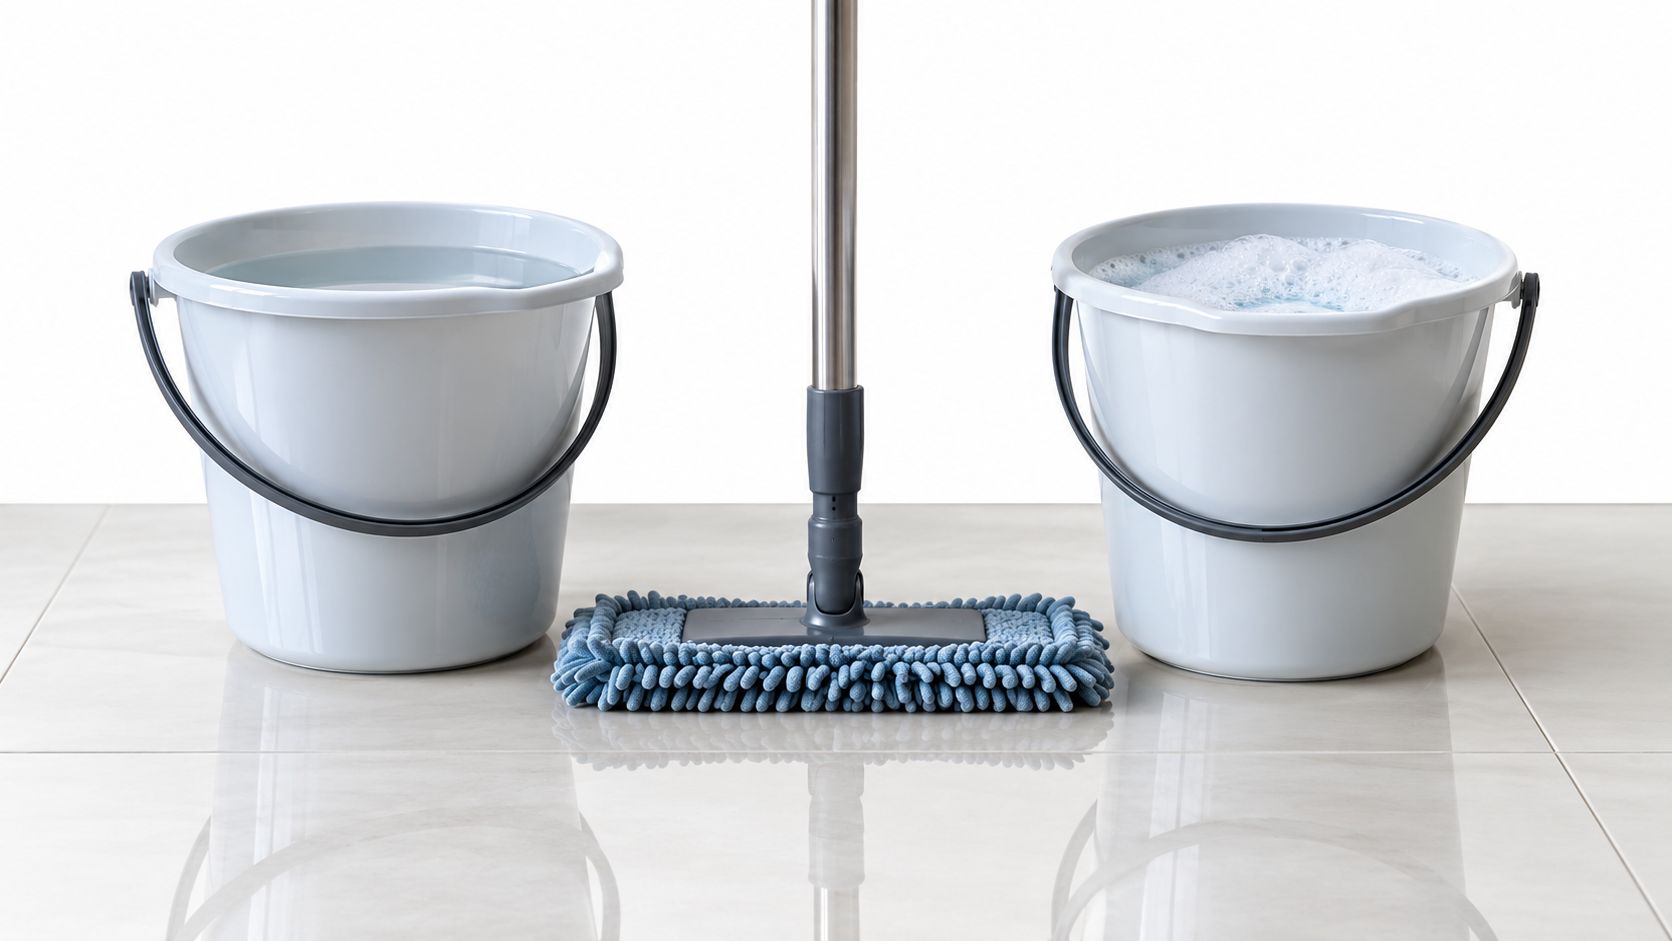
A mop can spread dirty water just as easily as it removes it. The two-bucket method solves that problem by separating the cleaning solution from the rinse water. Use one bucket for diluted cleaner and a second bucket for plain water. Rinse the mop or cloth in the second bucket before returning it to the cleaning solution.
This simple separation is especially useful on tile, sealed stone, and other hard surfaces where cloudy residue and water spots are easy to see. It also gives you better control over how much soil you're moving from one area to another.
How to use the method
- Fill the solution bucket according to the cleaner's label.
- Fill the rinse bucket with warm water.
- Dip the microfiber mop into the solution, then wring it until damp rather than dripping.
- Clean a manageable section.
- Rinse the mop in the second bucket and wring it thoroughly.
- Return to the solution bucket and continue.
Practical rule: If the rinse water looks visibly dirty, it's no longer helping you clean. Replace it, and change the solution bucket when it becomes cloudy or discolored.
Warm rinse water can help release soap residue from a cloth or mop. A small amount of white vinegar may help with residue on compatible surfaces, but don't use vinegar on marble, granite, or other acid-sensitive stone. For tile, the final rinse should be nearly as clean as tap water if you want to avoid haze. Use separate, clearly labeled buckets when moving between rooms, particularly bathrooms and kitchens.
2. Decluttering First as the Foundation of Efficient Cleaning
Cleaning around objects creates extra work and leaves hidden areas untouched. Before you spray a countertop or vacuum a room, remove items that don't belong there. A clear surface lets you wipe in one continuous pass instead of lifting, shifting, and cleaning around every object.
Work one room at a time. Put three boxes or bags nearby and label them Keep, Donate, and Trash. For small items, use the OHIO approach, or “Only Handle It Once.” Make a decision when you pick something up instead of creating a second pile that you'll have to sort later.
Start where the results will show
Focus first on high-visibility spaces, including the entryway, kitchen, bathrooms, bedrooms, and main living areas. Clear countertops completely before wiping them. Keep daily-use items accessible, but store duplicates, paperwork, decorative pieces, and rarely used appliances elsewhere.
A homeowner preparing a property for sale may start with the kitchen and living room because uncluttered surfaces photograph and show more clearly. Someone preparing for a move-out cleaning may begin with closets and storage areas so the cleaner can reach baseboards, shelves, and floors.

Take a quick photo of an item you're unsure about before donating it. That can make letting go easier without keeping the object indefinitely. If possible, declutter one day and clean the same room the next day. The momentum helps, and the newly cleared space won't have time to fill up again.
3. Establishing a Daily 15-Minute Reset Routine
Deep cleaning becomes harder when small messes remain in place for days. A short daily reset keeps the kitchen, bathroom, and main living space ready for normal use. Treat it as maintenance, not a substitute for periodic detail work.
Set a phone alarm for the same time each day and use a fixed sequence. A practical reset can include loading the dishwasher, wiping kitchen counters, cleaning the bathroom sink and toilet, sweeping the kitchen, and returning items to their usual places.
Keep the routine friction-free
Store a microfiber cloth and appropriate cleaner in the kitchen and each main bathroom. You'll lose consistency if every reset requires a search for supplies. Use the one-touch rule where possible. Put an item away once instead of moving it from a table to a chair, then from the chair to a counter.
A family can share the routine by assigning specific jobs. One person can load the dishwasher, another can wipe surfaces, and another can sweep. The tasks don't need to be equal in appearance. They need to be clear enough that nobody has to decide what to do next.
Use water and a clean microfiber cloth for many everyday wipe-downs, but choose a product that's compatible with the surface when grease, soap residue, or a hygiene concern requires more. Pair the daily reset with one weekly detail task, such as grout cleaning, dusting ceiling fans, or washing baseboards.
The American Cleaning Institute survey reports that Americans spend nearly six hours each week cleaning their homes, while 28% spend more than seven hours weekly. The same survey identifies bathroom cleaning as the most dreaded chore at 52%, followed by kitchen cleaning at 23%. That supports a practical priority: maintain bathrooms and kitchens regularly instead of waiting for a weekend cleaning marathon. Read the American Cleaning Institute survey details.
4. Using Microfiber Cloths and Mops for Superior Cleaning Performance
Microfiber works best when you use the right cloth for the right task. A looped cloth is useful for dusting and general wiping, while a smooth glass cloth is better for mirrors and windows because it leaves less lint. Microfiber mops are also effective on floors when they're damp, well wrung, and clean.
Laboratory and review evidence indicates that microfiber can remove soil and microbes more effectively than standard cotton in many settings, although results depend on the cloth, moisture level, and whether the cloth has been reused. One review also reports that microfiber can reduce residual organic debris by about 10% under the conditions studied. Review the microfiber evidence.
Prevent cross-contamination
Use different colors for bathrooms, kitchens, glass, and general rooms. Rinse cloths between tasks, and don't return a visibly dirty cloth to a clean stack. Wash microfiber separately from lint-producing laundry. Skip fabric softener because it can coat the fibers and reduce absorption, and use low heat if you machine-dry.
Test microfiber on an inconspicuous area before using it on unsealed stone, delicate finishes, or surfaces with a special coating. On hardwood and tile, use a damp mop rather than a wet one. Excess water can leave marks, enter seams, or affect materials that shouldn't stay wet.
A clean cloth can make a light maintenance job fast. A saturated cloth just transfers soil. When a cloth stops absorbing efficiently, becomes permanently grimy, or develops an odor after washing, retire it from detail work and assign it to a rougher task.
For laundering instructions and practical care guidance, use Sunny Day Pro Services' guide to washing microfiber cloths.
5. Using White Vinegar Strategically for Surface Cleaning
White vinegar is useful because its acidity helps dissolve mineral deposits and soap residue on compatible surfaces. It can be a practical option for glass, some tile, and certain sealed finishes, but it isn't a universal cleaner or a substitute for a registered disinfectant.
A mild general-purpose mixture is one part white vinegar to three parts water. Apply it to mineral buildup, allow it to sit briefly, and wipe with microfiber. For heavier deposits, a longer dwell time may help, but don't let the mixture dry on a surface unless the manufacturer specifically permits it.
Know where vinegar fails
Never use vinegar on marble, granite, limestone, or other acid-sensitive natural stone. It can etch the finish rather than clean it. It may also damage certain sealers, so pH-neutral cleaner is the safer choice for sealed tile and stone when the manufacturer recommends it.
Surface-safety rule: A natural ingredient can still damage a material. Read the product label and the surface manufacturer's care instructions before using vinegar.
Vinegar can help with shower glass, compatible ceramic tile, and some bathroom residue. It won't remove every type of grease, and mixing it with baking soda creates fizzing but largely neutralizes the acid. Use each ingredient for the job it handles best rather than assuming the combination is automatically stronger.
Don't add essential oils to a cleaner for the sake of fragrance if children, pets, or sensitive occupants may react to them. Ventilate the room, avoid mixing vinegar with bleach or other chemicals, and test any new mixture in a hidden area first. For additional guidance on the limits of this common combination, see Sunny Day Pro Services' vinegar and baking soda cleaning guide.
6. Applying Baking Soda Paste to Grout and Stubborn Stains
Baking soda is a mild abrasive that can help lift soil from grout lines and textured surfaces. It's most useful when you apply it directly to the problem area, give it time to soften residue, and rinse thoroughly afterward.
For a basic paste, mix three parts baking soda with one part water. Spread it over grout with a grout brush, old toothbrush, or small plastic scraper. For a stronger fizzing reaction, combine three parts baking soda with one part white vinegar, but remember that the reaction is brief and the ingredients become less chemically active after they react.
Scrub without damaging the joint
Allow the paste to sit for 15 to 30 minutes on stubborn stains. Work the brush along the grout line rather than aggressively scrubbing across the tile surface. Rinse with clean water and remove all residue. Leftover paste can dry in textured tile and leave its own haze.
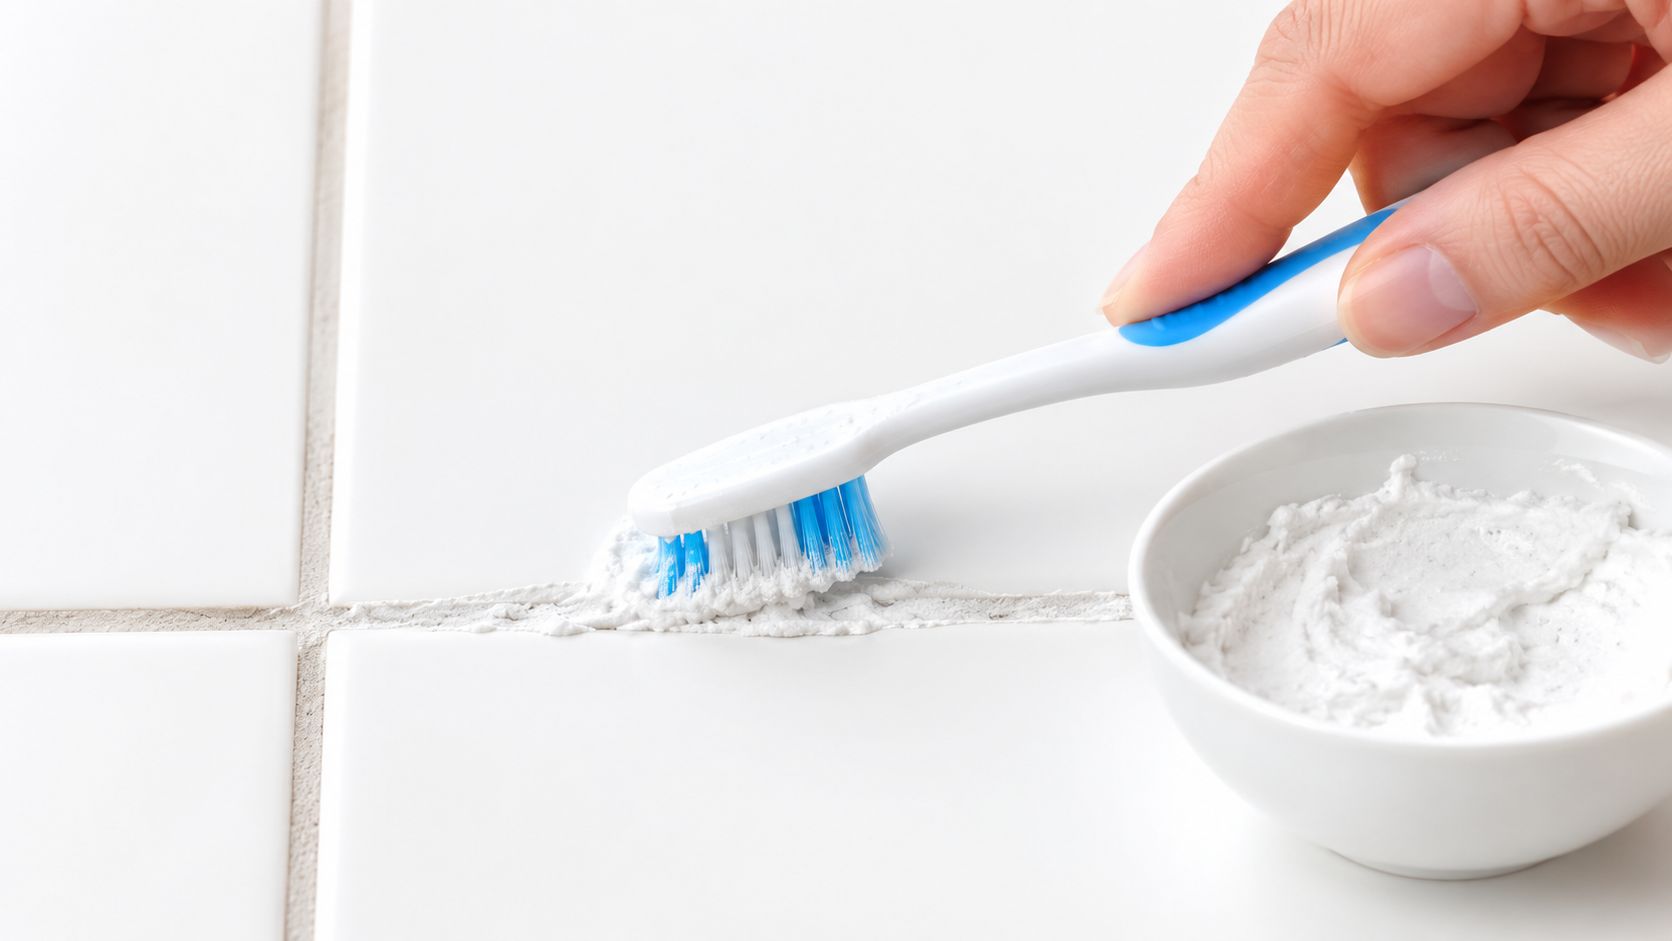
This method can be useful on kitchen backsplashes, bathroom grout, and renovation dust that has settled into joints. It isn't a guarantee that old, permanently discolored grout will return to its original color. Deep staining, damaged grout, and mold inside caulk may require repair or replacement rather than more scrubbing.
Test the paste first, particularly on colored grout, soft tile, polished surfaces, or a newly installed floor. Once grout is clean and completely dry, a compatible sealer can help reduce future absorption. Don't assume every grout sealer has the same maintenance requirements. Follow the product label and the installer's instructions.
7. Following a Top-to-Bottom Cleaning Sequence
Dust falls. Cleaning from the ceiling toward the floor uses that fact in your favor. Begin with ceiling corners, light fixtures, vents, high shelves, and the tops of cabinets. Then move to walls, furniture, counters, fixtures, hard surfaces, and floors.
Within each room, work from the back toward the entrance. That keeps you from walking across an area you've just cleaned. In a multistory home, finish the upper floors before moving downstairs so falling dust and foot traffic don't undo earlier work.
A reliable room order
- High surfaces: Dust ceiling fans, light fixtures, upper shelves, and cabinet tops.
- Middle surfaces: Wipe walls, furniture, counters, appliances, and fixtures.
- Detail areas: Clean sinks, faucets, handles, trim, and other touchpoints.
- Hard surfaces: Address tile, backsplashes, and other material-specific areas.
- Floors: Sweep first, then vacuum where appropriate, and mop last.
Bathrooms can be cleaned early so an appropriate product has time to work while you handle another room. Floors remain the final step because dust, crumbs, and cleaning water will otherwise land on them again.
A broom still has a place in the workflow. Sweep large debris and corners before using a vacuum, particularly after a project or when a floor contains grit that could damage equipment. For fine airborne particles and allergy-related dust control, a true HEPA vacuum is designed to capture 99.97% of particles sized 0.3 microns, according to the U.S. Environmental Protection Agency. See the EPA's explanation of HEPA vacuum requirements.
8. Protecting Newly Installed Tile Through Sealing and Care
New tile doesn't all require the same treatment. Porcelain, ceramic, marble, granite, and grout differ in porosity, finish, and resistance to acids or abrasion. Before cleaning, confirm what was installed and ask the tile installer which areas need sealing.
Natural stone often needs a compatible sealer after installation, and grout may need sealing as well. The correct timing depends on the material, grout, curing conditions, and manufacturer's instructions. Don't apply a sealer just because a calendar reminder says it's time. Clean and dry the surface first, then follow the sealer label.
Protect the finish during everyday use
Use a pH-neutral cleaner when caring for sealed tile or stone unless the manufacturer recommends something else. Vinegar may etch marble or granite and can affect some sealers. Avoid abrasive pads, harsh chemicals, and bleach on finishes that can dull or discolor.
Wipe spills promptly on unsealed or newly sealed natural stone. Use coasters under drinks and trivets under hot cookware. In a bathroom, remove standing water instead of allowing it to sit near grout and stone transitions.
Grout-sealing intervals vary with traffic, moisture, and product. Some homes may need attention every one to three years, but the surface's condition matters more than a fixed schedule. A simple water-absorption check may offer a clue, but the installer or sealer manufacturer should guide the final decision.
The biggest trade-off is convenience versus material safety. A strong acidic cleaner may remove mineral buildup quickly from compatible ceramic tile, yet the same product can permanently damage marble. When in doubt, choose the gentler material-specific cleaner and test it in a concealed location.
9. Establishing a Bathroom Protocol for Mold and Mildew Prevention
Bathrooms need moisture control as much as they need scrubbing. Run the exhaust fan during a shower and for 20 to 30 minutes afterward, or open a window when weather permits. In a small bathroom with weak ventilation, a dehumidifier can help reduce lingering moisture.
After bathing, wipe shower walls and tile with a clean microfiber cloth or squeegee. This removes water before it can sit in grout joints, corners, and caulk. A weekly cleaning with a compatible bathroom product keeps soap residue and body oils from becoming a base for further buildup.
Inspect the areas cleaners miss
Check grout, caulk, the underside of shower shelves, and the edge where the tub meets the wall. Look for discoloration, soft caulk, recurring dampness, or a musty smell. Replace failing caulk rather than painting over it. Old caulk can hold contamination beneath the surface, and paint won't solve the source.
Baking soda paste may be appropriate for small early spots on compatible surfaces, but avoid aggressive experimentation on marble, granite, or specialty tile. Bleach and other strong treatments can damage finishes and create fumes if used incorrectly. Never mix bleach with vinegar, ammonia, or other cleaners.
Keep the bathroom well lit and maintain airflow between uses. Mold prevention depends less on one powerful product than on a combination of ventilation, drying, regular soil removal, and timely repairs. If growth keeps returning, inspect for leaks, poor exhaust performance, or water entering behind tile.
10. Using a Post-Construction Cleaning Protocol for Tile and Flooring
Renovation dust is finer and more persistent than ordinary household dust. Tile and flooring may also have grout haze, adhesive residue, mortar splatter, packaging debris, or construction marks that ordinary spray cleaner won't remove safely.
Start with dry removal. Pick up large debris, sweep carefully, and vacuum with equipment suited to fine dust. Avoid scrubbing a dusty floor while it's dry, because grit can scratch a finish. Once loose material is removed, identify the residue before choosing a cleaner.
Protect the new installation
Grout haze, adhesive, and mortar each respond to different products. An acidic haze remover may be suitable for some ceramic or porcelain tile, but it can etch natural stone and damage sensitive finishes. Adhesive may require a manufacturer-approved solvent or mechanical method. Test any product in an inconspicuous area and protect adjacent surfaces.
Don't use a metal scraper on a polished tile surface. Use a soft pad, plastic tool, microfiber cloth, and the least aggressive method that works. Rinse thoroughly after residue removal so cleaner doesn't dry into grout lines or leave a film.
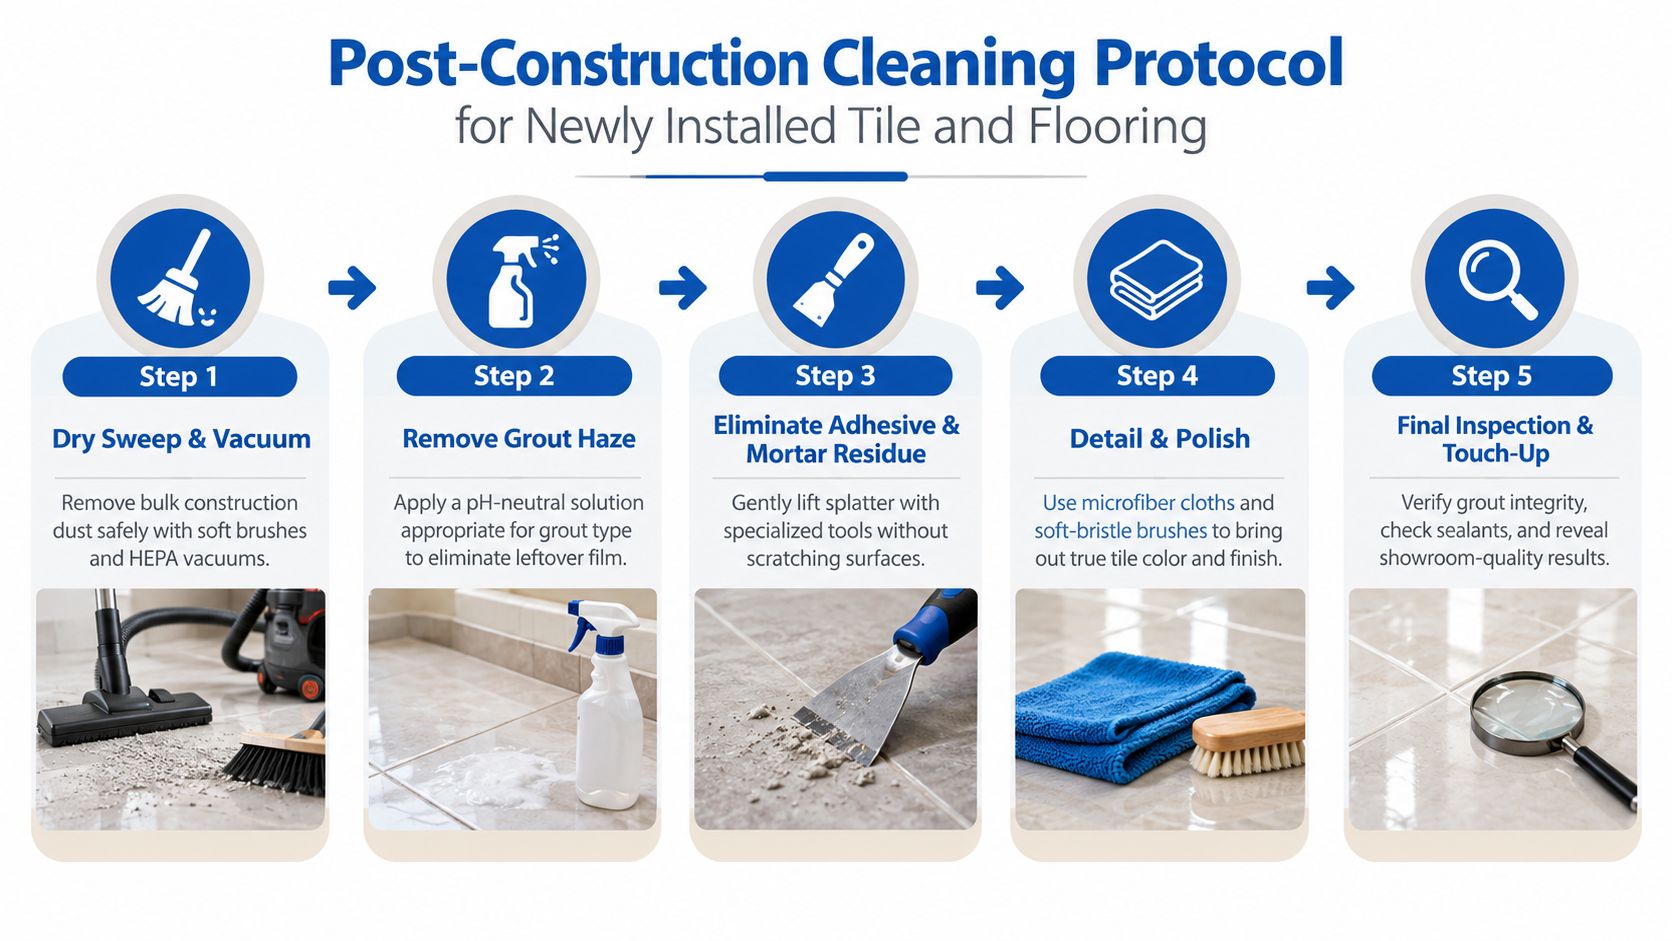
A professional post-construction service can be worthwhile when the renovation includes multiple materials, high walls, extensive dust, or residue close to finished cabinetry and stone. Use Sunny Day Pro Services' post-construction cleaning checklist to organize the final pass and identify areas that need specialist attention.
10-Point House Cleaning Tips Comparison
| Item | Implementation complexity | Resource requirements | Expected outcomes | Ideal use cases | Key advantages |
|---|---|---|---|---|---|
| The Two-Bucket Cleaning Method for Streak-Free Floors and Surfaces | Low–Moderate, simple steps, needs discipline | Two buckets, mop (microfiber/cotton), cleaning solution; low cost | Reduced streaking, cleaner tools, improved finish | Floor/tile/marble maintenance, post-installation care | Prevents recontamination; cost-effective; professional results |
| Decluttering First: The Foundation of Efficient Cleaning | Moderate, time and decision-making required | Boxes/bins, time, temporary storage or donation plan | Faster, more thorough cleaning; clear surfaces revealed | Move-in/move-out, showings, deep-clean prep | Speeds cleaning; exposes hidden dirt; simplifies maintenance |
| Establishing a Daily 15-Minute Reset Routine | Low, habit formation and consistency | 15 minutes/day, basic supplies, checklist/alarm | Prevents buildup; reduces need for frequent deep cleans | Busy households, between professional cleanings, rentals | Minimal time investment with high preventive impact |
| Using Microfiber Cloths and Mops for Superior Cleaning Performance | Low, simple usage, requires laundering care | Microfiber cloths/mops, laundry care (no softener); moderate upfront cost | Superior dirt/bacteria capture; lint-free, reduced chemicals | All surfaces, post-construction, sensitive finishes | Highly effective, reusable, eco-friendly, reduces chemicals |
| Strategic Use of White Vinegar for Natural, Effective Surface Cleaning | Low, dilution and surface testing required | White vinegar, water, spray bottle; very low cost | Dissolves mineral deposits, degreases, mild disinfection | Glass, sealed tile, stainless steel; general eco-cleaning | Non-toxic, inexpensive, biodegradable; effective on hard water |
| Baking Soda Paste Method for Tile Grout Lines and Stubborn Stains | Low–Moderate, mixing and scrubbing required | Baking soda, water/vinegar, brushes; very low cost | Lifts grout stains, abrasive cleaning without harsh chemicals | Grout lines, stubborn stains, post-renovation grout cleanup | Non-toxic mild abrasive; safe for grout; effective on stains |
| The Top-to-Bottom Cleaning Sequence to Maximize Efficiency and Results | Low–Moderate, requires discipline and planning | Organized supplies, sequence knowledge; no special tools | Fewer re-clean steps, faster workflow, comprehensive results | Whole-home deep cleans, professional teams, renovations | Prevents recontamination; time-saving; systematic approach |
| Maintaining Newly Installed Tile Through Proper Sealing and Regular Care | Moderate–High, requires correct materials and timing | Professional sealers/tools, possible contractor service; moderate cost ($100–300+) | Extended tile life, stain/moisture protection, easier upkeep | Natural stone (marble/granite), high-traffic or new installations | Long-term protection; preserves appearance; prevents damage |
| Implementing a Bathroom Cleaning Protocol for Mold and Mildew Prevention | Moderate, routine plus possible ventilation upgrades | Exhaust fan/dehumidifier, regular cleaners, inspection time | Reduced mold/mildew, healthier air, preserved caulk/grout | Humid bathrooms, new tile baths, rentals/tenant turnovers | Preventive approach reduces remediation and protects finishes |
| Post-Construction Cleaning Protocols for Newly Installed Tile and Flooring | High, specialized techniques, timing, and products | HEPA vacuums, soft-bristle tools, pH-appropriate solutions, trained personnel | Safe removal of haze/adhesives, showroom-ready finishes, damage avoidance | Renovations, new builds, move-in after construction | Protects renovation investment; thorough, professional results |
Turn Better Techniques Into a Home-Care Rhythm
The most effective cleaning routine isn't a collection of isolated hacks. It's a sequence that prevents one task from undoing another.
Start with decluttering before a major clean. Remove objects from floors, counters, and shelves so you can reach the actual surface. Use the top-to-bottom sequence next, beginning with high dust and ending with floors. A clean microfiber cloth or mop should handle each task, and separate colors can help prevent bathroom soil from reaching kitchen surfaces.
For daily maintenance, reset the high-traffic rooms first. The kitchen, bathroom, entryway, and main living area usually create the most visible friction. A short reset can include dishes, counter wiping, sink care, toilet care, sweeping, and returning misplaced items. Add one rotating weekly task, such as grout work, baseboards, vents, or cabinet fronts.
Eco-friendly products can be useful, but “natural” doesn't mean “safe for every material.” White vinegar works for some mineral deposits and soap residue, but it's unsafe for marble and granite because acids can etch sensitive stone. Baking soda can help with grout and stains, but test it before applying it across a polished or delicate surface. Product labels, tile documentation, sealer instructions, and manufacturer guidance take priority over a general recipe.
Tile protection depends on correct sealing, immediate spill care, limited standing water, and the right cleaner. Moisture control matters just as much in bathrooms. Run ventilation after showers, dry tile and grout, inspect caulk, and address leaks instead of repeatedly treating the visible symptom.
Post-construction residue deserves extra caution. Fine dust should be removed before wet cleaning, and grout haze, mortar, and adhesive may need different treatments. If a new floor includes natural stone, polished finishes, specialty grout, or residue close to finished cabinetry, professional care can reduce the risk of etching, scratching, or dulling the installation.
Frequently asked questions
What's the best order for cleaning a house?
Declutter first, then clean high surfaces, walls, furniture, fixtures, counters, and floors. Work from the back of each room toward the entrance, complete upper floors before lower floors, and mop only after dry soil has been removed.
Is vinegar safe for tile?
Vinegar can be suitable for some ceramic tile, glass, and compatible sealed surfaces. It isn't safe for marble, granite, limestone, or other acid-sensitive stone, and it may affect certain sealers. Test first and follow the material manufacturer's instructions.
How should grout be maintained?
Remove surface soil regularly, use a compatible cleaner and brush, rinse thoroughly, and allow grout to dry. Apply a suitable sealer when recommended, with reapplication based on traffic, moisture, product instructions, and the grout's condition.
When should you book professional cleaning?
Book deep cleaning when buildup has exceeded routine maintenance, move-in or move-out cleaning when a property needs a thorough turnover, and post-construction cleaning when renovation dust or residue could damage new flooring and tile. Property managers, sellers, renovators, and busy households may also benefit from recurring service.
For search visibility, this article can use Article schema, while the question-and-answer section can use FAQ schema if the page follows Google's eligibility requirements. Relevant internal links should point to Sunny Day Pro Services cleaning services, tile installation pages, microfiber care guidance, and post-construction resources. This creates a useful path from educational advice to service details without forcing the reader to search for the next step.
Homeowners in Wayland, Newton, Needham, Wellesley, Weston, and nearby Massachusetts communities can turn these methods into a realistic maintenance plan, or bring in help for recurring cleaning, deep cleaning, move-in or move-out work, tile installation, and renovation cleanup.
Sunny Day Pro Services offers recurring house cleaning, deep cleaning, move-in/move-out service, post-construction cleanup, and tile and flooring installation for Massachusetts homeowners. If you need help protecting new surfaces or turning these house cleaning tips and tricks into a dependable routine, visit Sunny Day Pro Services to request a quote.

