
Installing Flooring Over Concrete: A Homeowner's Guide
Learn installing flooring over concrete the right way with moisture testing, leveling, material choices, and pro tips for a lasting install.
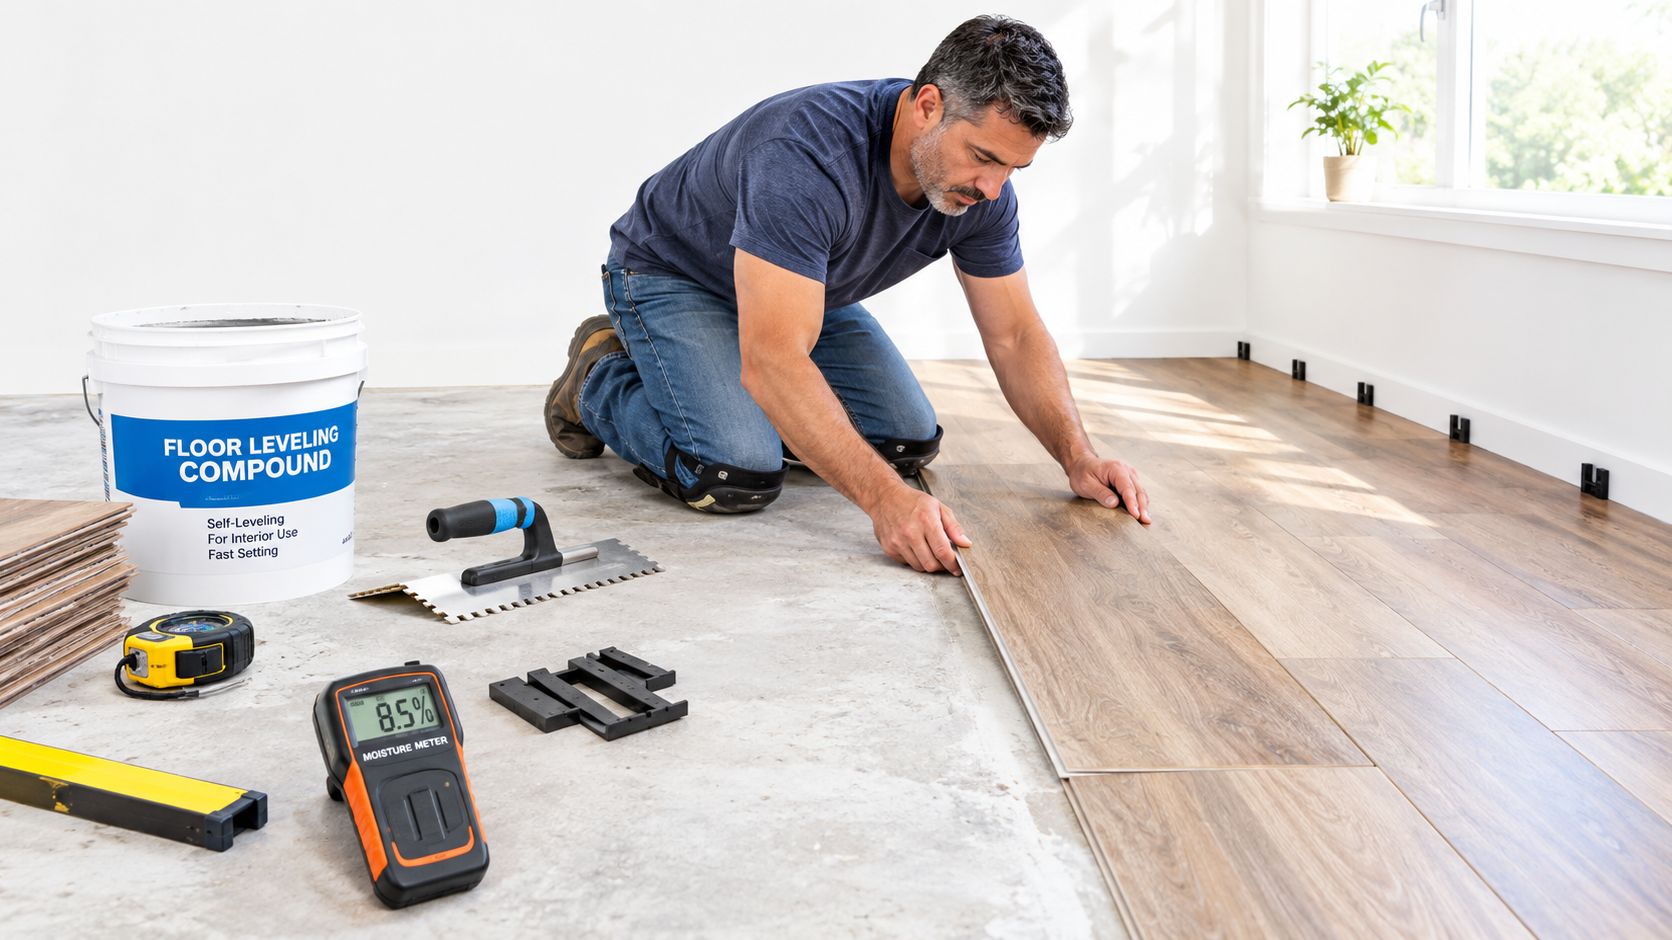
You've picked the flooring, cleared the room, and maybe even stacked the boxes beside the slab. The concrete looks solid and level, so it's tempting to start laying planks or spreading adhesive. That's where many installations go wrong. A slab can look dry while still releasing moisture, hide dips that telegraph through resilient flooring, or contain residue that prevents an adhesive from bonding.
Installing flooring over concrete succeeds when you treat the slab as part of the flooring system, not as an invisible surface beneath it. Moisture, flatness, cleanliness, cracks, temperature, and the flooring manufacturer's limits all matter. The practical checks below show what good looks like before the first piece goes down.
Table of Contents
Why Concrete Subfloors Need a Different Game Plan
Concrete can look ready while still setting up a flooring failure. A slab may feel hard and dry, yet hold moisture, contain weak spots, or vary enough in height to telegraph through the finished surface. Concrete-like floors date to about 5600 BC along the Danube River, and terrazzo emerged in 16th-century Venice, according to Britannica's flooring overview. Modern slab-on-grade and basement floors still demand the same basic discipline: control moisture, correct irregularities, and prepare the surface before installation.
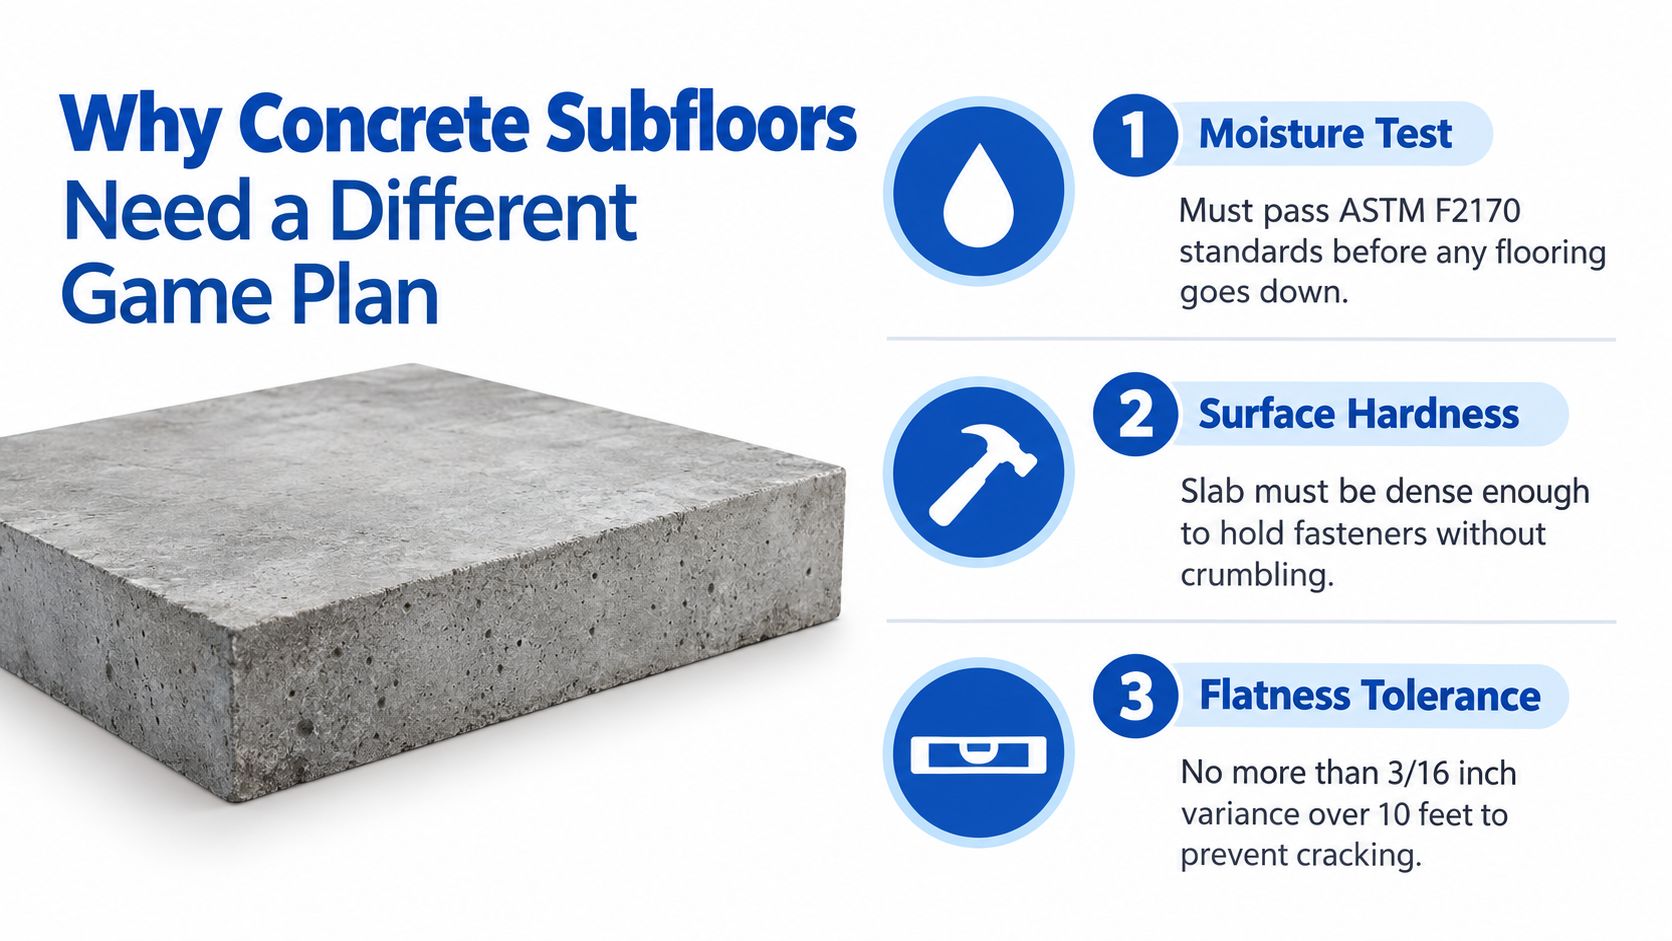
Before selecting adhesive, underlayment, or a layout, check three conditions:
- Moisture inside the slab, using ASTM F2170 in-situ relative humidity testing.
- Moisture vapor emissions, using ASTM F1869 calcium chloride testing when the flooring system permits or requires it.
- Flatness and surface condition, including cracks, weak concrete, residue, and contamination.
Each check addresses a different failure. Excess moisture can make wood cup, soften or release adhesive, and contribute to efflorescence in some tile assemblies. Uneven concrete can leave vinyl planks rocking, create hollow spots beneath tile, or produce lippage between adjacent tile edges.
Practical rule: A dry-looking slab is not proof that it is ready.
The risk changes with the room
New concrete needs time and testing because it continues releasing moisture as it cures and dries. Below-grade rooms can receive vapor from the ground. Test more carefully around bathrooms, kitchens, laundry areas, exterior walls, and plumbing lines. An older slab is not automatically safer. Its vapor retarder may be unknown, damaged, or missing, so renovation work may still require testing or remediation.
Flatness and level describe different conditions. A floor can slope steadily toward a drain and remain flat enough for flooring. Ridges, depressions, and abrupt transitions are the problems, especially when they exceed the product's tolerance. Many installation guides use 3/16 inch over 10 feet or 1/8 inch over 6 feet as benchmark flatness targets for floating and glue-down systems, as noted in FloorExpert's subfloor moisture and preparation guidance.
Use a straightedge, mark problem areas, and correct the slab before the flooring hides the evidence. Skipping these checks commonly turns a weekend installation into a tear-out. Knowing the moisture reading and measured flatness gives you a practical go/no-go decision before materials and labor are committed.
Moisture Testing You Can Trust
A slab can look dry and still release enough vapor to damage flooring or weaken adhesive. Test before patch, underlayment, or flooring covers the concrete. Start with the product installation guide, because acceptable readings depend on the flooring and installation system.
ASTM F2170 in plain language
ASTM F2170 measures relative humidity inside the concrete, rather than moisture only at the surface. For a slab drying from one side, installers generally place probes at 40% of the slab depth. A slab drying from two sides is tested at 20% of slab depth, following Shaw's installation guidance.
Drill clean, accurate holes, then allow the slab and room to reach the temperature and humidity expected during normal use. A test taken too early, or inside a cold unfinished building, may not represent conditions after the HVAC system operates. Compare each probe result with the flooring manufacturer's limit. Many systems use limits around 75% RH, while some product-specific systems allow higher readings, including Shaw SPC guidance permitting up to 90% RH.
Record each location and reading. That test map gives you evidence for the installation decision instead of relying on a surface that merely feels dry.
ASTM F1869 measures vapor emission
The calcium chloride method measures moisture vapor emission rate, or MVER, from the slab surface. A sealed test area remains on bare concrete for the required period. The collected moisture is then weighed and reported as pounds per 1,000 square feet per 24 hours. Some systems commonly specify less than 3 pounds per 1,000 square feet per 24 hours, while others allow a range around 3 to 5 pounds. The flooring manufacturer's instructions control. Background on these thresholds appears in LATICRETE's concrete moisture guidance.
Plan three tests for the first 1,000 square feet and one additional test for each extra 1,000 square feet. Place them near exterior walls, plumbing, bathrooms, laundry areas, and spots with a history of dampness. One test in the room's center can miss the wettest section.
| Factor | ASTM F2170, RH | ASTM F1869, MVER |
|---|---|---|
| What it measures | Relative humidity inside the concrete | Moisture vapor released at the surface |
| Typical use | In-situ probes installed at the required slab depth | Sealed calcium chloride test on bare concrete |
| Common benchmarks | Often around 75% RH, but product limits vary | Often around 3 to 5 pounds per 1,000 square feet per 24 hours, with product-specific limits |
| Main mistake | Testing too early or before service conditions exist | Testing over residue, curing compounds, or an unrepresentative location |
Concrete may need months to dry. Technical guidance notes that mixes with a water-cement ratio of 0.50 to 0.70 may take 3 to 9 months to reach 90% RH under suitable drying conditions. Mixes in the 0.38 to 0.50 range often take 2 to 3 months. The same guidance gives a rough rule of 1 month per inch of slab thickness, or about 1 millimeter per day.
A failed reading requires an appropriate vapor-mitigation system or a change in flooring plan. A casual retest does not remove moisture from the slab. For high readings, unclear test conditions, or a large project, bring in a flooring professional before installation.
Choosing Flooring That Works Over Concrete
A showroom sample can look perfect while the slab fails the product's moisture or flatness limits. Choose the floor only after matching those test results to the room and installation method.
Ceramic and porcelain tile handle moisture well and provide a hard, durable surface. They still require a clean, sound, flat slab because rigid tile will not bridge dips as a floating plank might. Tile also raises the finished floor, so check door clearance and transitions to adjacent rooms before ordering materials.
Luxury vinyl plank suits finished basements, living areas, and slab-on-grade homes. A click-lock floating product can tolerate minor variation when the slab meets its stated flatness requirement, and it can usually be removed more easily than a bonded floor. Glue-down vinyl offers a stable, quiet surface, but it demands tighter control of moisture, surface profile, adhesive choice, and rolling technique.
Engineered hardwood adds warmth and a wood appearance, but it leaves less room for slab problems. Product instructions commonly set limits for slab relative humidity below 70% and indoor humidity between 30% and 55%. Follow the selected manufacturer's instructions rather than applying one limit to every product. Engineered boards may float over approved underlayment or be fully glued, depending on the specified assembly.
| Material | Moisture Tolerance | Prep Demands | Comfort and Feel | Best Room |
|---|---|---|---|---|
| Ceramic or porcelain tile | High, within the tile system's requirements | Very flat, clean, sound slab | Hard and cool unless softened with rugs or radiant heat | Bathrooms, kitchens, entries |
| LVP | Moderate to high, depending on product and adhesive | Flat, clean, tested slab | Quieter and warmer than tile | Basements, living rooms, offices |
| Engineered hardwood | Lower, with strict product limits | Careful moisture control and stable conditions | Warm, natural, residential feel | Living rooms, bedrooms, above-grade spaces |
| Laminate | Product-dependent and moisture-sensitive | Approved vapor protection and flatness | Comfortable with suitable underlayment | Bedrooms and living areas |
| Carpet | Needs a dry slab and suitable pad | Moisture control and smooth preparation | Softest option | Bedrooms and finished basements |
For a broader comparison, review these basement flooring options. Select the material that fits the slab's measured condition, not just the sample that looks best under showroom lighting.
Prep Work That Sets the Floor Up to Succeed
A professional preparation sequence is simple, but it isn't casual. Remove everything that can interfere with bond or hide defects before you start correcting the surface.
Clean and profile the concrete
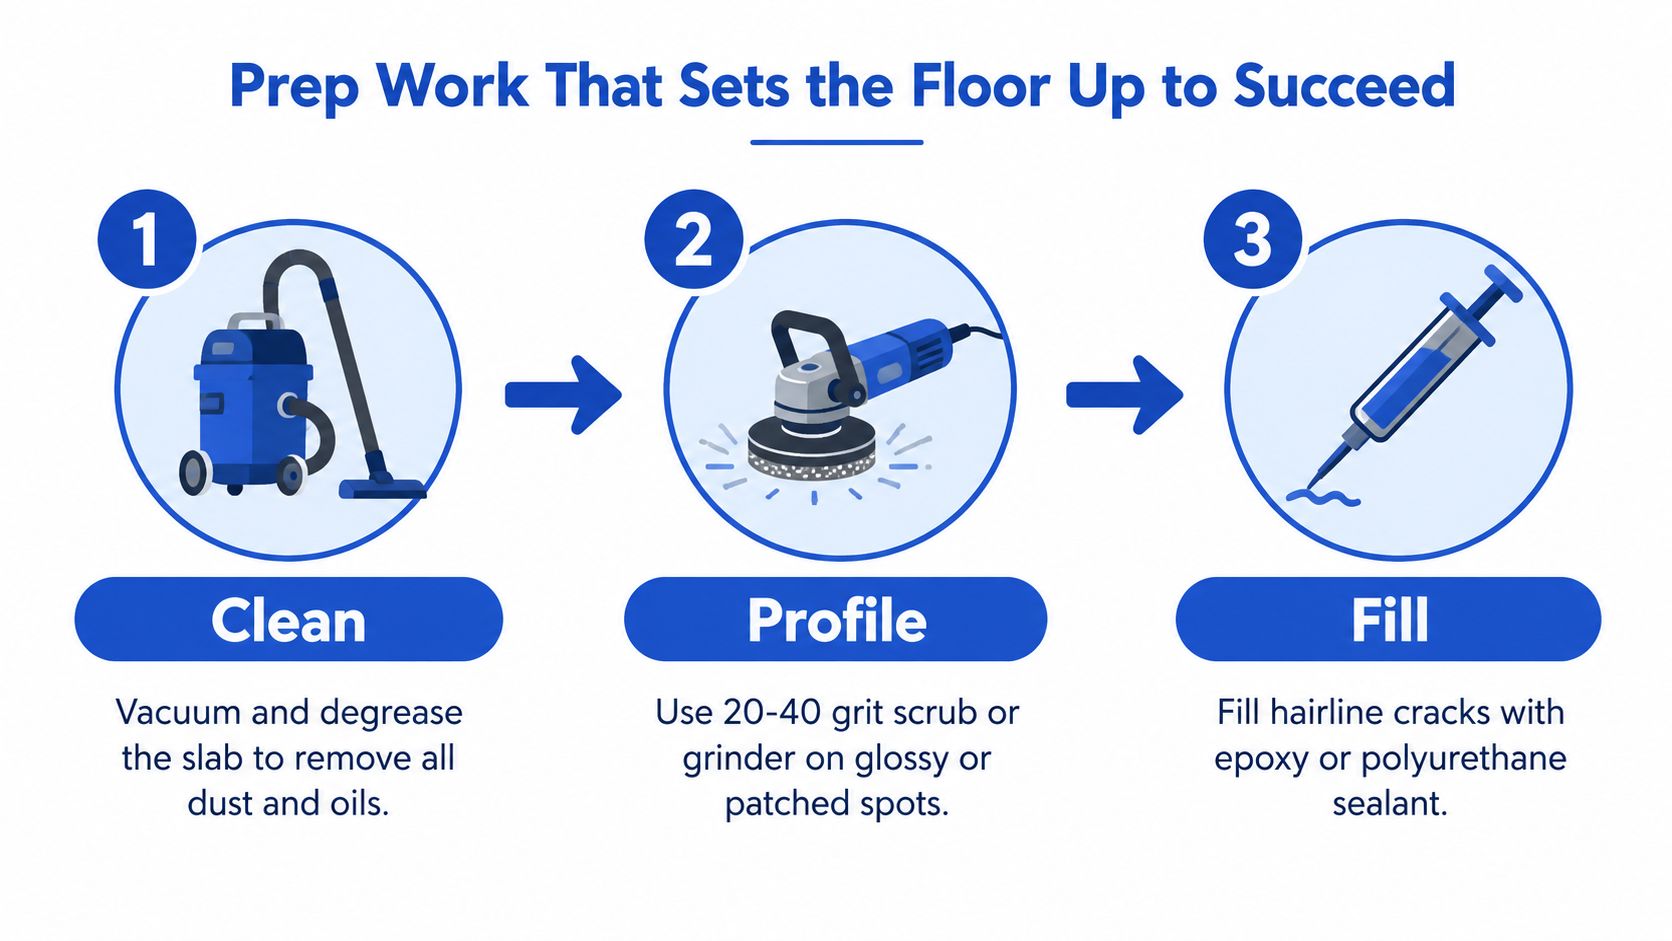
Begin with a commercial vacuum, then degrease oil spots and remove paint, drywall compound, old adhesive, curing compounds, and loose patching material. A glossy slab or a patched area usually needs mechanical profiling with a 20 to 40 grit scrub or grinder. The finished texture should resemble fine sandpaper, not polished stone.
Repair hairline cracks with a compatible epoxy or polyurethane crack-repair product. Active structural cracks need more investigation than a surface filler can provide. Don't cover a crack just because a new floor will hide it.
Correct dips and high areas
Use a straightedge to find low spots and ridges. Small depressions can be filled with a Portland-based patching compound and feathered at the edges. If an area exceeds the common 3/16 inch over 10 feet flatness benchmark, use an appropriate self-leveling underlayment after cleaning and priming the slab.
Self-leveling material still requires judgment. Set the perimeter, mix with the correct water ratio, pour promptly, and use a gauge rake or smoother to control depth. Product directions govern cure time, but many systems allow foot traffic after about 24 hours. Re-test moisture after leveling, because added water and a new cementitious layer change the drying profile.
Good work leaves evidence: A straight 10-foot edge should show no meaningful light gaps, and the slab should be clean enough that dust doesn't transfer to your hand.
Choose moisture protection carefully
The moisture-control assembly must match the flooring system. Options can include a 6 mil polyethylene sheet with seams taped 6 inches, or a liquid-applied epoxy vapor retarder installed at 10 to 15 mils dry film thickness, where approved. Armstrong's concrete subfloor guidance emphasizes an intact vapor retarder under the slab, ideally with concrete placed directly against it, and sealed seams and penetrations.
Check slab temperature before adhesive work. Keep it within 5 degrees of room temperature when the adhesive requires that condition, and always follow the adhesive data sheet. For related substrate assemblies, review Sunny Day Pro Services' tile backer board installation guide, while remembering that a backer-board detail doesn't replace concrete moisture testing.
Laying the Floor From First Row to Final Cut
A small room still rewards a deliberate layout. On a 200-square-foot room, bring the flooring inside and acclimate it for 48 to 72 hours under the conditions specified by the manufacturer. Keep cartons flat, protect them from damp areas, and don't begin until the slab and room meet the product requirements.
Snap a chalk centerline and dry-lay the first row. Starting perpendicular to the wall can improve the visual balance and reduce the chance that a crooked wall dictates the entire installation. Check the first row against the reference line, then use 1/4-inch spacers where the product requires a perimeter expansion gap.
Build the field without losing alignment
Click-lock planks should engage fully without forcing a joint. For glue-down products, spread adhesive with the manufacturer's specified trowel notch. A 1/4 inch by 1/4 inch by 1/4 inch notch is common for some vinyl applications, but the adhesive label and flooring instructions take priority.
Cut vinyl with a sharp utility knife and straightedge. Engineered hardwood usually calls for a miter saw with a fine-tooth blade. Keep end joints staggered, with joints offset at least 6 inches where the product instructions permit. Avoid a repetitive staggered-stagger pattern that creates visible stair-step lines.
When the last plank in a row needs trimming, measure from the installed joint to the wall, subtract the required expansion space, mark the face or back as directed, and make the cut. Dry-fit it before applying adhesive or locking the joint. Rushed end cuts are easy to spot once baseboards are installed.
Finish transitions and inspect the surface
Use T-molding at doorways where the flooring meets another floating floor or where the product calls for a movement break. Use reducer strips at lower thresholds. At tubs and sliding glass doors, use the manufacturer-approved sealant detail, commonly silicone where the assembly requires a flexible waterproof joint.
A finished glue-down vinyl floor should be rolled with a 100-pound roller in two directions when required by the adhesive and product instructions. Before baseboard goes on, inspect the floor with a headlamp. Look for raised edges, open seams, peaking, adhesive squeeze-out, and a first row that has drifted out of square.
The job is ready to continue only when plank seams are tight, the first row is square, and no high edge catches the light.
Mistakes That Cost Homeowners the Most
A slab can look ready and still cause a failed installation. The costly errors usually happen before flooring arrives, when homeowners assume the concrete is dry, flat, and clean without measuring or testing it.
Skipping moisture testing can cause cupping in a floating floor, adhesive re-emulsification beneath vinyl, or efflorescence in a tile assembly. Failures can become expensive once removal, disposal, slab correction, and replacement are involved. A separate flooring cost reference places replacement at $8 to $15 per square foot including demolition, but local labor, access, and material costs vary, so use that figure only as a planning range.
A 3/8-inch dip deserves correction before installation. It can contribute to cracked grout joints, hollow-sounding planks, and ledges that catch furniture. Underlayment can reduce sound and improve comfort, but it will not flatten a wavy slab.
| Mistake | Resulting Failure | Typical Rework Cost per Sq Ft |
|---|---|---|
| Skipping moisture testing | Cupping, adhesive failure, efflorescence, or warranty problems | $8 to $15 including demolition, as cited by Floor Freight's concrete slab guidance |
| Ignoring a 3/8-inch dip | Cracked grout, hollow spots, visible ledges, or moving planks | Varies with removal and leveling scope |
| Using incompatible adhesive | Bond failure and full re-pull of the floor | Varies by product and room size |
| Blocking expansion gaps | Buckling or peaking as conditions change | Varies with affected area |
| Painting or sealing with the wrong product | Poor adhesive bite and premature debonding | Varies with removal and re-preparation |
Water-based adhesive over an unprimed or contaminated slab is a common failure point. A paint or sealer that blocks adhesive bite creates the same problem. Floating floors need clear expansion space at walls and columns. Glue-down hardwood may require moisture mitigation and rolling equipment beyond a typical homeowner setup.
Call a flooring professional when the job includes a moisture-mitigation system, a large leveling pour, or glue-down hardwood. Those conditions demand product-specific preparation and reliable measurement. Paying for that work can prevent demolition, disposal, surface correction, and a second installation.
Care, Troubleshooting, and When to Call a Pro
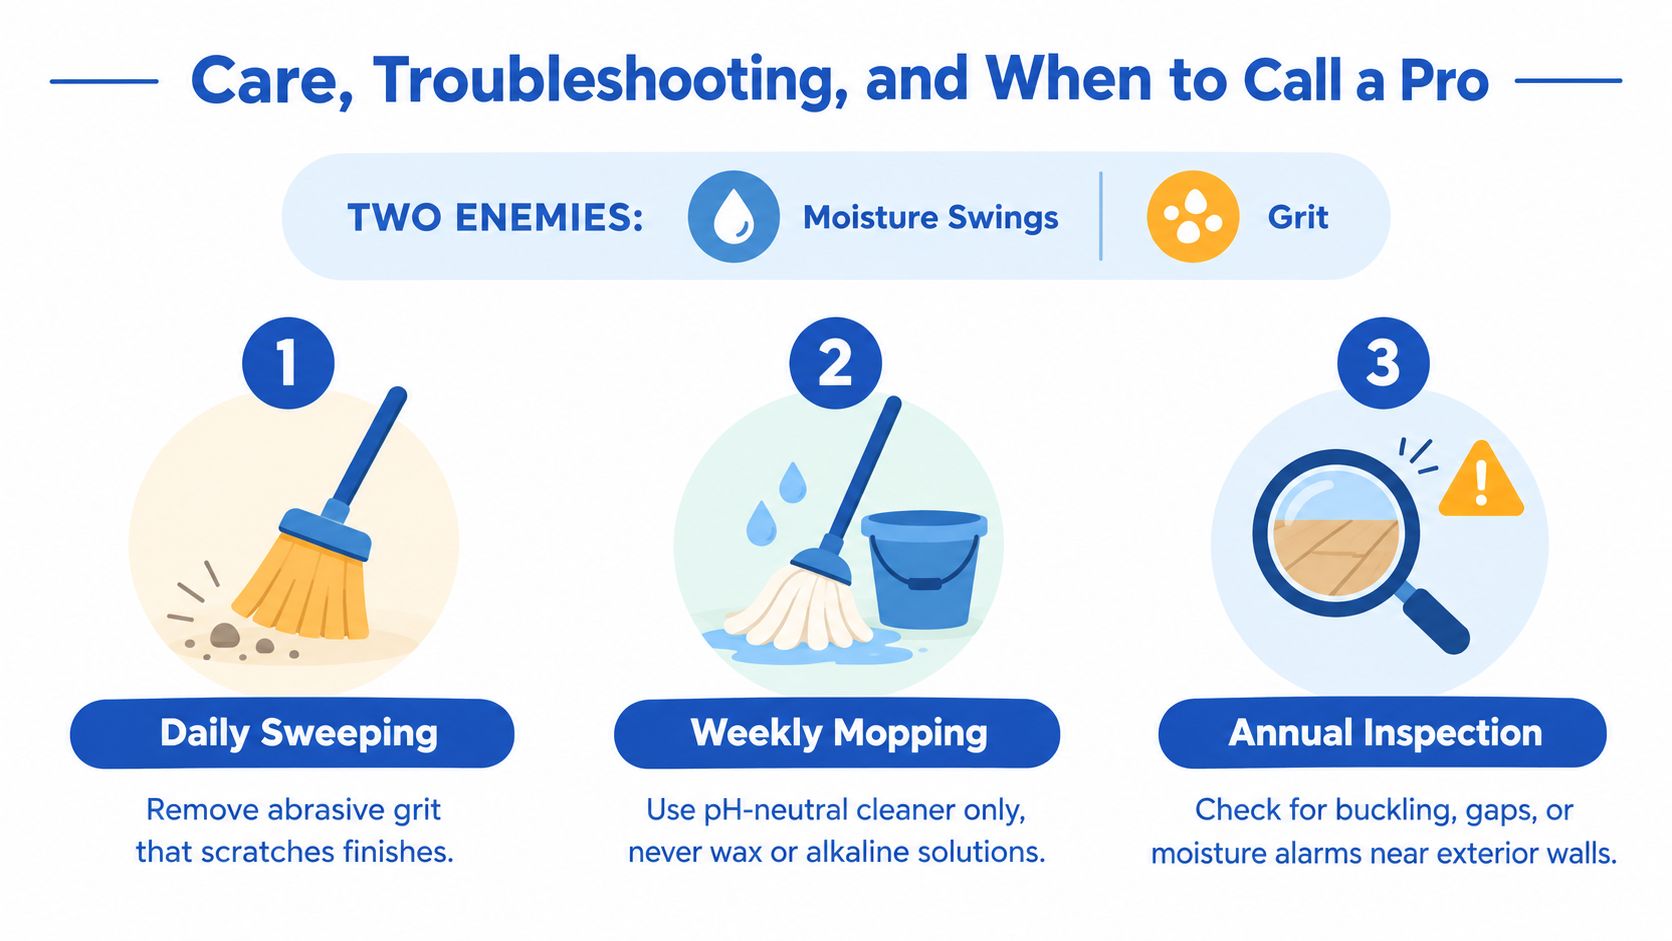
Concrete floors transfer problems upward when moisture and grit get ignored. Once the flooring is installed, protect the finish from abrasive dirt and clean with enough restraint that water doesn't sit in joints or at edges.
Use this routine:
- Sweep daily: Remove grit that can scratch resilient finishes and wear protective coatings.
- Damp mop weekly: Use a pH-neutral cleaner approved for the flooring. Avoid wax and alkaline solutions unless the product manufacturer specifically allows them.
- Inspect quarterly: Check expansion gaps, transitions, and doorways for pressure, movement, or sealant failure.
- Watch wet zones: Look near exterior walls, plumbing fixtures, tubs, and sliding doors for new staining, swelling, or movement.
Read the symptoms correctly
Cupping or peaking usually points to a missed moisture issue or a blocked expansion gap. Hollow-sounding tile suggests incomplete support beneath the tile or a hollow spot in the thinset bed. Vinyl plank seams that lift often indicate movement over an uneven slab, especially where someone skipped approved underlayment or used it to conceal major waviness.
Don't respond to every symptom by adding more adhesive or caulk. Find the underlying cause first. If moisture is still moving through the slab, surface repairs alone won't stabilize the floor.
Call a qualified installer before flooring goes down if you find standing water after heavy rain, cracks wider than 1/8 inch that return after patching, moisture readings above 3 pounds per 1,000 square feet on a calcium chloride test, or movement underfoot. Product-specific limits can differ, so compare every reading with the flooring and adhesive documentation. Guidance from the Resilient Floor Covering Institute also highlights the uncertainty that can surround older slabs where the original vapor retarder is unknown.
For installation planning and professional substrate work, review flooring installation services. If the slab needs moisture mitigation or leveling, Sunny Day Pro Services can assess those conditions before a new floor conceals the evidence.
Sunny Day Pro Services provides professional tile and flooring installation, including preparation for flooring systems installed over concrete, in Wayland, Newton, Needham, Wellesley, Weston, and nearby Massachusetts communities. Request an assessment through Sunny Day Pro Services so moisture readings, flatness, repairs, and the final installation plan are addressed before materials go down.

