
Kitchen Tile Installation: Step-by-Step Guide for 2026
Kitchen tile installation explained step by step: substrate prep, thinset, layout, grout, cure times, common mistakes and when to hire a pro.
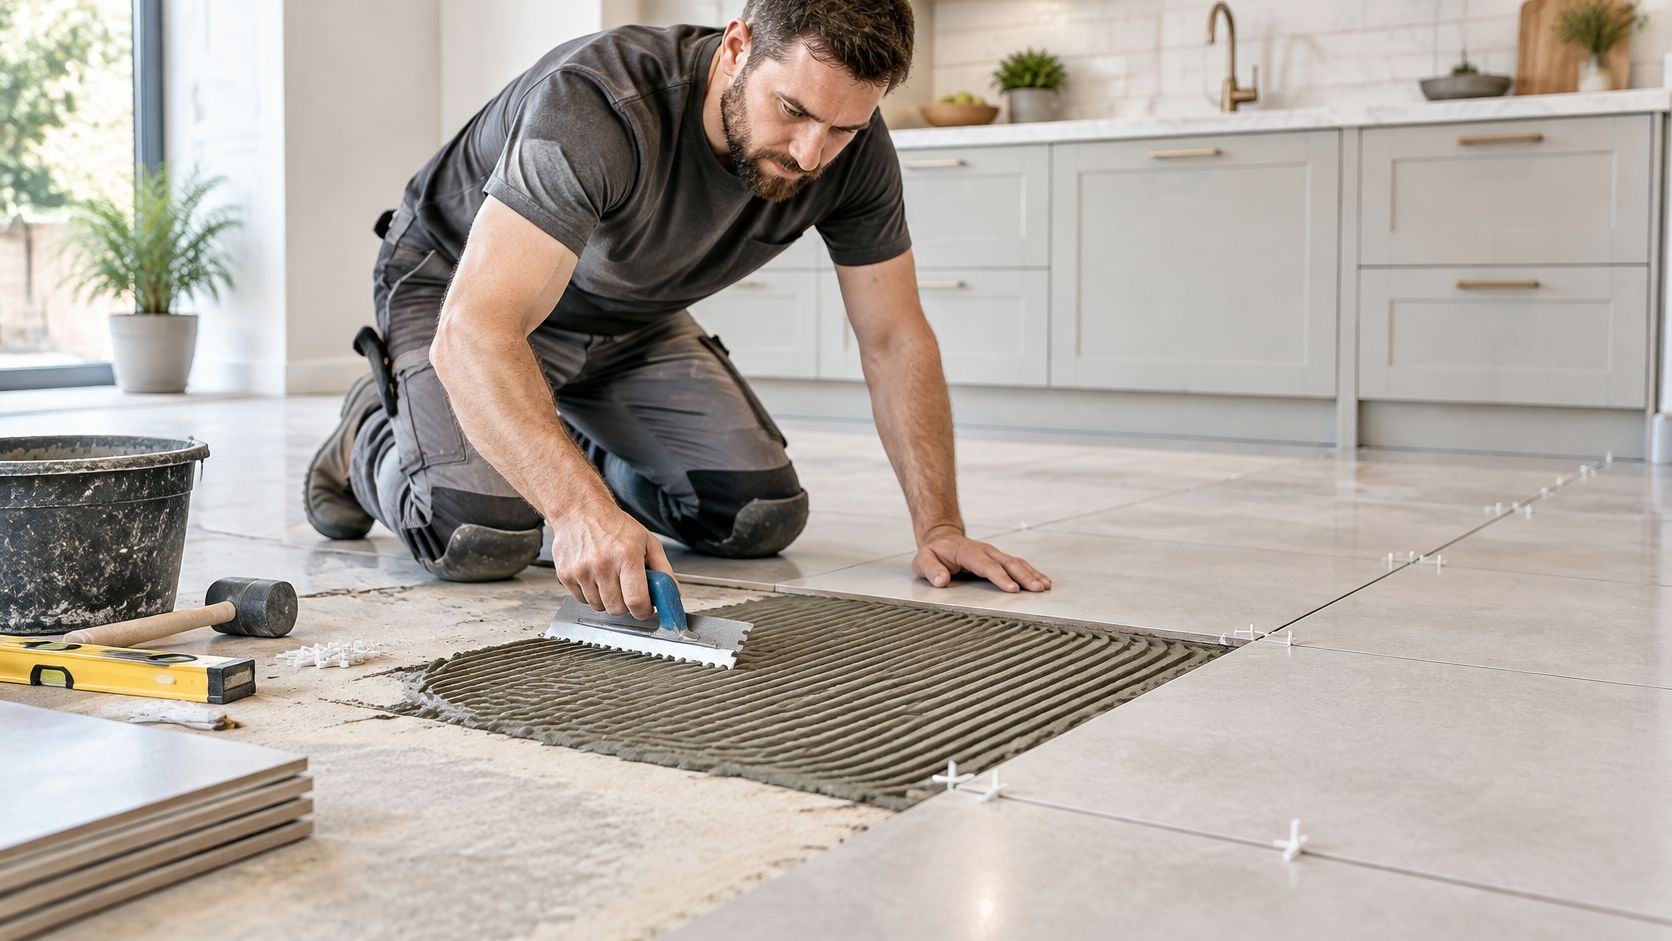
The advice you'll hear first is to fall in love with a tile and then match the grout. That choice is the easy part, and it is also the part that fails last. A backsplash can look straight on day one and still crack, sound hollow, or let water sit behind the wall because the base was never flat, the membrane stopped short of a corner, or someone grouted before the mortar had set. Kitchen tile installation is a sequence of checks. Color and pattern come after the substrate, the movement joints, and the cure times are settled.
In older houses around Wayland, Newton, Needham, Wellesley, and Weston, plaster, drywall on furring, and plywood floors shift with the season. A clean subway layout will not hide that. I would start with a long straightedge on the wall, not a sample board.
Table of Contents
- Kitchen Tile Installation Timeline and Phases
- Substrate Prep, Layout and Movement Joints
- Choosing Thinset, Mortar or Mastic for Each Surface
- How to Grout, Seal and Ventilate Safely
- Common Mistakes and How to Fix Them
- When to Hire a Pro for Your Kitchen Tile
Kitchen Tile Installation Timeline and Phases
Build the calendar backward from the day the kitchen has to be usable again. Kitchen tile installation runs in a fixed order, and skipping a gate just pushes the delay onto the next trade.
Order tile and confirm measurements before demolition. Then repair the substrate, check flatness, install the waterproofing membrane, dry-lay and set the tile, grout and seal, and finish with a real clean. A backsplash usually goes in after the cabinets and countertops are set, so the tile dies cleanly into those edges. Floor tile is typically set before base cabinets and toe-kicks go on, or you will be cutting around cabinet feet you could have avoided.
Two cure windows cause most of the rescheduling. Mortar generally needs 24 to 48 hours before grout, depending on the system, and a sealer waits until the grout itself has fully cured. 2025 ceramic tiling specifications also require the membrane over a prepared substrate, reinforced at cracks, joints, corners, and penetrations, and turned up adjacent surfaces, with movement joints where they apply. Times below are a planning range. Room size, the product data sheet, and crew size all change the clock.
| Phase | Typical time | Check before moving on |
|---|---|---|
| Planning and tile ordering | 1-2 weeks before demolition | Tile count with a 10% waste allowance |
| Demolition and substrate repair | 1-3 days | Base clean, cracks filled, paint tested on pre-1978 homes |
| Flatness check | Half a day | Variation within tolerance for your tile size |
| Waterproofing membrane | 1 day plus product cure | Membrane extended up adjacent walls and at corners |
| Dry layout and tile setting | 1-2 days | Coverage confirmed by lifting a tile |
| Mortar cure before grouting | 24-48 hours | Tiles do not move when pressed |
| Grout and sealing | 1 day plus 72 hours | Sealer applied only after grout is fully cured |
| Ventilation after install | At least 72 hours | Air kept moving during and after work |
Before you order, write the list: modified thinset rated for the surface, grout, the membrane or underlayment, spacers, a notched trowel that matches the mortar spec, a long straightedge, a level, a wet saw, a rubber grout float, sponges, and a sealer matched to the tile and the grout. Buy 10 percent extra tile for cuts and a future repair.
The tile price is rarely the cost driver. Demolition, substrate repair, membrane work, the cut count, and whether prep is a line on the quote matter more. The 2024 U.S. Houzz & Home Study put the median kitchen project at $24,000 in 2023, after a 20 percent increase. That figure is the whole remodel, not the tile alone. Ask for a line-item quote so the prep is visible before you sign, then leave buffer days on the slowest phase, usually substrate repair or cure time.
Substrate Prep, Layout and Movement Joints
Most failed kitchen tile traces back to the base, not the glaze. Prep in this order, and do not pick a trowel until the flatness reading is inside the limit for your tile size.
- Strip the old surface. Remove old tile, adhesive, grease, and dust. Probe for soft drywall, crumbling plaster, or plywood that flexes under a foot.
- Repair what is left. Fill cracks and low spots with a patch made for that substrate. A gypsum patch on a wet wall, or a floor patch on a wall, will not stay put.
- Read the plane. Run a long straightedge both ways and mark every high spot with a pencil.
- Compare the marks to the tolerance in the table below before you buy thinset.
- Grind highs and fill lows. Extra thinset is not a leveler. A thick blob next to a thin one leaves lippage, a hollow sound, and grout that cracks along the high edge.
- Install the membrane. Turn it up adjacent walls and reinforce corners, cracks, and penetrations. On a floor, that often means the specified underlayment or an uncoupling membrane after the plane is stable. If you are choosing that layer, our notes on tile backer board installation cover how the board is fastened and taped.
- Confirm clean and dry. Dust on the face of a membrane kills the bond the same way grease does.
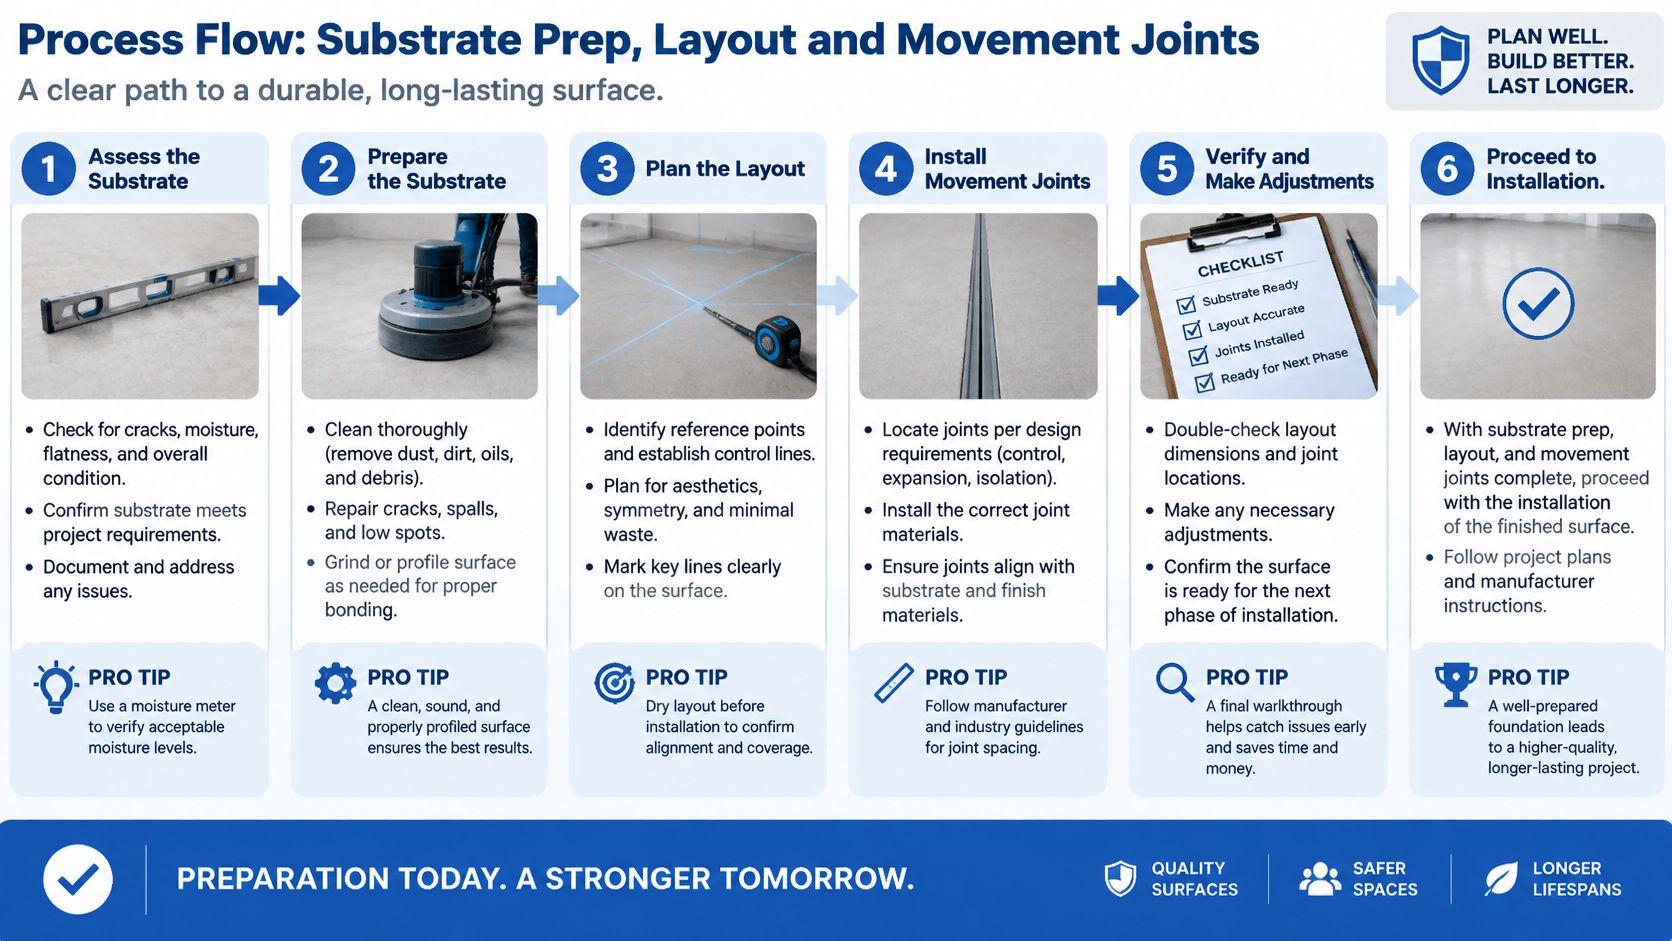
Flatness limits by tile size
Large-format tile shows every dip and crown because the piece cannot bend into the hollow. Ceramic tile installation guidance limits variation for tiles 15 inches or smaller to 1/4 inch over 10 feet and 1/16 inch over 12 inches. For tiles larger than 15 inches, that tightens to 1/8 inch over 10 feet and 1/16 inch over 24 inches.
| Tile size | Variation over 10 feet | Variation over 12 or 24 inches |
|---|---|---|
| 15 inches or smaller | 1/4 inch | 1/16 inch over 12 inches |
| Larger than 15 inches | 1/8 inch | 1/16 inch over 24 inches |
Practical rule: If the straightedge rocks or daylight shows under it past those limits, stop. Grinding and patching are cheaper than resetting a wall.
Say the backsplash is 3 by 12 inch ceramic and the straightedge shows a 1/8 inch crown in one foot beside the range. That already fails the short-span limit, even if the full 10-foot reading looks fine. A 12 by 24 inch porcelain floor with a 3/16 inch dip in 10 feet fails the long-span limit for large format. Fill or grind first.
Dry layout before any mortar is mixed
Snap center lines. Dry-lay both directions so you can see the edge cuts. Shift the grid until cuts at walls, cabinets, and the range balance, and kill any sliver narrower than about half a tile. Mark each cut. Check the fit around outlets, switch plates, and the range hood with the actual grout-joint width, not a guess. Use a wet saw for porcelain and stone. Score-and-snap is fine for simple straight cuts in softer ceramic.
Hold the trowel at one angle, comb all ridges in one direction, and lift a tile now and then to confirm transfer. A control joint in the substrate has to continue through the tile. Bridging it with rigid tile and grout just moves the crack into the finish.
Where the movement joint goes
Tile and the base under it expand and contract at different rates. The Tile Council of North America recommends accommodating that movement in every installation. A small kitchen may need only a perimeter gap hidden by baseboard or shoe molding. Larger rooms, and any interior run that sees moisture or direct sun, generally need visible movement joints more often. There is no single spacing number that fits every kitchen, because room size, moisture, and sunlight all change the plan.
Do not pack grout into every edge and every change of plane. Leave the allowance at restraining surfaces, and line those joints up with joints already in the substrate.
Before you buy a box of tile, run that straightedge and count the spots past the limit. If you cannot name the count, you are not ready to order.
Choosing Thinset, Mortar or Mastic for Each Surface
The setting material is a match to the surface, not a brand preference. Modified thinset is the default for most kitchen floors, backsplashes, and wet zones. A mortar bed earns its place on an uneven floor or under heavy natural stone, where you need real thickness and you accept the added height. Mastic, an organic adhesive, belongs only on a light-duty dry wall. It is the wrong product behind a sink, on a floor, or anywhere you hoped it would fill a dip.
| Material | Best for | Limitation |
|---|---|---|
| Modified thinset mortar | Kitchen floors, backsplashes and wet areas | Needs the correct notch size, mixing and open-time control |
| Mortar bed (thick-set) | Uneven floors and heavy natural stone | Slow, skill-intensive and adds height |
| Mastic (organic adhesive) | Light-duty dry walls only | Not for wet areas or floors; cannot correct a poor substrate |
Coverage is a pass or a fail
Industry guidance cited for the TCNA Handbook calls for at least 80 percent mortar contact in dry interior areas and 95 percent in wet or exterior areas. Coverage means the back of the tile is bonded to the substrate. Mortar smeared around the perimeter does not count.
Use the notch size on the mortar bag. Key a skim coat into the substrate with the flat of the trowel, then comb uniform ridges in one direction. Back-butter large-format, heavily ribbed, or warped tile so the ridges on the wall meet ridges on the tile. Press the piece in and slide it slightly across the ridges to collapse the air channels. Lift a fresh tile every so often, especially near corners and at the end of a row.
Three habits create the voids that rock, crack, and debond tile:
- Spot-bonding: Five dabs on the back leave the center hollow, and a dropped pan finds that hollow.
- Dead mortar: Once the ridges skin over, the open time is gone. Scrape it off and comb fresh mortar.
- Remixing with water: Adding water after the initial mix weakens the bond. Throw the batch out.
A straight grout line does not prove the bond. Flatness, lippage, joint width, and movement joints are separate checks. If a lifted tile shows scattered contact or a dry patch, scrape both faces and reset that piece before you start the next row. I would rather lose ten minutes on one tile than a Saturday on a hollow course.
How to Grout, Seal and Ventilate Safely
Grout is not a patch for a soft set. Confirm the mortar has cured for the time on its data sheet before any grout goes in the joints. Rushing this step is how grout lines crack in a neat grid two weeks later.
- Clear the joints. Pull spacers and vacuum crumbs, thinset squeezes, and dust. Grout will not bond to debris.
- Mix and slake. Follow the bag's water ratio. Let the grout rest for the slake time on the label, then remix without adding water. Premixed grout skips the dust, which helps in an occupied house, but you still work it before it skins.
- Pack on a diagonal. Load a rubber float and press grout across the joints at an angle, in sections you can clean before a haze sets. Forcing it straight down the joint tends to pull it back out.
- Wipe on a diagonal. Use a barely damp sponge, rinse it often, and change the water when it turns to milk. A soaking sponge digs out the joint you just packed.
- Wait out the grout cure. Many bags call for about 72 hours before a sealer. The data sheet wins if it says longer.
- Seal what is porous. A penetrating sealer goes on natural stone and on cement grout in a thin coat. Wipe the excess before it dries on the face. Porcelain with epoxy grout often needs nothing. Confirm the bottle matches both the tile and the grout before you coat the whole backsplash.
More detail on joint types and haze lives in our guide to grout for a tile installation.
Dust, lead paint, and air after the install
Kitchen work throws dust farther than the tile area. The U.S. Environmental Protection Agency says to treat paint in homes built before 1978 as if it contains lead unless testing shows otherwise. Use low-dust methods, put durable plastic sheeting under the work, close the room off with barriers, and exhaust air outdoors. Ventilate as much as you can during the work and for at least 72 hours afterward when materials may release pollutants. If the job disturbs paint in pre-1978 housing, the firm and the workers have to be EPA-certified and follow lead-safe practices.
If the house is pre-1978 and you are opening a wall or scraping paint beside the backsplash, ask who is certified and where the exhaust hose leaves the building before the first tile comes off.
Common Mistakes and How to Fix Them
A hollow tile is the failure I hear about most, and it almost never starts in the glaze. Tap the face with a knuckle. A dull thud means the mortar never made full contact, usually from spot-bonding or from setting over dust. One bad tile is a coverage problem. A whole row of hollow or cracked pieces points at the substrate or the layout, and replacing tiles one by one will not fix it.
| Symptom | Likely cause | Fix |
|---|---|---|
| Hollow sound or rocking tile | Low mortar coverage or spot-bonding | Lift, back-butter and reset the tile with full contact |
| Lippage at tile edges | Substrate outside flatness tolerance | Grind high spots or level the base before resetting |
| Cracked grout lines | Movement joint bridged or no perimeter gap | Cut out grout and add a movement joint |
| Grout haze or film | Grout left too long on the tile face | Clean with a grout-compatible cleaner before it cures |
| Stains after sealing | Sealer applied before grout cure | Wait for the full cure, then strip and reseal |
Resetting is the scope for hollow tile and for lippage. You are lifting pieces, correcting the bed, and setting again. Cracked grout, haze, and a bad sealer job stay in the joint or on the face. You are not buying a new field of tile for those.
Failures the table does not list
Grout that changes color after sealing. Drip water on an unsealed scrap of the same grout and on the finished joint. If only the sealed joint looks darker or blotchy, the sealer went on unevenly or too soon. Strip that area and reseal in thin, even coats.
Efflorescence, the white chalky bloom on grout lines, is minerals riding moisture to the surface. Wipe a dry finger across it. If powder comes off, dry the assembly out, brush the salts away, and stop washing the wall every day until the bloom stops. Sealing over active salts traps them.
Chipped edges usually come from a dull wet-saw blade or from forcing the cut. Look at the cut face. A glazed chip with a melted, dark edge means the blade was burning. Swap the blade, slow the feed, and keep water on the cut. A chip in the middle of a field tile is impact, not the saw.
A crooked backsplash with even joints still looks wrong when nobody snapped a reference line and every course followed the last one. Hold a level on the top course. If it drifts while the counter is level, the grid walked. Pop the worst course and reset it to a chalk line, rather than fattening grout joints to hide the drift.
Photograph each problem tile and mark it with painter's tape before you repair anything. The photo keeps you from lifting sound tile because it sits next to a bad one.
When to Hire a Pro for Your Kitchen Tile
A confident DIYer can handle a small backsplash in standard ceramic, in a straight layout, on a wall that is already sound and inside flatness tolerance. Hire the work out when the job is large-format tile, natural stone such as marble or granite, a full-height backsplash, a substrate that fails the straightedge, a pre-1978 house where paint will be disturbed, or a calendar that cannot absorb a failed course. Those are the jobs where a wrong membrane or a missed movement joint costs more than the labor you hoped to save.
What to ask before you book
Ask how flatness is checked, how mortar coverage is verified, which membrane goes on that wall or floor, how long the crew waits before grouting and sealing, how dust is contained, and what the finished timeline looks like in days, not "about a week." If the answers stay vague, the prep is probably not in the price.
Sunny Day Pro Services installs porcelain, ceramic, marble, and granite tile, including custom kitchen backsplashes, with a guaranteed high-end finish. If the surface is natural stone or another sensitive material, say so on the quote form so the sealer and the cleaners match it. You can also read how we scope tile installation services before you decide what to keep and what to hand off.
Questions homeowners ask before hiring
Can I tile over existing tile? Usually not. A new layer adds height at the counter, the outlets, and the appliance toe-kicks, and it inherits whatever bond is already failing underneath. Remove the old tile, or prove it is sound, well bonded, and flat before you even consider going over it.
Do I need a membrane behind a backsplash? It depends on how wet the wall gets and what is behind the tile. Behind a sink or a range, I would specify one. On a dry wall far from water, a sound painted surface may not need the same build-up. Put the decision in the scope so it is not a surprise mid-job.
List the tile type, the room measurements, photos of the walls and floor, and any natural stone. That packet is enough for a real estimate instead of a guess.
Sunny Day Pro Services installs porcelain, ceramic, marble, and granite tile for kitchens, including custom backsplashes, and we schedule the work around the date you need the room back. If you are in Wayland, Newton, Needham, Wellesley, Weston, or a nearby town and the substrate, membrane, or cure time is the part you do not want to guess at, send the measurements and photos. Visit Sunny Day Pro Services to request an estimate and choose a time that fits the rest of the remodel.

