
How to Remove Paint Spots on Wall Surfaces
Learn how to remove paint spots on wall surfaces safely. Step-by-step methods for fresh and dried spots, latex vs oil-based, plus prevention tips.
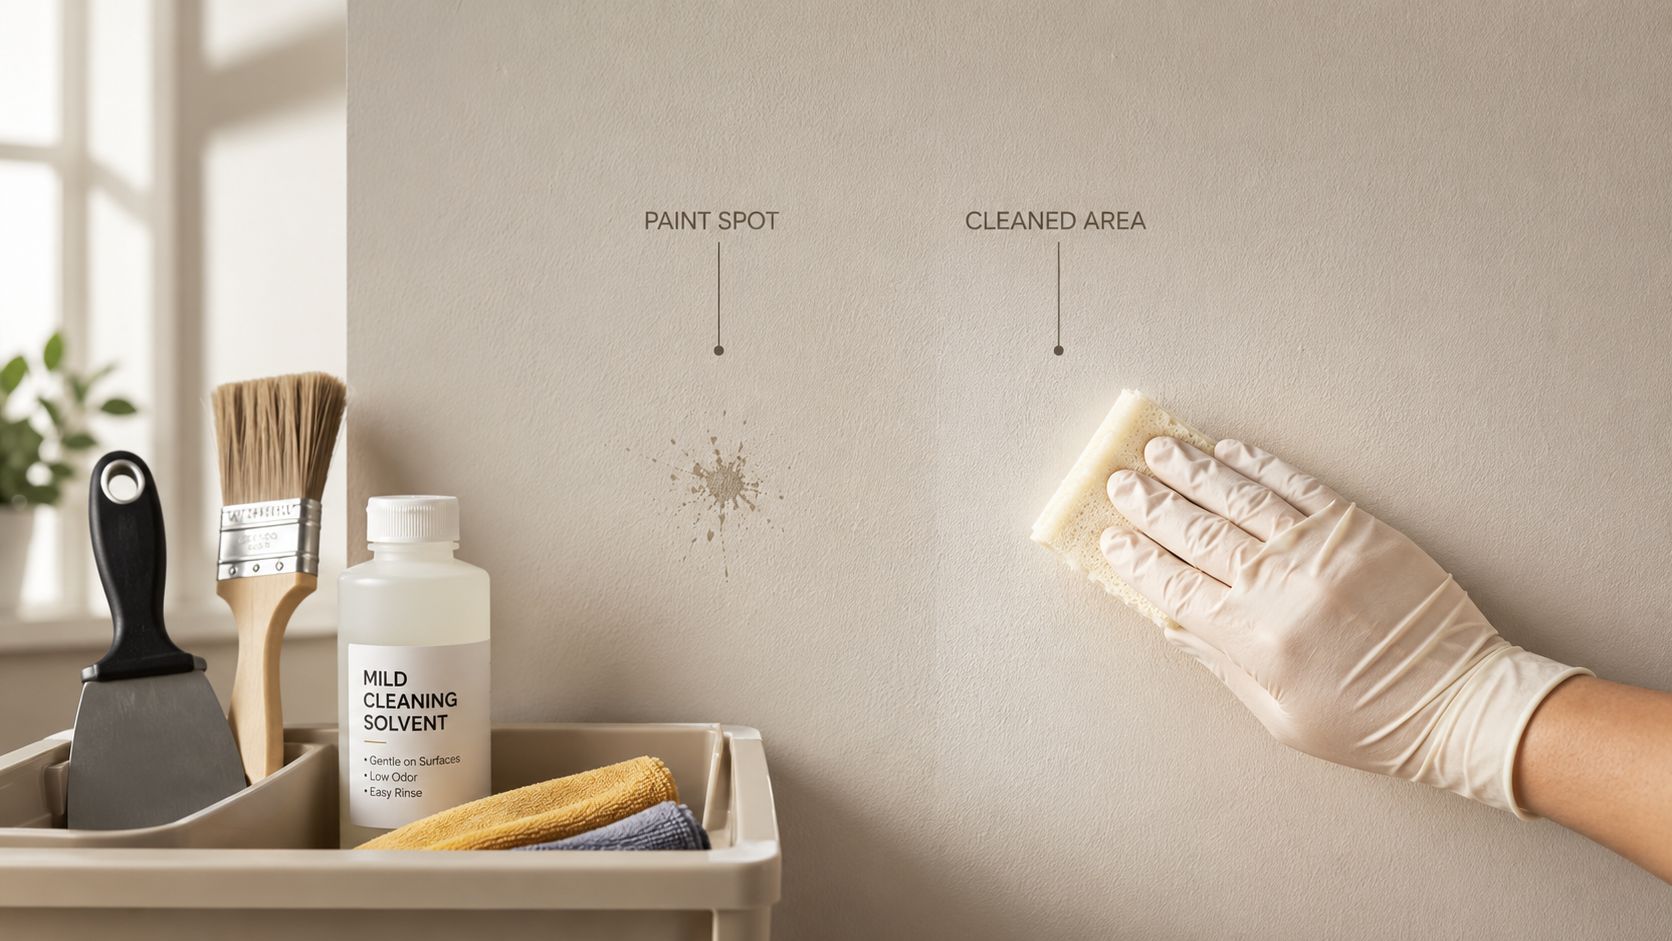
You're halfway through painting a room when you notice a dried drip below the trim, a dark scuff beside the sofa, or a yellowish mark that wasn't there before. The natural reaction is to grab a sponge and scrub, but that can turn a small paint spot on wall surfaces into a larger dull patch, scratched finish, or exposed repair.
The safer approach is triage before treatment. First decide whether the mark is loose paint, transferred dirt, a stain beneath the coating, or a possible moisture problem. Then match the cleaning method to the paint type and sheen. A wall isn't just a flat surface, it's a film with a finish that can burnish, soften, scratch, or lift when the wrong product meets it.
Table of Contents
- Drips and splatters
- Scuff and transfer marks
- Bleed-through stains
- Chips, scratches, and small divots
- Mold, mildew, and efflorescence
Why That Spot on Your Wall Is Not Always What It Seems
A homeowner may see one annoying mark. A professional cleaner sees a decision point. Before touching the wall, look at the spot's age, texture, location, and surrounding paint.

Start with the wall, not the cleaner
Ask three questions:
- How long has it been there? Fresh latex paint may respond to gentle blotting and warm water. A dried drip may need softening and careful lifting.
- What kind of paint is on the wall? Water-based latex and oil-based paint don't respond to the same solvents.
- What's the sheen? Flat and matte finishes show abrasion and uneven wiping quickly. Eggshell, satin, semi-gloss, and gloss generally tolerate more careful cleaning, though they can still lose uniformity.
The finish changes the risk. Expert guidance on cleaning painted walls recommends starting with a barely damp microfiber cloth and plain water, blotting instead of scrubbing. Even water can alter the appearance of flat paint, so more aggressive products should never be the first move.
Read the visual clues
A raised, shiny mark is more likely to be a paint drip or splatter. A gray transfer near a doorway or chair is often cosmetic. A spreading yellow, brown, green, or black discoloration deserves more attention, especially if the paint is bubbling, peeling, or accompanied by a musty smell.
Practical rule: If the spot changes shape, returns after cleaning, or appears with damaged paint, stop treating it as an ordinary stain.
Wall painting itself has roots stretching back at least 40,000 years, when early humans used soil, animal fat, minerals, charcoal, and chalk to create painted surfaces in a basic palette of red, yellow, brown, black, and white, as described in this history of color in art. Modern interior paint is more refined, but the basic lesson remains familiar: the material on the wall matters before the mark can be removed safely.
The Five Types of Paint Spots You Will Actually Find
Most paint spots on wall surfaces fit a recognizable pattern. Identifying that pattern helps you choose between cleaning, lifting, repairing, or investigating.
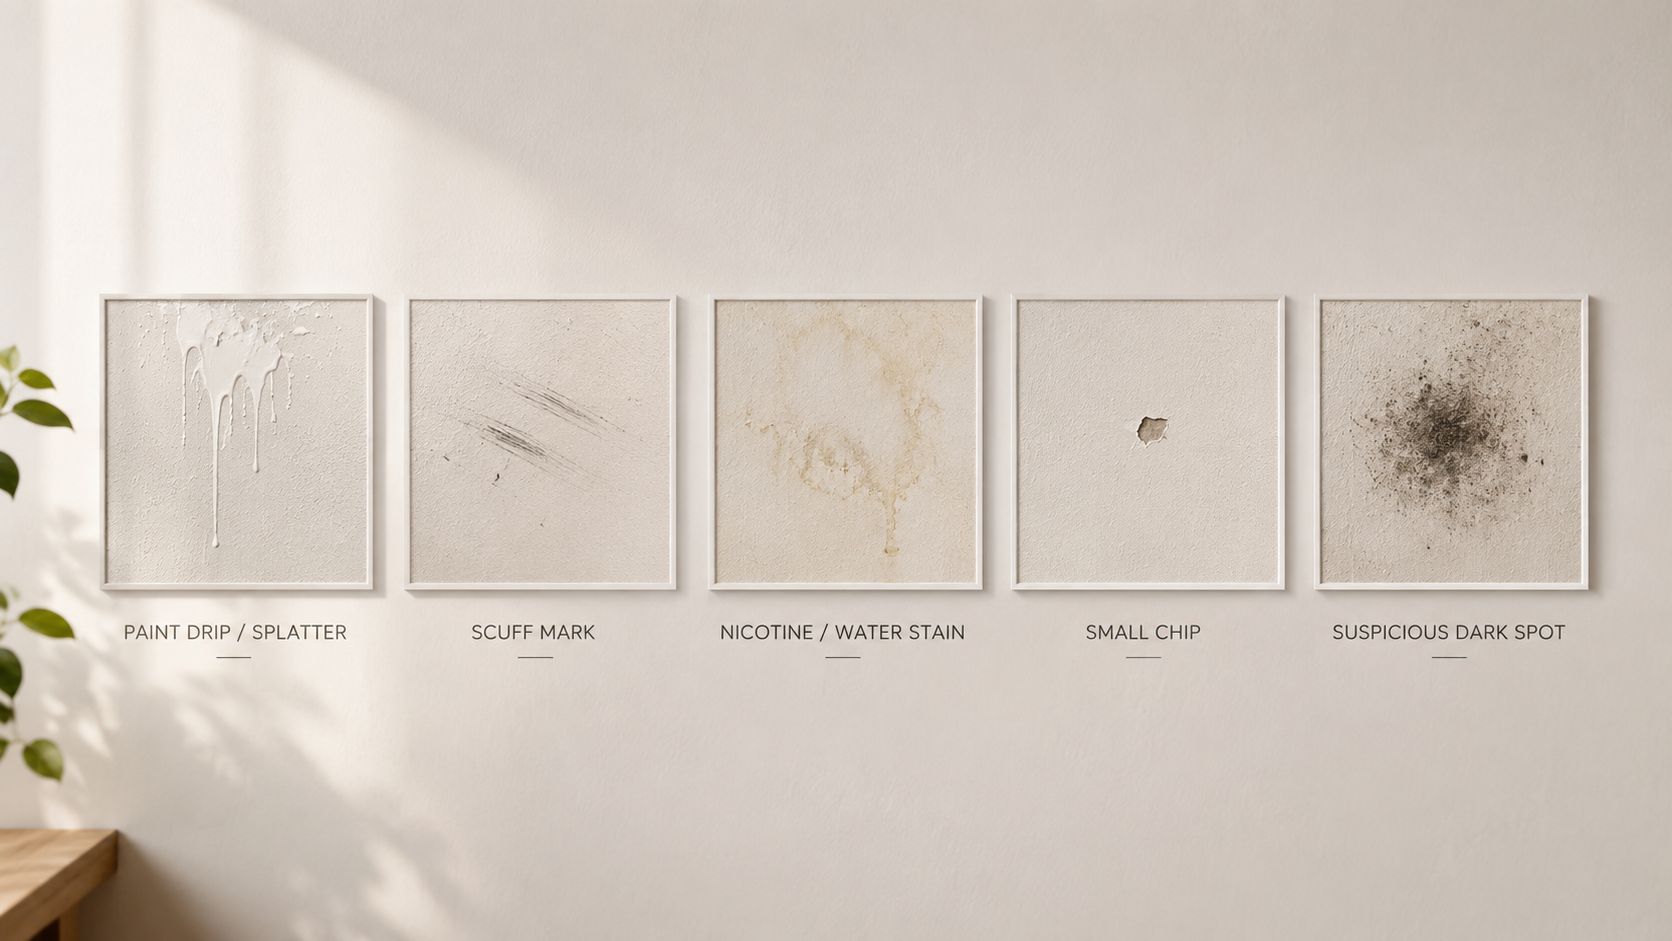
Drips and splatters
These usually come from trim painting, touch-ups, remodeling, or overspray. Fresh drips look glossy or wet and may smear under pressure. Dried latex splatters often sit slightly above the wall surface and can sometimes be softened and lifted without disturbing the surrounding finish.
Your best-case DIY result is a clean surface with no visible outline. The risk rises when you scrape too hard or use solvent before confirming the paint type.
Scuff and transfer marks
Furniture, shoes, boxes, toys, and hands can leave gray, black, or colored marks. These sit on top of the paint film rather than inside it. A barely damp microfiber cloth is the appropriate starting point, followed by a small amount of diluted mild dish soap if plain water doesn't work.
Flat paint is the difficult exception. Aggressive rubbing can leave a shiny area that's more noticeable than the original scuff.
Bleed-through stains
Yellow, brown, or tan marks may come from nicotine, water, smoke, or an older coating beneath the current paint. Surface cleaning may lighten the appearance, but it won't solve a stain that has migrated through the paint film.
A stain-blocking primer and repainting may be necessary after the cause is resolved. If the discoloration keeps returning, investigate moisture before applying more paint.
Chips, scratches, and small divots
A chip is missing paint. A scratch may expose primer, drywall paper, or an older color. A divot is a surface defect rather than a removable spot.
Cleaning won't restore missing material. Small repairs generally require loose-paint removal, light filling where needed, smoothing, spot priming, and paint applied with a controlled brush.
Mold, mildew, and efflorescence
Colored growth, recurring dark marks, and musty areas may signal moisture. White, chalky crystals can be efflorescence, mineral deposits that are easily mistaken for mold. Guidance on distinguishing moisture-related wall damage stresses that cleaning without correcting the moisture source usually leads to recurring spots.
Scientific surveys also show that mineral-based wall colors dominated for millennia, while organic colorants appeared later, including Tyrian purple in the Minoan period, indigo, and madder, as documented in research on wall-painting pigments. That history doesn't identify a modern stain, but it reinforces why color alone isn't a diagnosis.
Tools and Solvents Worth Keeping in Your Spot Kit
A small caddy is enough for routine wall marks. The key is not owning the strongest cleaner. It's having several gentle options and escalating only after a hidden test area looks safe.
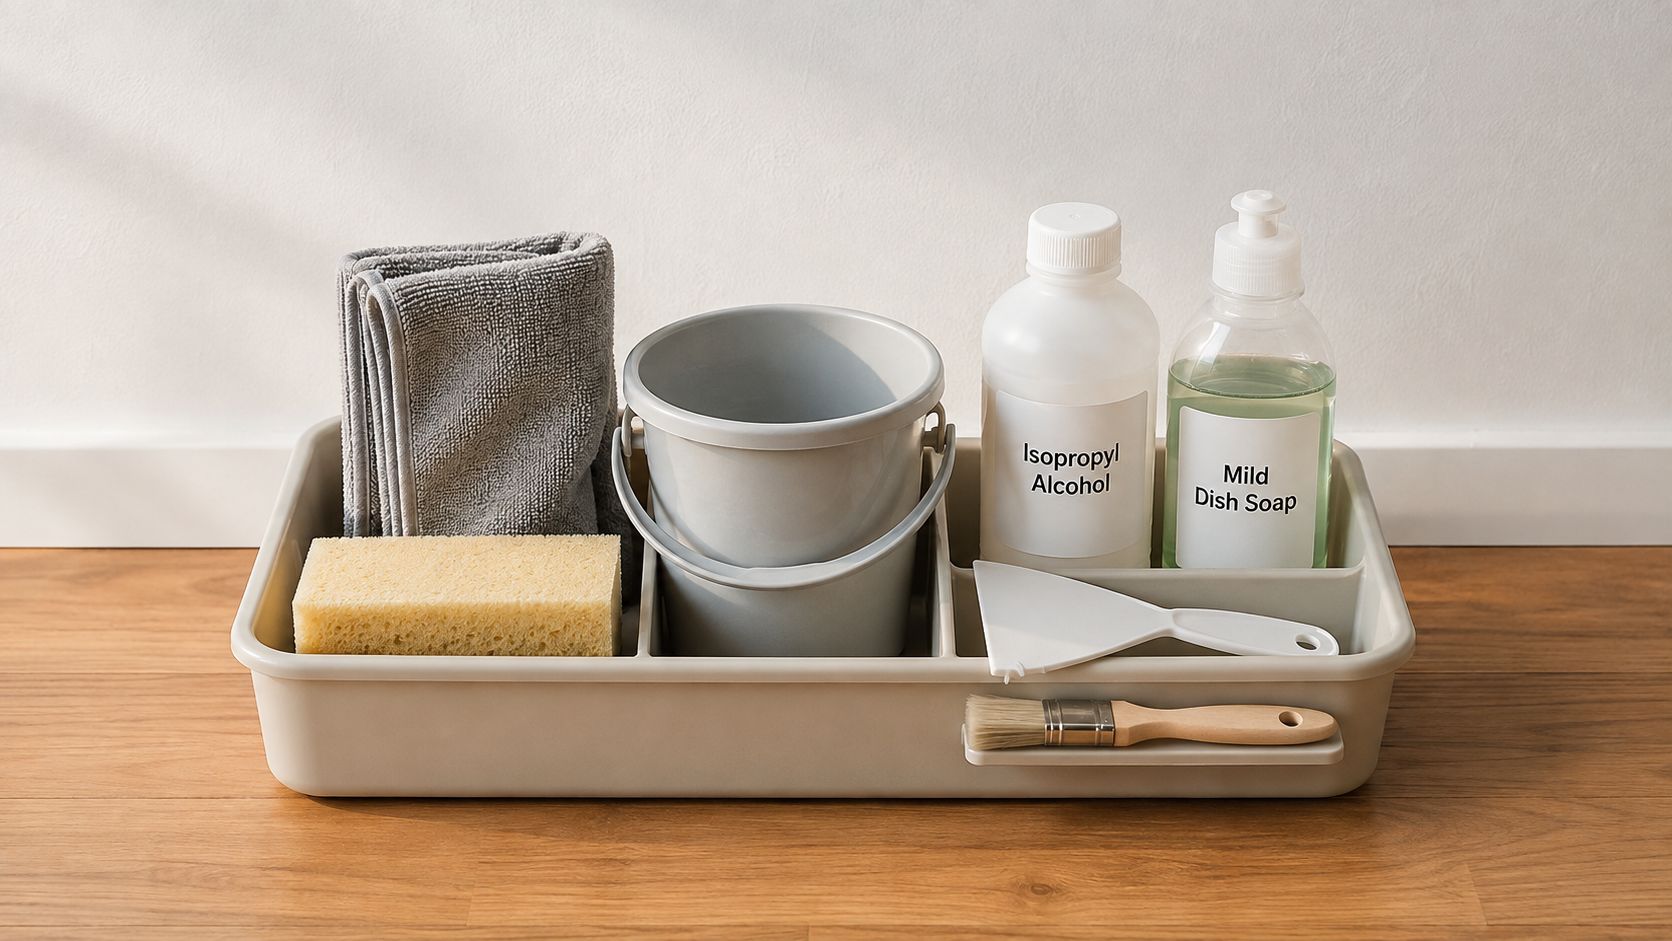
Build a controlled kit
Keep these supplies together:
- Microfiber cloths: Use them for blotting, wiping, and drying without loose fibers.
- Soft sponge: Choose a nonabrasive sponge, not a scouring pad.
- Bucket: Reserve one for clean water and dilute soap carefully.
- Mild dish soap: A small amount in warm water is sufficient for many painted-wall cleaning jobs, consistent with painted-wall cleaning guidance from Bob Vila.
- Plastic putty knife: Use it to lift softened dried paint, never to gouge the finish.
- Small artist's brush or foam brush: These help with precise touch-ups.
- Isopropyl alcohol or denatured alcohol: Keep them for carefully tested escalation, not routine wiping.
- Labeled solvent: Identify whether it's intended for latex, oil-based paint, or both, and follow its label.
You can also review Sunny Day Pro Services' guidance on vinegar and baking soda cleaning, but avoid assuming a household mixture is automatically safe for painted walls. Acids, abrasives, and repeated rubbing can change the finish.
Test before you commit
Choose a hidden area behind furniture or near a baseboard. Apply the least aggressive solution with a cotton swab or corner of a cloth, then let it dry before judging the sheen and color.
Work top to bottom and from the outside of the mark toward its center. That keeps loosened soil or paint residue from running across an area you've already cleaned. Use separate cloth sections for wiping and drying, and don't saturate drywall.
Magic erasers and abrasive cleaners have a narrow place in wall care. They may be suitable for durable glossy trim after testing, but they're a poor choice for flat or matte wall paint because they can remove or burnish the paint film.
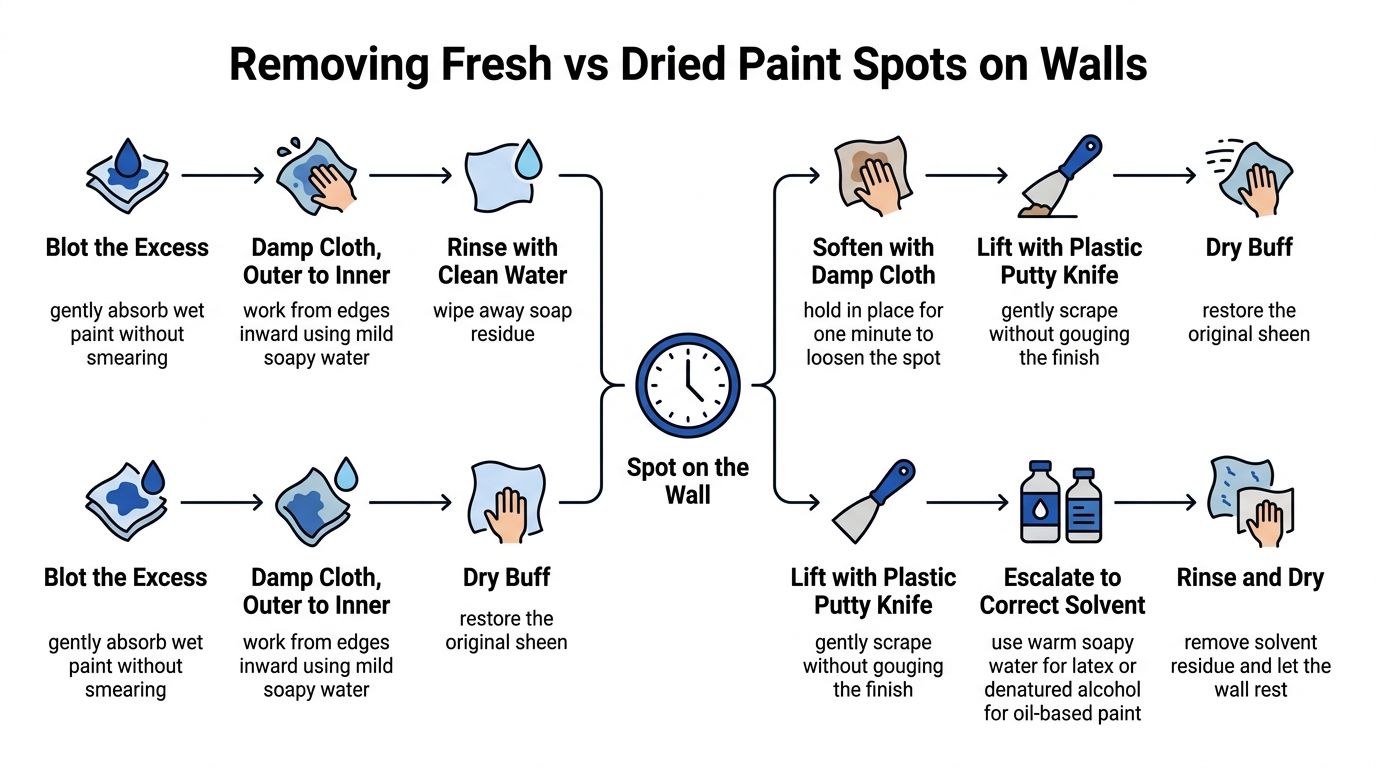
Removing Fresh Spots Versus Dried Spots on Walls
Time on the wall changes the job. Fresh paint is often easier to remove, but only if you avoid spreading it. Dried paint may release after softening, though every scrape and solvent application adds risk to the underlying finish.
Fresh paint needs absorption, not friction
For a fresh drip or splatter, begin by blotting the excess with a dry microfiber cloth. Don't wipe sideways across the mark, because that turns a small spot into a thin smear.
Once the raised paint is removed, dampen a clean cloth with plain water. Work from the outer edge inward, using light passes. If water isn't enough, add heavily diluted mild dish soap to the cloth rather than pouring solution onto the wall.
Finish with a separate cloth dampened with clean water to remove soap residue. Dry-buff gently with a clean microfiber cloth. Residue can leave a dull halo, especially on low-sheen finishes.
For broader post-renovation residue, post-construction cleaning guidance supports the same practical principle: remove loose material carefully, protect finished surfaces, and avoid turning cleanup into additional damage.
Dried paint needs patience
Hold a damp cloth over the dried spot for about one minute to soften the edge. Test whether the paint lifts with a plastic putty knife held nearly parallel to the wall. Use short, controlled movements and stop if the wall coating begins to come away.
Latex paint usually responds first to warm soapy water and careful scraping. If the spot remains, a product labeled for latex paint removal may be considered after patch-testing.
Oil-based paint often requires a more targeted approach, such as denatured alcohol or a dedicated remover labeled for latex and oil-based paint. Apply the smallest practical amount to the spot, keep ventilation available, and never assume that a solvent safe for the dried paint is safe for the wall coating beneath it.
Solvent rule: The correct product is the weakest one that removes the mark without changing the wall's color or sheen.
After escalation, wipe away residue with a clean damp cloth and let the area dry completely. If the spot leaves a shadow or dull patch, stop cleaning and move into repair rather than repeating stronger applications.
Touch-Up and Small Repair Work After the Spot Is Gone
A removed spot doesn't always leave a perfect wall. You may see a faint outline, a dull section, exposed primer, or a tiny divot where dried paint pulled at the surface.
Repair the surface before painting
If the spot has chipped the wall, remove loose edges and fill the divot with a compatible lightweight spackling compound. Let it dry fully, then sand only until the repair feels level. Remove dust with a dry or barely damp cloth before priming.
A porous repair can absorb paint differently from the surrounding wall and create a visible flashing effect. Spot priming gives the touch-up a more consistent base, particularly when the repair exposes drywall or filler.
Use a small foam brush or artist's brush for tight areas. Apply thin paint and feather the edges outward, reducing pressure as the brush leaves the repair. A heavy central dab creates a raised patch that catches light.
Judge the match after drying
Don't evaluate a touch-up while it's wet. The color and sheen can shift as the coating dries, and directional light may reveal differences that weren't visible during application.
Paint touch-up guidance explains why even paint from the same product can look different over time. Wall paint can fade, oxidize, and change sheen, so an older surrounding surface and a fresh application may not match under the same light.
One thin coat may be enough when the repair is small and the paint is well matched. Add another light pass only after the first coat has dried and the repair still shows through. If the color, sheen, or texture remains visibly different, repaint the wall from corner to corner rather than layering increasingly obvious patches.
That approach uses more paint, but it often produces a more uniform result than repeated spot corrections across an aged wall.
When the Spot Is Actually Mold, Mildew, or Moisture
A discolored mark can be cosmetic, but it can also be the wall's evidence of a building problem. Dark, yellow, brown, green, or black spots may point to leaks, condensation, or mold, particularly when the area changes or returns.
Separate surface growth from hidden moisture
Mildew may wipe away temporarily and then return because the damp condition remains. Mold can be rooted in or around the paint film, while efflorescence appears as white, crystalline deposits caused by moisture moving through masonry or another porous material.
The stronger warning signs include:
- Bubbling paint: The coating may be losing adhesion because moisture is trapped behind it.
- Peeling or soft paint: Surface failure can indicate a persistent damp area.
- Musty odor: A smell near the spot suggests more than ordinary wall dirt.
- Recurring discoloration: A mark that returns after cleaning deserves investigation.
The correct order is fix the moisture source first, let the wall dry fully, then clean or treat the contamination, seal the surface, and repaint if necessary. Painting over an active leak or damp cavity only hides the symptom temporarily.
Don't reach for bleach automatically
Chlorine and bleach are related terms, but they aren't interchangeable descriptions of every cleaning product. Before using any disinfectant, read the label, confirm the surface compatibility, ventilate the area, and never mix cleaning chemicals. This explanation of chlorine and bleach can help clarify the distinction.
If the spot is extensive, keeps returning, or appears alongside bubbling and odor, move from stain removal to moisture investigation. A plumber, remediation professional, or qualified contractor may be more appropriate than a cleaning-only solution.
A clean-looking wall isn't a successful repair if moisture is still reaching it.
Preventing Paint Spots and Knowing When to Call a Pro
The easiest paint spot to remove is the one you prevent. During painting or renovation, lay down drop cloths before opening a can, protect nearby surfaces, and keep a damp microfiber cloth available for accidental drips.
Furniture causes many everyday marks. Lift pieces instead of dragging them against the wall, add appropriate protection to contact points, and avoid storing boxes tightly against painted surfaces. High-touch areas near switches, hallways, and doorways benefit from regular gentle wiping rather than infrequent aggressive scrubbing.
Use the right handoff point
DIY cleaning makes sense when the mark is small, clearly superficial, and on a finish that passes a hidden-area test. Call a professional when the situation involves:
- A large affected area: A spot larger than a dinner plate is harder to blend and more likely to reveal uneven cleaning.
- Recurring stains: Reappearance suggests an unresolved source or bleed-through.
- Moisture signs: Bubbling, peeling, dampness, or a musty smell calls for investigation.
- Delicate finishes: Flat and matte walls can burnish before the mark disappears.
- A sale or move-out: Uniform results matter more when the entire home needs to present consistently.
- Construction residue: Overspray, splatter, and dust often require coordinated surface protection and cleanup.
For homeowners in Wayland, Newton, Needham, Wellesley, Weston, and nearby Massachusetts communities, Sunny Day Pro Services offers wall scuff and mark removal, recurring maintenance, deep cleaning, move-in and move-out cleaning, and post-construction cleanup. Those services can be useful when paint spots are part of a larger cleaning project rather than an isolated mark.
| Spot Type | Likely Cause | First Move | Likely DIY or Pro |
|---|---|---|---|
| Drip or splatter | Painting, trim work, or renovation | Blot if fresh, soften and lift if dried | DIY when small and isolated |
| Scuff or transfer | Furniture, shoes, boxes, or hands | Barely damp microfiber cloth | Usually DIY, with extra care on flat paint |
| Yellow or brown stain | Water, smoke, nicotine, or bleed-through | Check whether it returns or spreads | Pro when recurring or moisture-related |
| Chip or scratch | Impact, abrasion, or failed paint adhesion | Remove loose material and assess the substrate | DIY for small repairs, pro for broad damage |
| Dark, colored, or white deposits | Mold, mildew, condensation, leaks, or efflorescence | Investigate and correct moisture first | Professional help when recurring or extensive |
Sunny Day Pro Services handles wall scuff and mark removal, paint splatter and overspray cleanup, recurring house cleaning, and post-construction cleanup for homes across Massachusetts. Visit Sunny Day Pro Services to request a quote and get help deciding whether your paint spots need careful cleaning, surface repair, or a broader home-service plan.

