
Tile Installation Wall Secrets from Pros
Discover pro tile installation wall secrets for lasting results. Learn waterproofing, layout, and mortar coverage tips for your Massachusetts home remodel.
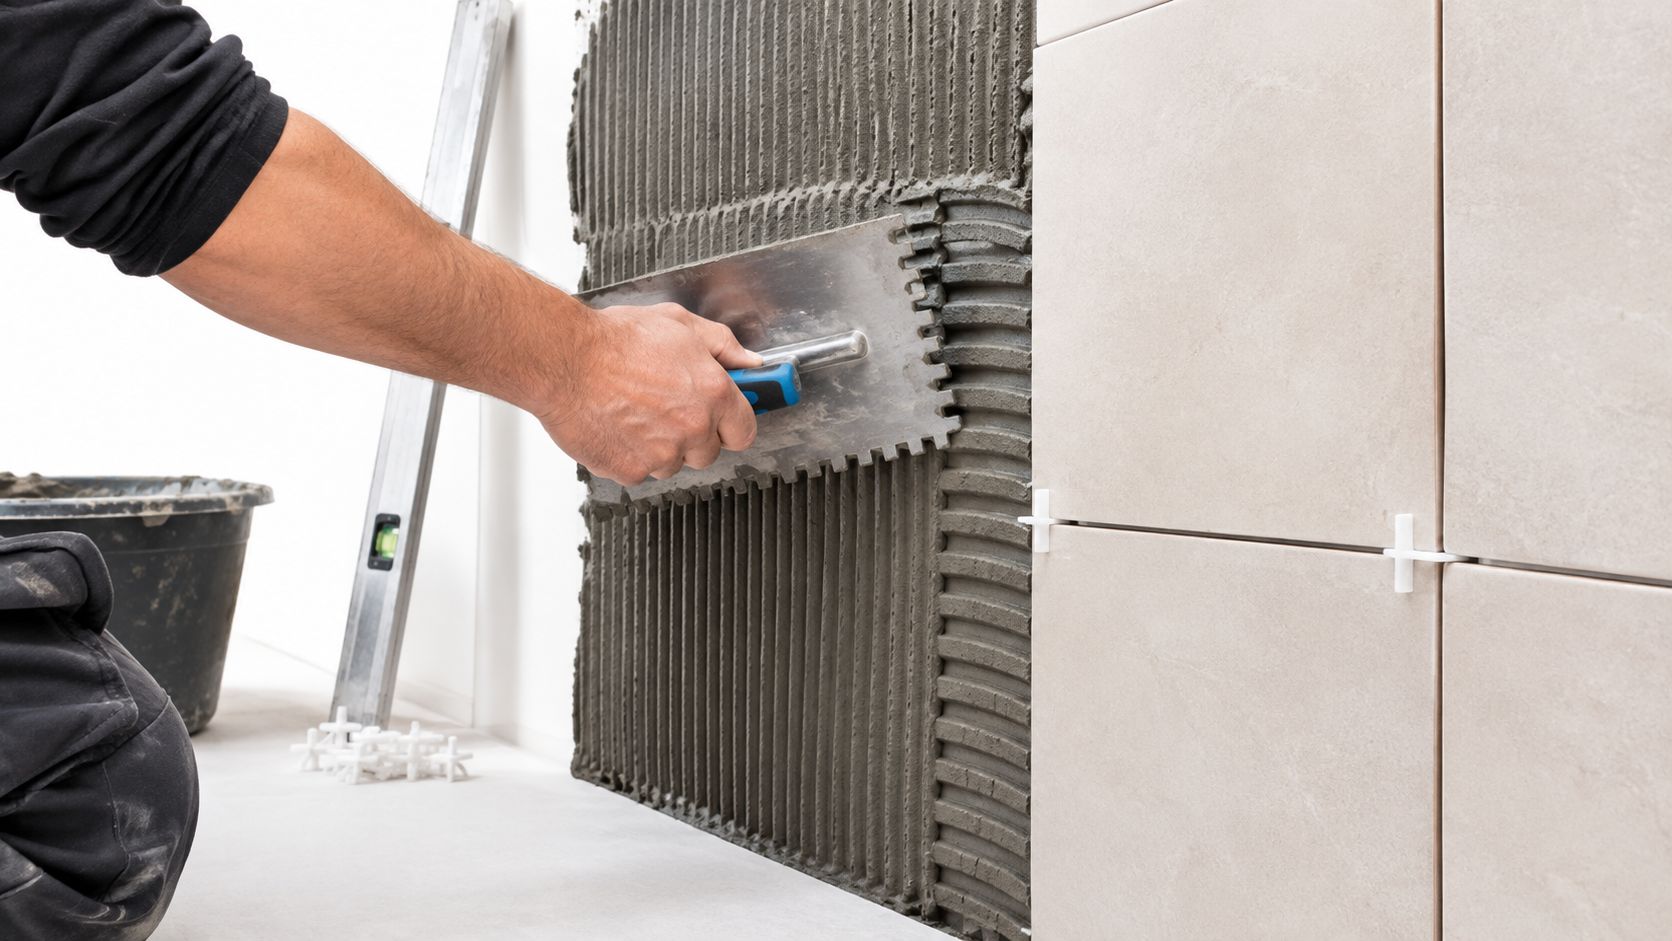
Most advice about a tile installation wall starts in the wrong place. People obsess over grout color, tile size, and pattern, then act surprised when a shower corner cracks or a backsplash debonds behind the sink. What separates a wall that looks good for a few months from one that holds up for years is the assembly behind the tile, not the tile itself.
Table of Contents
- Why the standard matters more than the marketing term
- Large panels and gauged porcelain need different planning
The Hidden Moisture System Behind Your Tile
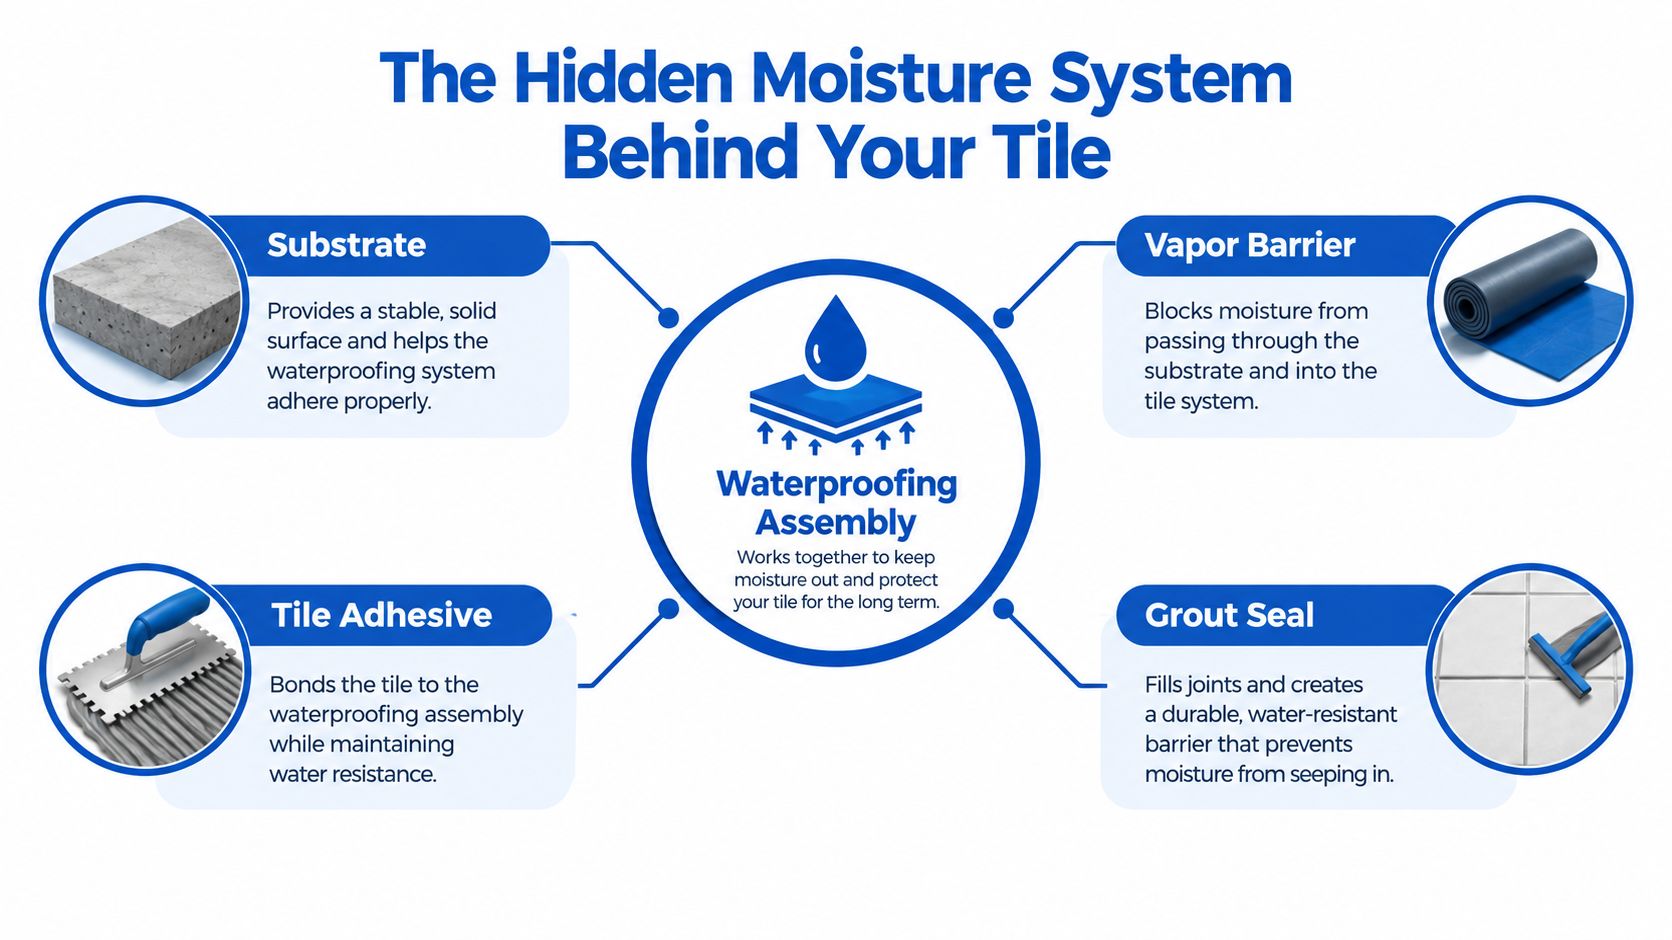
A tiled wall is not a waterproof wall by default. The tile face sheds some water, but the assembly behind it has to control moisture, movement, and drying if the installation is going to hold up. In wet areas, that means a waterproofing strategy, not just adhesive and grout, as explained in this shower waterproofing guide.
Where water really gets in
The weak points are rarely the open field of the wall. Corners, valve penetrations, niches, tub edges, and transitions between materials let water past the finish layer first. In New England bathrooms, that risk climbs because condensation can sit on cool surfaces and feed mold growth when ventilation is weak, which the EPA identifies as a key condition for indoor mold growth (EPA mold guidance).
Practical rule: If you can see a seam, a corner, or a penetration, assume that detail needs more than tile and grout to stay dry.
The surface can still look clean while the wall behind it stays damp. That is how homeowners end up regrouting the same shower over and over without fixing the underlying problem.
What a durable wall assembly needs
A wet-area wall system starts with a sound substrate, then a moisture-control layer, then the right bonding material, then the tile and grout. ANSI's tile standards treat those parts as one performance system, not separate cosmetic choices (ANSI ceramic tile standards overview). That matters in kitchens, baths, and shower walls because movement and water exposure punish shortcuts fast.
A few details deserve attention every time:
- Corners and changes of plane: These are stress points and moisture pathways.
- Backs of niches: Water lingers here longer than on flat walls.
- Around valves and fixtures: Penetrations need careful sealing, not just cut tile.
- Tub and shower transitions: These joints move differently from the tile field.
A wall has to manage moisture before it deserves a decorative finish. Tile can cover the structure, but it cannot compensate for a bad one.
Selecting Materials That Meet Performance Standards
Picking a tile that looks right is the easy part. Choosing one that survives a wall in a wet room takes more judgment, because the box label says little about density, absorption, or whether the product belongs on a shower wall at all.
Why the standard matters more than the marketing term
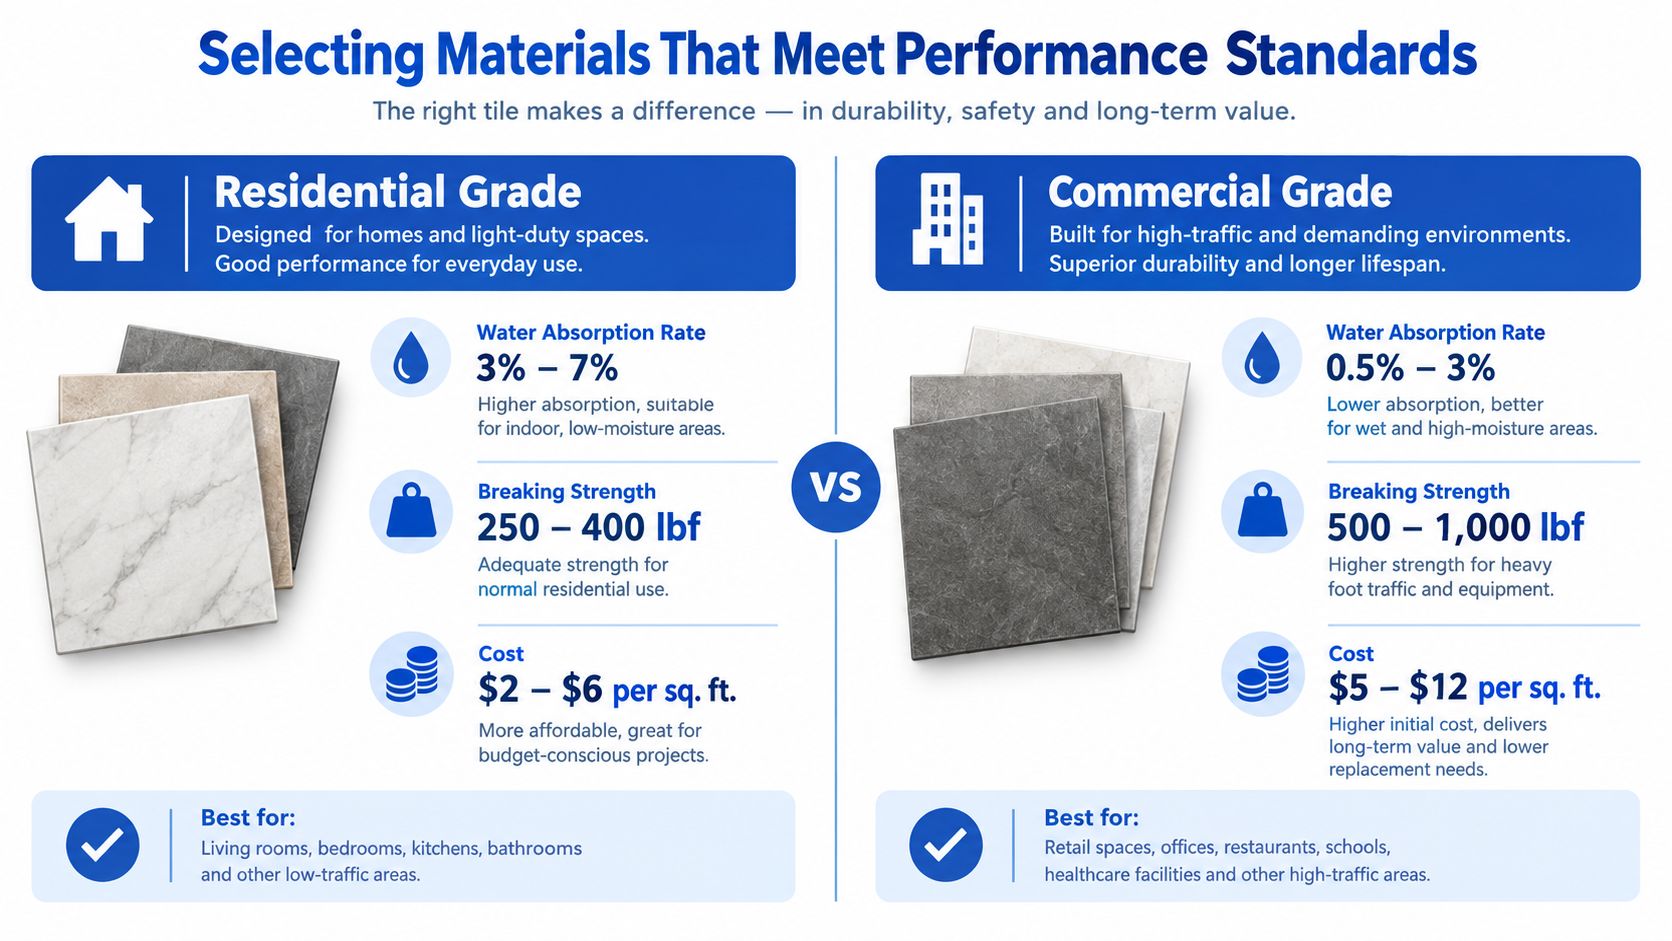
Under ANSI A137.1, porcelain tile is identified by a water absorption rate of 0.5% or less, measured with ASTM C373 (ASTM tile standards note). That is a practical sign that the tile body is denser and less porous, which is why porcelain usually fits shower walls and other moisture-prone spots better than a product only marketed as porcelain.
ANSI A137.1 also sets acceptance criteria, testing methods, product marking, certification, and physical-property classifications before installation, while the ANSI A108, A118, and A136.1 family covers installation practices after the tile is chosen (ANSI tile standards overview). For wall work, that matters because the tile is part of a system, not a standalone finish.
Installer's lens: Judge wall tile by absorption, substrate compatibility, and exposure, not by showroom lighting.
Large panels and gauged porcelain need different planning
Wall tile is not one category. ANSI A108.19-2020 is written for gauged porcelain tiles and gauged porcelain tile panels or slabs, which signals different handling and substrate demands than conventional wall tile (TCNA gauged porcelain panel guidance). Large panels expose flaws fast. Uneven walls, weak support, and casual layout decisions show through immediately.
A practical pre-buy check is simple:
- Is the absorption rate documented? If not, do not assume.
- Is the wall in a wet area? A shower wall needs a higher-performing selection than a dry backsplash.
- Is the tile large or thin enough to need special handling? Panels and gauged porcelain are their own category.
- Does the substrate match the tile and adhesive system? The wall has to be ready before the tile arrives.
The trade-off is plain. A more dramatic surface often demands tighter preparation and more disciplined installation. If the wall assembly cannot support the material, the material is wrong for the job.
Preparing the Substrate and Planning Movement Joints
A wall tile job usually fails before the first tile is set. The surface has to be structurally sound, clean, dry, and flat, because mortar cannot correct bad framing, loose backing, or a wall that moves under load. Dust, paint residue, and hidden softness all weaken the bond, and the grout line is usually where that mistake shows up first.
Flatness comes before layout
Layout only works after the wall is right. If the plane is off, the tile will show it, especially on long runs and larger pieces. Wet-area walls need proper backing before any tile goes up, as covered in this backer board installation guide. Standards-based wall prep also points in the same direction, with the substrate prepared before installation starts and the wall judged on soundness, dryness, and flatness.
For wall work, I check three conditions before setting anything:
- The wall is sound, not soft or flaky.
- The surface is dry and free of dust, paint skin, or contaminants.
- The plane is flat enough that tile is not being used to hide defects.
If the wall fails any one of those checks, correct the wall first. Mortar should bond tile, not act as a patch for framing problems or a damaged substrate.
Movement joints need to be designed, not guessed
Tile and substrate move at different rates. Corners and changes of plane crack fast when they are locked together with rigid grout. TCNA guidance places interior movement joints at about 20 to 25 feet in each direction under typical conditions, with closer spacing of about 8 to 12 feet where there is direct sunlight or notable thermal exposure, and exterior assemblies commonly use 8 to 12 feet spacing (TCNA movement joint guidance). Those joints manage stress before it shows up as failure.
Never bridge a structural joint with mortar and tile. If the building moves there, the tile has to move there too.
The dry layout should already show perimeter gaps, changes of plane, and structural joints. If the room needs a movement gap, leave it open and finish it with compatible flexible sealant or backer material where required. A tidy corner packed solid with grout often becomes the first corner that cracks.
Public specs from Alberta make the same separation clear by treating substrate preparation, lath or mortar-bed details, priming, and wall-tile installation methods as distinct steps (Alberta construction specification). That matters in practice, because the wall assembly has to control moisture, movement, and support before aesthetics ever enter the picture.
Achieving Proper Mortar Coverage and Adhesion
Mortar coverage decides whether the tile supports itself or just looks supported. A wall can pass a quick visual check and still fail when the corners are hollow, the ridges never collapsed, or the adhesive skinned over before the tile was set. That's why coverage needs to be checked, not assumed.
Set the wall to the right contact, not the right appearance
For durable interior wall work, ANSI and TCNA benchmarks generally call for at least 80% mortar coverage in dry interior areas and 95% in wet areas, exteriors, and many large-format applications (Custom Building Products wall installation FAQ). Coverage has to support the edges and corners, not just the center. A tile with a coated back isn't automatically well bonded.
The practical sequence is straightforward:
- Choose the right notched trowel: Size it to the tile and substrate, not your habit.
- Comb the ridges in one direction: That lets air escape when the tile is pressed in.
- Back-butter when needed: Especially on larger or heavier wall tile.
- Check coverage right away: Lift a tile or two before the mortar sets and inspect the actual transfer.
If the ridges are swirling in every direction, air gets trapped. If the mortar has skinned, transfer drops. If the back of the tile just looks damp, that still doesn't prove the contact is there.
Common mistakes that create callbacks
Dusty walls, painted surfaces, and weak waterproofing behind shower tile are recurring failure points. So is pressing on a tile long after the mortar has started to firm up. Hollow corners usually mean the tile was never fully bedded, and once the grout starts cracking, the repair is more expensive than the inspection that should've caught it.
I've seen installers blame grout when the problem was coverage from the start. The core fix is technique, not a different color joint.
If you're working with bigger wall pieces, the handling matters even more. A good reference point for that category is this large-format tile installation guide, because large wall tiles demand cleaner bedding and more deliberate support than small formats.
Grout Sizing and Flexible Sealant Transitions
Grout holds the visual field together, but it also has to leave enough room for the system to move. Tight joints may look sleek in photos, yet if they're too narrow for the tile type or the movement gap, they turn into stress concentrators. The wall survives when the assembly is allowed to move in the right places, not when every joint is packed rigidly.
Joint width is part of the structure
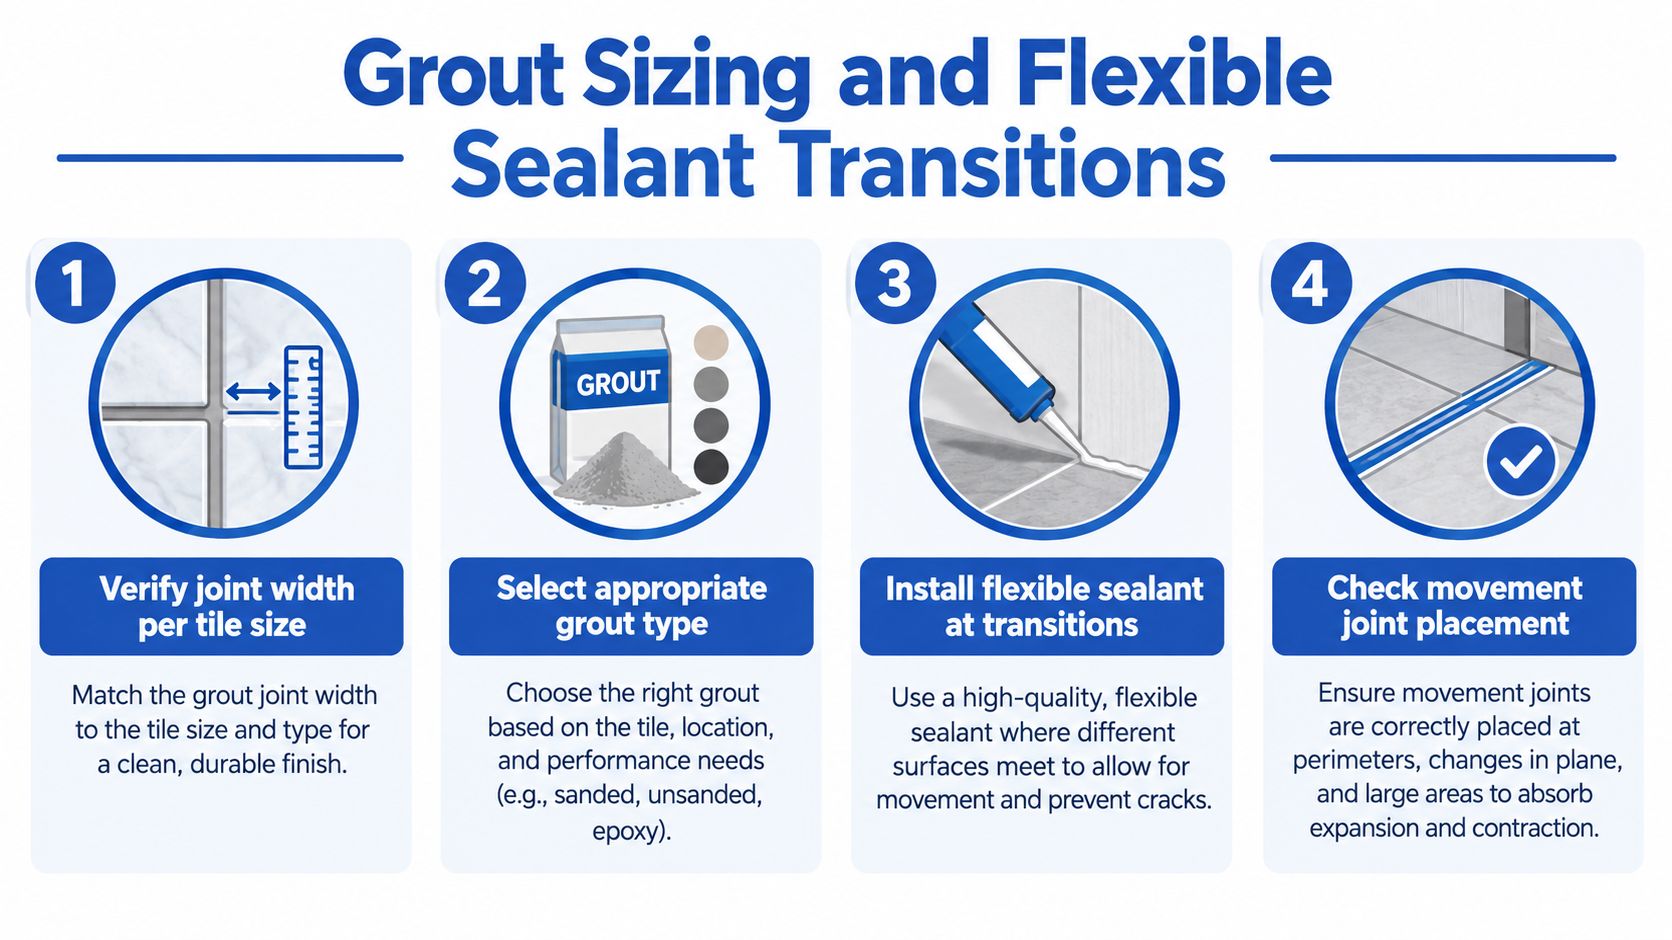
A published installation specification says ceramic mosaic tile and glazed wall tile need joints at least 1/8 inch, or 3 millimeters, unless a nearby control, expansion, seismic, or other movement joint is wider. Quarry and paver tile need at least 1/4 inch, or 6 millimeters, or the movement joint width, whichever is greater (technical installation specification). That's not about style, it's about giving the wall enough working space.
The key mistake is treating grout joints like a design preference detached from the assembly. They're part of the performance system. If the grout line is narrower than the movement detail it borders, the wall has a conflict built into it.
Flexible sealant belongs at changes of plane
Wall-to-wall corners, wall-to-floor transitions, and tile-to-tub joints should use flexible sealant rather than rigid cement grout. The reason is simple. Different materials move differently, and a flexible joint gives that movement somewhere to go without cracking the tile field.
A clean finishing checklist helps:
- Match the joint plan to the tile type: Don't assume one joint size works everywhere.
- Use flexible sealant at changes of plane: Corners and transitions need movement accommodation.
- Keep structural joints open: Never fill them with mortar or grout.
- Inspect recurring crack lines carefully: If the same corner keeps failing, the joint detail is usually the problem.
A cracked shower corner is usually a movement issue first and a cosmetic issue second.
Many repairs go wrong for this reason. Regrouting a corner with rigid material makes it look fresh for a while, but it doesn't solve the reason the joint failed in the first place. The wall needs a transition that can move.
When to Call a Professional Tile Installer
Tile work often fails in places you cannot see on day one. The visible finish may look clean while the wall underneath already has problems, from uneven substrate conditions to weak waterproofing or movement details that were treated casually. That is why complex wall installs belong with a professional, especially in bathrooms and other moisture-heavy rooms where hidden water exposure can turn into callbacks later.
The jobs that deserve specialized handling
Large-format porcelain panels are one clear example. They need careful support, handling, and layout planning, and they are not the same as standard wall tile. Historic walls with waves, patches, or out-of-plumb sections are another, because they usually need real substrate correction before tile can go on. Shower walls with niches, multiple penetrations, or tight transition details also raise the stakes, since waterproofing and movement accommodation have to be right the first time.
Here's what to ask a contractor before hiring:
- Which ANSI methods are you following? Ask for the specific wall system, not a vague assurance.
- How are you handling waterproofing at corners and penetrations? Those details reveal the quality of the install.
- Where are the movement joints going? The answer should come from layout, not leftover space.
- How do you verify mortar coverage? A pro should be able to explain the field check.
What a professional install buys you
Professionals do more than set tile. They manage the wall assembly so it can handle moisture, movement, and everyday use without breaking down. That matters in Massachusetts homes, where bathrooms deal with winter temperature swings, condensation, and constant use. A wall that is built to perform costs less than repeated repairs, especially when the finish sits on top of a system that was never prepared to handle water in the first place.
Sunny Day Pro Services handles tile installation for walls, including backsplash and bathroom work, along with the wall preparation that comes before the finish. For homeowners who want a documented, durable install instead of a quick cosmetic fix, that kind of end-to-end service is the safer path.
If you're planning a kitchen backsplash, shower wall, or full bathroom tile replacement in Massachusetts, talk with Sunny Day Pro Services about the substrate, waterproofing, and movement details before you buy the tile. Visit Sunny Day Pro Services to request a quote and get the wall assembly planned the right way from the start.

